GJ Motorsports 3rd Brake Light Wiring

Disclaimer: Links on this page pointing to Amazon, eBay and other sites may include affiliate code. If you click them and make a purchase, we may earn a small commission.

Vegas7315101

Member
Joined
Oct 25, 2018
Posts
3
Reaction score
1
Location
Las Vegas
Anyone install the GJ Mostorsports 3rd brake light and have tips/tricks for wiring the 2 S2s to the upfitter switches?

Specifically looking for info on wiring the new harness to the front. Were you able to fish wires with the headliner still in place, or did you have to pull that down? What trim panels had to be pulled/does anyone have tips for removing those as well?

Pictures would be very helpful!

Any info would be appreciated! Looking to see what all kind of work it takes before I go and order one...
 

McGrath4u

Full Access Member
Joined
Dec 23, 2014
Posts
302
Reaction score
223
Anyone install the GJ Mostorsports 3rd brake light and have tips/tricks for wiring the 2 S2s to the upfitter switches?

Specifically looking for info on wiring the new harness to the front. Were you able to fish wires with the headliner still in place, or did you have to pull that down? What trim panels had to be pulled/does anyone have tips for removing those as well?

Pictures would be very helpful!

Any info would be appreciated! Looking to see what all kind of work it takes before I go and order one...

Vegas,

Please note I have a crew cab so my notes may not apply.

I only pulled down the back passenger portion of the headliner. There is enough wires and components that you can grab and pull them through.

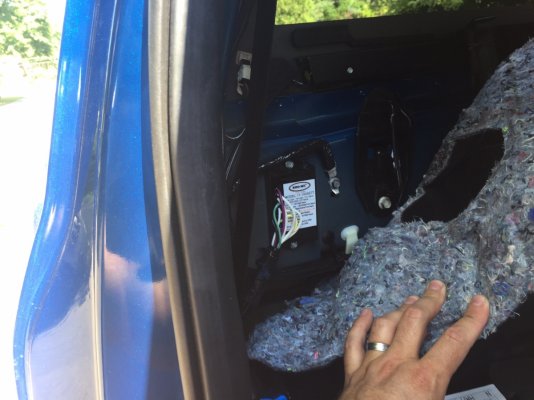
I removed the rear passenger plastic pillar piece to route the wires toward the door sills. If you got the turn/stop/tail, I mounted the showme module on the back panel of the truck. I used a ground on the passenger side rather than the driver side as the instructions might show. I have not found the best way to remove this plastic pillar piece and have already broke off one tab.

I routed the wires through the door sill areas up to the passenger kick panel where you can tie into the upfitter wires. You will have to make the interior wires “hot” by soldering the pass through wires to the hot wires in the hood near the battery compartment.

Use this website to better understand the upfitter switches and wiring. Note: there is a difference between 2017 and 2018 wiring colors.

http://bajamod.com/feature-wiring-switches18.php

http://bajamod.com/feature-wiring-switches.php

If you are running an antenna, the antenna will be routed similar but then terminate whereever you may be installing your radio.

This is the only picture I took of the install. Feel free to reach out if you need any additional help.

ce4b0743434c2d0c5f691f8444e3fe31.jpg

@Kmandoske or @t_j can weigh in as well.


Sent from my iPhone using Tapatalk
 
OP
OP
V

Vegas7315101

Member
Joined
Oct 25, 2018
Posts
3
Reaction score
1
Location
Las Vegas
That's actually very helpful! I was hoping I wouldn't have to drop the whole headliner to run it down. My initial impression from the GJ site is they were having you run it all the way across the roof to the front, but this seems way easier.

Do you remember how you went about pulling the headliner in the back?

I've got a crew cab as well, and I won't be getting any of the additional flashers. Just tying the side S2s directly to the switches.

Hopefully someone else will come along with a better way to remove the pillar trim.

Thanks!
 

McGrath4u

Full Access Member
Joined
Dec 23, 2014
Posts
302
Reaction score
223
That's actually very helpful! I was hoping I wouldn't have to drop the whole headliner to run it down. My initial impression from the GJ site is they were having you run it all the way across the roof to the front, but this seems way easier.

Do you remember how you went about pulling the headliner in the back?

I've got a crew cab as well, and I won't be getting any of the additional flashers. Just tying the side S2s directly to the switches.

Hopefully someone else will come along with a better way to remove the pillar trim.

Thanks!

No problem. This piece of trim is tricky as you are routing through the belts and the tensioners and around the seat. It would be best to remove the rear seat as this is how it was installed in the factory. The geometry gets thrown off with the seat installed hence the breaking of the clips/tabs. The tabs are 3” long flimsy pieces of crap. With one gone and through a few off-roading excursions, I havnt noticed any bad rattling or misalignment so don’t be too worried about it.


Sent from my iPhone using Tapatalk
 

Boost_it638

Full Access Member
Joined
Mar 29, 2017
Posts
128
Reaction score
135
Location
New Jersey
I purchased the reverse light harness and Y splitter with mine. Going to tie the 2 outer lights to togeather and run them to a switch. What wire did you tap into so the middle light turns on automatically when the truck is placed into reverse?
 

4x4TruckLEDs.com

Supporting Vendor
Supporting Vendor
Joined
Jul 18, 2017
Posts
2,976
Reaction score
1,390
Nice write-up. We received some inventory over at 4x4TruckLEDs.com and were wondering ourselves the best method to install these. I figured going along the roof liner (as I had done on other Fords) but this method might prove easier. We'll be throwing the kit on our shop truck in a week or so, but we have the mounts both with and without the NMO antenna mount available on our website right now.
 

4x4TruckLEDs.com

Supporting Vendor
Supporting Vendor
Joined
Jul 18, 2017
Posts
2,976
Reaction score
1,390
Yeah the only suggestion I'd make is route the wires on the passenger side instead of the driver's side. They show the basic harness being ran on the driver's side in one photo, but since the upfitters are on the passenger side that's where most of us ran the wire harness through. It was the perfect length with some room to spare. They do show a photo of the passenger side when showing the upfitter wires though.
 

Boost_it638

Full Access Member
Joined
Mar 29, 2017
Posts
128
Reaction score
135
Location
New Jersey
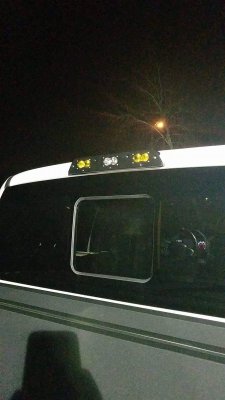
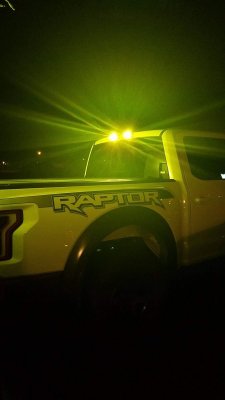
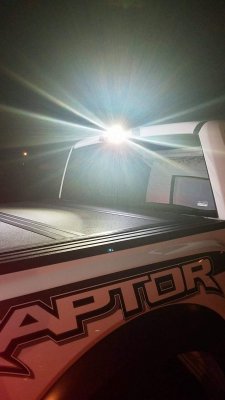
Got the brake light in this weekend. Was pretty easy. Didnt have to touch the head liner, used a coat hanger to snake the harness to the rear passenger side corner ( removed corner trim piece). Attacked the ground to the rear wall, ran harness under all the trim all the way to the front passenger kicker panel. The reverse wire to tap in to is green & brown. Used uplifter 3 for the 2 ambers.
received_2054046128049953.jpeg received_2362972673933162.jpeg received_824524624589587.jpeg
 

BlazinPond

Full Access Member
Joined
Oct 29, 2018
Posts
310
Reaction score
150
Location
ATLANTA / MSP
Got the brake light in this weekend. Was pretty easy. Didnt have to touch the head liner, used a coat hanger to snake the harness to the rear passenger side corner ( removed corner trim piece). Attacked the ground to the rear wall, ran harness under all the trim all the way to the front passenger kicker panel. The reverse wire to tap in to is green & brown. Used uplifter 3 for the 2 ambers.
View attachment 120919 View attachment 120920 View attachment 120921

Good god that looks good.
 
Top