
SVT-SourCream
Member
As per special request I’ll do my best to build a little how-to here. I would not say this is a hard job but it is not for the impatient or faint of heart. It took me about 12 hours. I went into this project prepared to buy new lights if things went south. I did not plan on doing a how-to so forgive my lack of photos.
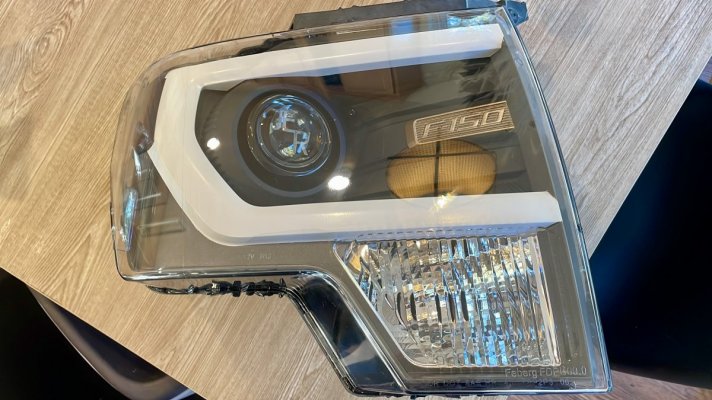
These were the lenses I used. The clips do not all line up but I broke most of them taking the old lenses out of the housing anyway. Seems to me they are only to hold the lense in place while your gasket cures.
Once the headlights are out of the truck I removed any screws I could find in the back of the housing to make sure they weren’t holding anything together that I might break while pulling the lenses. I used a pretty general guide for removing the lenses from the housing. Here’s the link..

 www.wikihow.com
I believe I settled on 235 degrees. I used an oven mitt and some leather gloves to handle the light after it had been in the oven.

To be clear you will not put it in the oven once and get the lens right off. It’s going to take 10+ times in and out to work the lens loose. I started working on the fatter side of the light (the side that will touch your grill). Just gently prying and pulling. IF YOU HAVE TO USE FORCE, PUT IT BACK IN THE OVEN! I learned this the hard way. The interior plastic trim comes out with the lens and has tabs that go deep into the glue. If you pull too hard you will crack the bezel like I did. (Arrow pointing to the problematic tab)

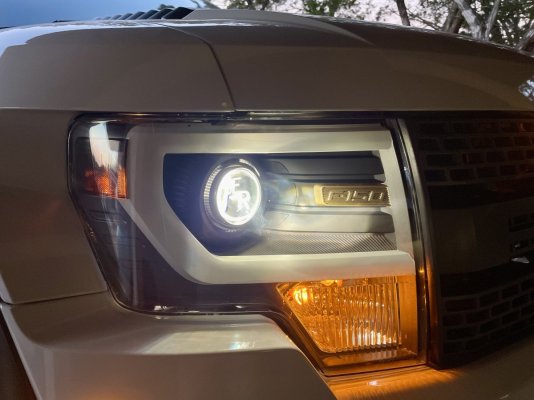
A few screws hold the bezel to the lens. Once those are off, customize to your liking! I used duplicolor paint to match my truck, bronze accent to match my wheels and VHT Nightshades spray to darken the sidemarker.


To be continued….
These were the lenses I used. The clips do not all line up but I broke most of them taking the old lenses out of the housing anyway. Seems to me they are only to hold the lense in place while your gasket cures.
Once the headlights are out of the truck I removed any screws I could find in the back of the housing to make sure they weren’t holding anything together that I might break while pulling the lenses. I used a pretty general guide for removing the lenses from the housing. Here’s the link..
Easy Ways to Open a Headlight of a Car (with Pictures) - wikiHow
If you want to black-out or customize your headlights, you'll have to take them apart to access the interior. Headlights are sealed with a glue-like sealant, which can make them more difficult to open. Luckily, you only need a few tools...
www.wikihow.com
I believe I settled on 235 degrees. I used an oven mitt and some leather gloves to handle the light after it had been in the oven.
To be clear you will not put it in the oven once and get the lens right off. It’s going to take 10+ times in and out to work the lens loose. I started working on the fatter side of the light (the side that will touch your grill). Just gently prying and pulling. IF YOU HAVE TO USE FORCE, PUT IT BACK IN THE OVEN! I learned this the hard way. The interior plastic trim comes out with the lens and has tabs that go deep into the glue. If you pull too hard you will crack the bezel like I did. (Arrow pointing to the problematic tab)
A few screws hold the bezel to the lens. Once those are off, customize to your liking! I used duplicolor paint to match my truck, bronze accent to match my wheels and VHT Nightshades spray to darken the sidemarker.
To be continued….


 I’ve had mine in for a few months, cold snaps, hot days, carwashs and even been airborne! No problems yet!!