You are using an out of date browser. It may not display this or other websites correctly.
You should upgrade or use an alternative browser.
You should upgrade or use an alternative browser.
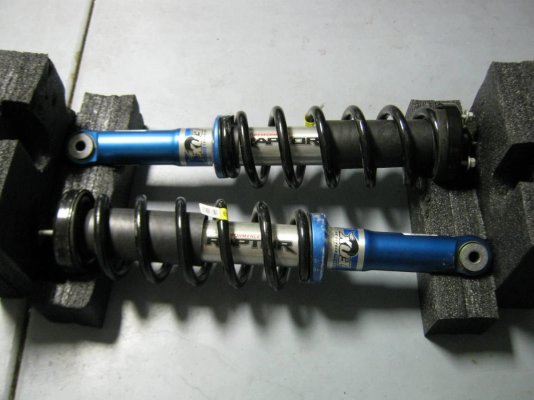
Gen 2 OE rear shocks on gen 1
- Thread starter xBryanHoodsx
- Start date
Disclaimer: Links on this page pointing to Amazon, eBay and other sites may include affiliate code. If you click them and make a purchase, we may earn a small commission.
Jimster58
Full Access Member
Reviving the thread, post-"festivities"
Anyone have any updates or useful information regarding their Gen2 to Gen1 shock swaps?
Anyone have any updates or useful information regarding their Gen2 to Gen1 shock swaps?
Haha that great!
Being a cheap ass (kind of) and with my stock 2010 raptor shocks nearing their 3rd rebuild over 206,000 miles, the thought of upgrading to Gen 2 shocks over rebuilding the Gen 1's lead me to this thread. The drawbacks of the longer front shock, limiting straps, not in the sweet spot of the shock valving, etc. initially turned me away but when I found a set of low mileage Gen 2 shocks on eBay for 700 shipped, I jumped.
DISCLAIMER!!!!!
I don't recommend this mod, as I have done it, to anyone. My hope is that a machine shop will pick up on the idea and copy my design with a solid billet piece. If you work at a machine shop and can make these PM me.
To help avoid some of the shit storm that will surely follow let me say this. I have a brand new 2018 raptor that is my daily. Thus the 2010 is now a ranch truck and never spends any time on road, if a shock breaks I'm not going to crash into anyone on the highway. I'm single with zero dependents so if I a shock breaks and I mangle myself hauling ass across a pasture, that's my own business. Damage to the truck is the least of my worries.
Cool? Good, lets move on.
The rears fit fine, I already had an aftermarket bump stop kit. I moved it down 1" to prevent the shock from bottoming out and breaking the upper shock mount. I then flexed the rear suspension with a forklift and the bumpstop bottomed out before the shock. All good.
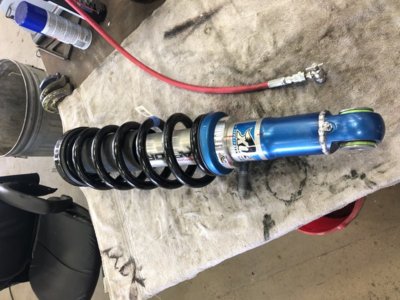
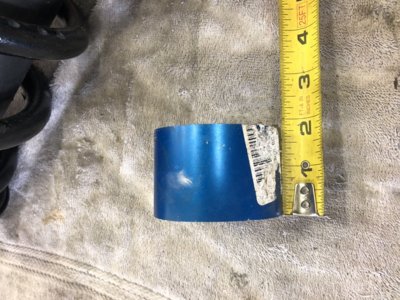
The fronts as we know are roughly 2" longer than the Gen 1 shocks. So I disassembled the whole shock, didn't take pictures of this, but it's not really complicated. The blue piece on the bottom (bottom shock mount) is a hollow nitrogen reservoir with a nitrogen piston that slides up and down. I cut 1 7/8" out with a metal band saw, trued both pieces up on my lathe (removing another 1/16" per side), beveled the edges then welded it back with my Miller 250 syncrowave TIG. Reassemble the shock, charge it, then throw it on the truck.
With this method you still have full compression and extension of the shock, the internal shock piston is still in the proper area to take advantage of the valving, you don't have to worry about toasting your front CV's or limiting straps, you can use the Gen 2 springs. Taking out 2" with the Gen2 springs puts you a bottom perch height, I installed a cheap lift collar after some "ranch testing" and the front end settled. Now I'm back at mid perch.
The only downside I can think of is the nitrogen piston inside the lower mount has 2" less room to travel, and the possibility of breaking a shock at the weld ending in catastrophic failure and a fiery, painful death. Again I stress, don't copy this mod.
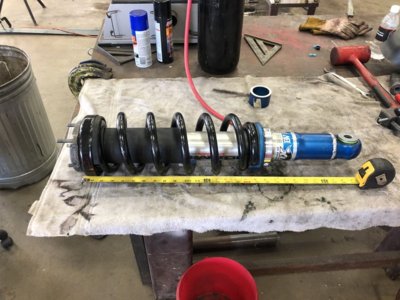
Pictures attached.
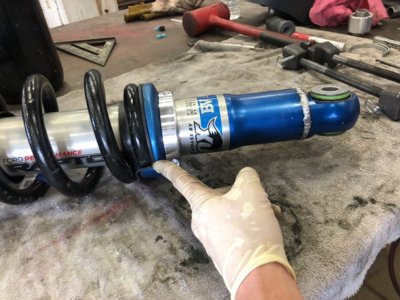
First pic shows the assembled shock with the weld. Drill and tap 1/8 NPT for a Schrader valve. The welding cooked the lower bushings, but surprisingly I couldn't feel or hear bushing failure them when testing. I have new ones that I'll swap in someday.
Second pic shows overall length, 26 3/4" as measured from top of the hat to center of lower mount.
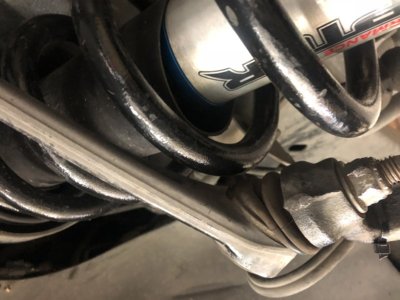
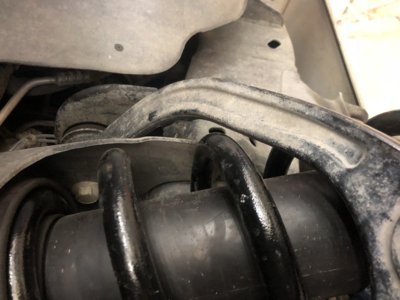
Then some pics showing the piece I cut out, springs clearing the A arm, etc. You need to make sure the springs are clocked correctly or they can hit the upper A arm.
For the price and only a Saturday worth of time invested I couldn't resist. Ride is fantastic, smoother on moderate terrain and I don't have the "rebound bounce" when landing a jump. Who wants to do this the right way and make a small run of billet lower mounts? PM me please!


Behrman
Member

So have we ever decided if the Rear 3.0s are safe to run with bone stock rear suspension. I have gone through ever page of this thread and couldn't find an exact answer . Thanks
engine45
Full Access Member
my gen1 ran with them just fine.
Behrman
Member
Did you have any rear suspension mods ?my gen1 ran with them just fine.
engine45
Full Access Member
No mods. Rear had stock leafs.Did you have any rear suspension mods ?
Similar threads
- Replies
- 5
- Views
- 462
- Replies
- 4
- Views
- 419
- Replies
- 22
- Views
- 4K
Members online
- flyitaway
- Helopilot
- billprins
- Kyler Sykora
- FreightTerrain
- Rustyseatbelt
- viper2pt0
- StuartR
- efergus11
- Keith88
- abrown
- EZDA45
- 8AV8
- singleshot1231
- FossilFuel
- MurderedOutSVT
- Bajatrick
- NEOGARAGE
- The Car Stereo Company
- SpiderBat2099
- vahidberdjis
- EricM
- GCATX
- HOLLYWOOD 1
- mleaky
- RaptorFun
- Jesse1983
- colticus
- wyomingraptor
- bobbyph1
- raptor730
- Javi
- Dnpbakon
- AMB_22_Raptor
- Dee
- JohnyPython
- shakazulu12
- FiveOsvt
- taquitos
- iwish97
- Sharpie69
- downforce137
- ajames1395
- Old-Raptor-guy
- Speedhunter
- Burrus
- SVT-SourCream
- 03Cobraraptor
- DMacDonald
- tigo
Total: 5,388 (members: 87, guests: 5,301)


