Gen 1 Paddle Shifter Kits Now Ready

Disclaimer: Links on this page pointing to Amazon, eBay and other sites may include affiliate code. If you click them and make a purchase, we may earn a small commission.

Cody Templeton

FRF Addict
Joined
Oct 29, 2020
Posts
1,485
Reaction score
1,150
Location
Des Moines, IA
I'll toss up some pictures of my kit installed, but I would highly recommend it, especially for those of you running an aftermarket steering wheel. I have the carbon fiber wheel from eBay and the paddle shifters are the perfect piece to really finish it out.
 

XCReapor

Member
Joined
Jan 29, 2018
Posts
34
Reaction score
20
Location
Albany, Ny
I'll toss up some pictures of my kit installed, but I would highly recommend it, especially for those of you running an aftermarket steering wheel. I have the carbon fiber wheel from eBay and the paddle shifters are the perfect piece to really finish it out.
I have the same, did you go with the carbon fiber shifters?
 

BenBB

FRF Supporting Member
Supporting Member
Joined
Apr 21, 2016
Posts
1,819
Reaction score
2,491
Location
Lots of different places
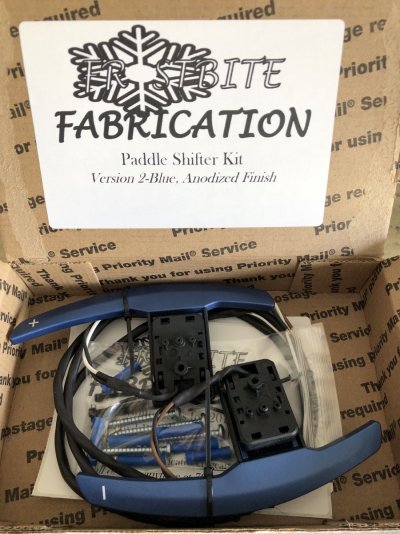
Finally got around to ordering a set in blue, can't wait haha! I need to replace my steering wheel RH radio switch and I figure that's a close enough excuse to get this done at the same time =) I'll post some pics when I get it done...
 

BenBB

FRF Supporting Member
Supporting Member
Joined
Apr 21, 2016
Posts
1,819
Reaction score
2,491
Location
Lots of different places
Got this done today, thanks for building an awesome kit and walkthrough videos @KrautKabbage!
IMG_6774.JPG
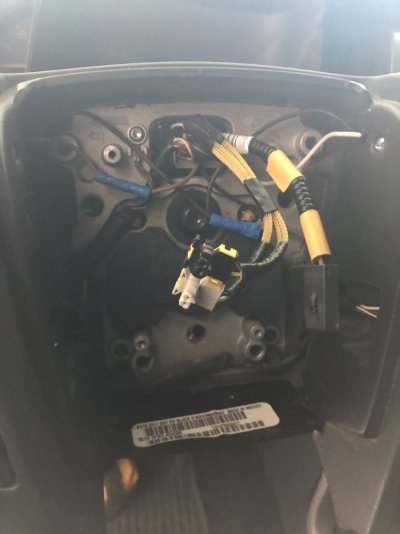
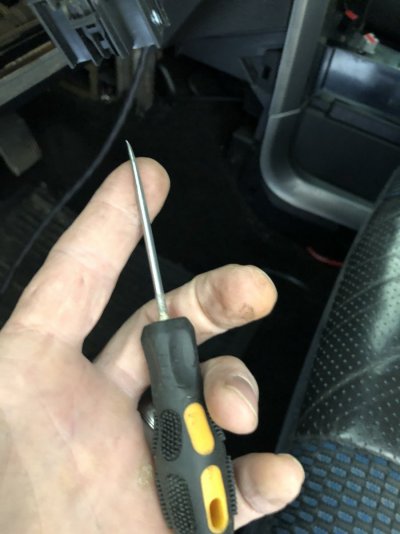
Some thoughts for anyone else that does this. The wires are TINY and luckily I didn't have to use any of the extra included wire terminals for the connectors but just be careful with em and don't hamfist them into the connectors or anything and you'll be fine. On the connector on the back side of the steering wheel/clockspring I had some trouble seating the terminals fully in the connector, I used a pick to push them (carefully) from the back:
IMG_6780.JPG
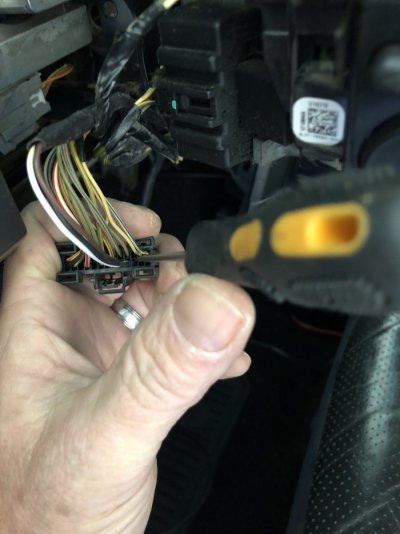
Then pushing the little terminals all the way in until they click and don't come right back out when you tug on em:
IMG_6779.JPG
I did the same for the other connector inside the steering wheel, be patient and make sure they don't pull back out.

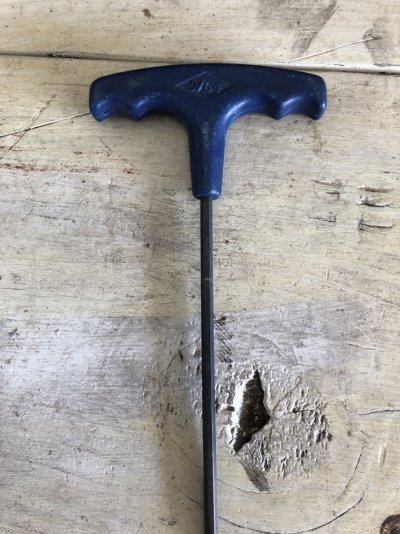
Then getting the airbag out was difficult, I crammed all kinds of tools into those three holes trying to release the springs; different sizes of eyeglass screwdrivers (a large one worked for the lower hole, a smaller one worked for the LH hole), screwdrivers/torx drivers and a long skinny punch (wasn't long enough) and nothing would release that RH hole until I tried this:
IMG_6781.JPG
That thing worked great both times I removed the airbag, shove it straight into the hole, kinda favoring the tip of the tool towards the rear of the truck (if you angle towards the front of the truck it'll hit a little plastic ledge thing), and it SHOULD engage and release the spring. It doesn't take much pressure and you'll kinda feel it (but you definitely can't see shit haha!).

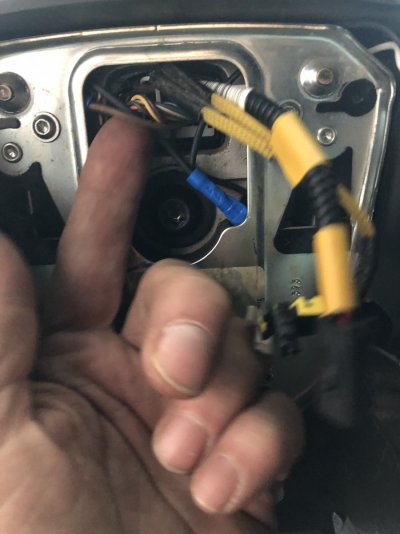
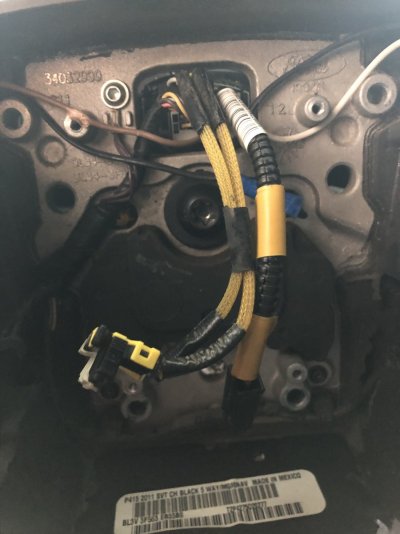
Last thing, I know the youtube video tells you to make sure the wires behind the plate on the steering wheel need to have slack and be careful of their routing but...yeah I F'd that up. Got everything assembled and started truck to test, no worky at either the paddles or the shift lever. Nada. I figured I botched one of the butt connectors at the lever so I tested with an ohmmeter from the lever side to the connector under the console, had continuity, pulled the steering wheel covers and tested from lever side to that connector pins, had continuity, pulled airbag again and tested from lever side to THAT connector pins, had continuity. Dammit. Pulled the steering wheel plate and found this:
IMG_6784.JPG
Conintued...
 

BenBB

FRF Supporting Member
Supporting Member
Joined
Apr 21, 2016
Posts
1,819
Reaction score
2,491
Location
Lots of different places
Brown wire going to downshift lever was smashed good and grounding to steering wheel. I installed another butt connector there just to be safe:
IMG_6786.JPG
Then made double sure the wires cleared and had slack in them after the plate was in:
IMG_6787.JPG
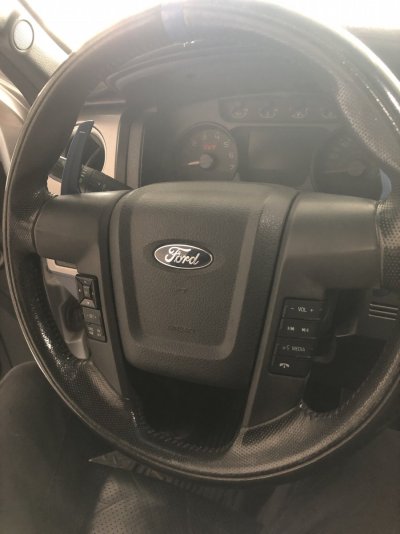
Honestly on the first go 'round I was more worried that the somewhat sharp edges of the plate metal would cut one of the wires coming from the switches but when correctly routed that shouldn't be a concern either. Anyway, once I fixed my boo-boo and got it back together it works flawlessley, at both the lever and the paddles. I'll put them through the paces and report back with any issues but I'm giving them two thumbs up.
IMG_6791.JPG
 
Top