BMart
FRF Resident Artist
IDK why the pictures are displaying sideways, they are not sideways on the hosted site. Apologies.
Objective: Protect paint from rocks.
Solution: Custom fitted urethane mud flaps, removable via rivet nuts.
Difficulty: 7/10. Lots of precision work.
Time: ~8 hours. Not including acquiring hardware or specialty tools.
Cost: ~$160, depending on what tools you already have.
Needed:
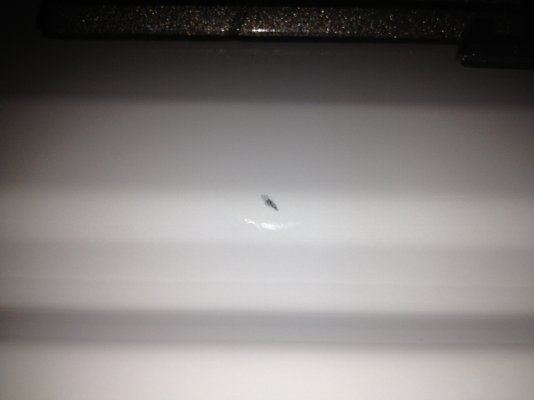
When I bought my truck in the summer of 2013, I had no intention of adding mud flaps. I didn't like the look of them, and most available options seem flimsy and brittle. 2 weeks later, my tire lugs decided to chuck a large stone at my passenger door, hitting it right on the corner of the horizontal bevel, chipping the paint off down to the metal. I can live with scratches in the clear coat and swirl marks, but if it's damaging down to the metal I cannot abide.
So I decided to add mudflaps, but I still refused to buy any of the commonly available options. I didn't like the hard plastic, their small size, the look of vents on some of them, and I definitely didn't like the idea of using a small self-tapping screw as a means of securing them. I decided to look elsewhere, and when I didn't find anything I decided to go my own route.
My requirements:
During blueprinting, I really came to appreciate how they do it in rally sports. They use heavy duty urethane, bolts, and they are oversized so that they stick out laterally from the wheel wells, which makes it more functional and drastically improves the appearance IMO (if done right).

It was only natural that this research led me to Rally Armor, a well-respected and popular brand in the rally sport industry for mud flaps. It only helped that they are made in the USA and that I am a fan of the WRC and had seen them used during races before (Rhys Millen for one). Unfortunately Rally Armor doesn't make a mud flap kit for the F-150 or Raptor. In fact, they don't make flaps for trucks at all. They do however, make "universal" urethane flaps. I bought the "Universal UR Plus Mud flap Grey logo" for $128, which includes 4 flaps. I made sure to get the "UR Plus" version, because they are the larger of the two universal options.
Once I had them in my hands, it was only a matter of working out how to attach them with durable fasteners than are completely removable. No big deal.
I don't quite remember how I found them, but I discovered hardware called "thread setters" or "rivet nuts" somewhere in my research. They are essentially rivets that are hollowed out and threaded on the inside. If you have installed the EZ Down Tailgate Assist, you have already used them before. They require some special tools, but nothing too crazy. Just a specified drill bit, a rivet nut, and the rivet nut tools: a special nut and a regular bolt.
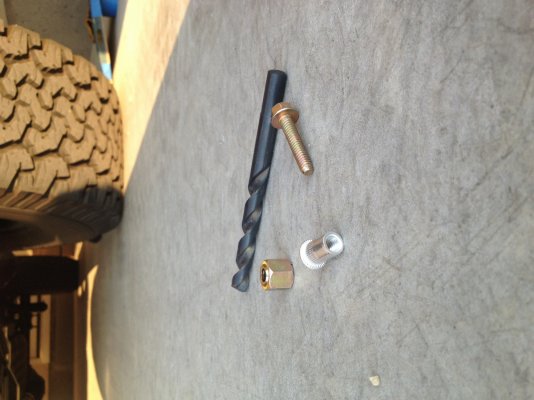
Here's how I worked it out:
You first measure the thickness of your object to be drilled, in this case the gray fenders. My digital caliper measured the fender thickness to be between 0.14-0.15 inches thick. From there, I found an all-aluminum rivet nut at my local Ace Hardware that had a "grip-range" that included my fender thickness. While I was there, I picked up the necessary 'insert tool nut' to set the rivet nut, and a bolt that fit the 'tool.'
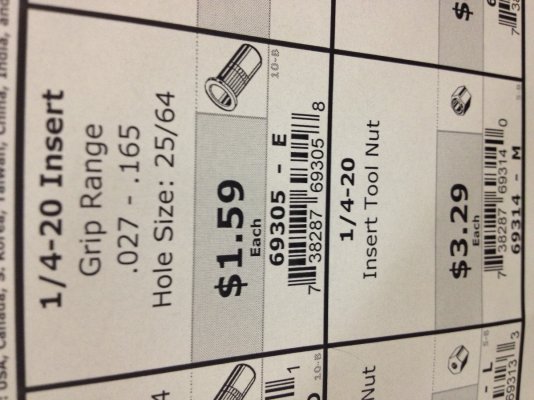
As seen in the picture above, my rivet nuts require a 25/64" hole, which I had to buy a special drill bit for. Usually when you buy your rivet nuts, they tell you how big the hole needs to be. Don't think you can get by with a drill bit that's 'close enough.' The principles behind a rivet nut require very exact tolerances to work properly.
Time for a test to see these babies in action before drilling holes in my $50k truck. First I drilled a hole and inserted the rivet nut. Perfect fit.
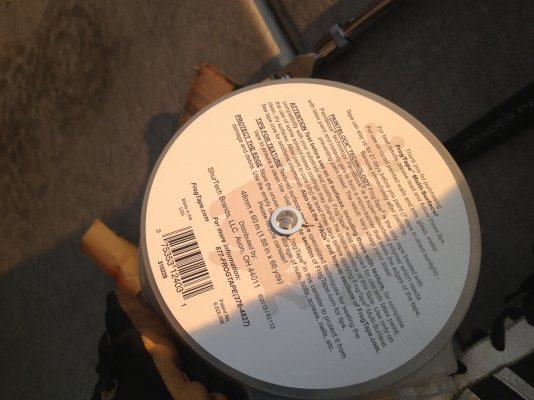
Next, put the 'tool' (nut) on the face of the rivet nut, with the beveled-face side of the tool touching the face of the rivet nut. Thread the tool's bolt through the two of them, and you'll have this:
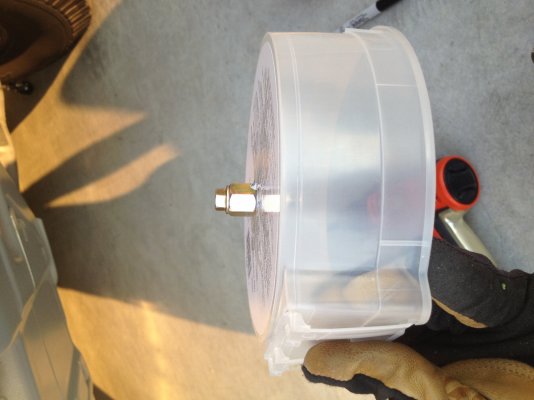
While holding the 'tool' in place with a box wrench, use a ratchet to tighten the bolt.
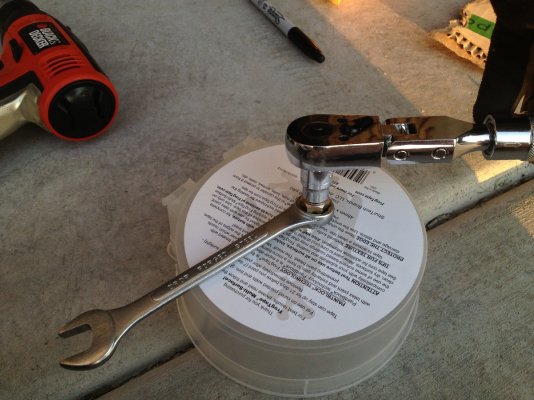
Here's the opposite side, showing that as I am tightening the rivet nut, it is crimping back on the object that you drilled through:
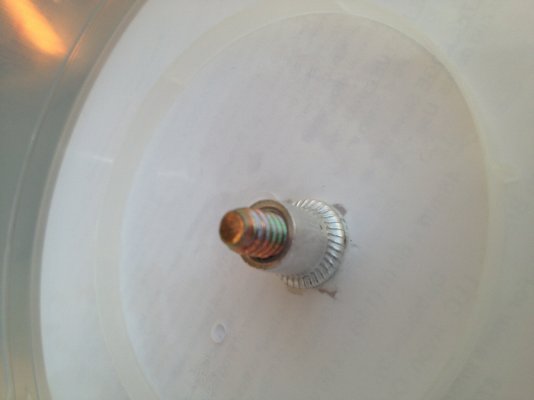
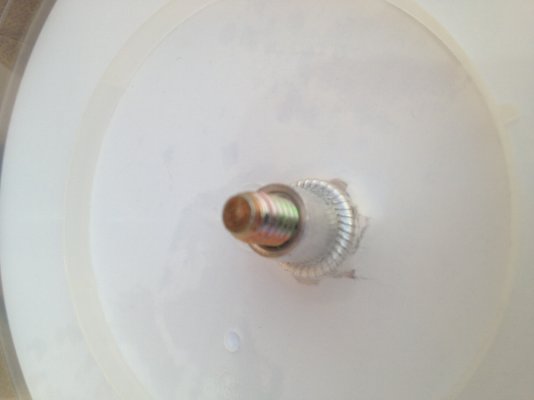
I found that 2.5 fulls turns of the bolt tightened my rivet nuts perfectly. Here's the rivet nut set in its final resting place, ready to receive your fastening hardware:
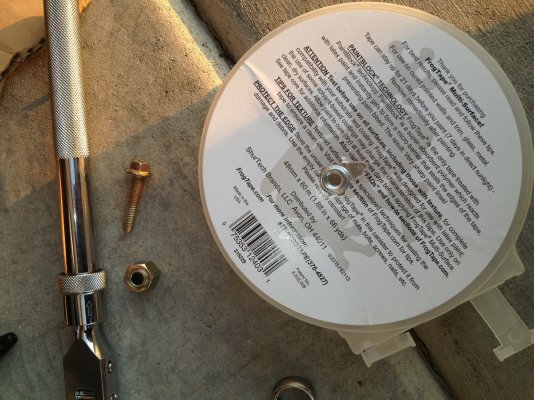
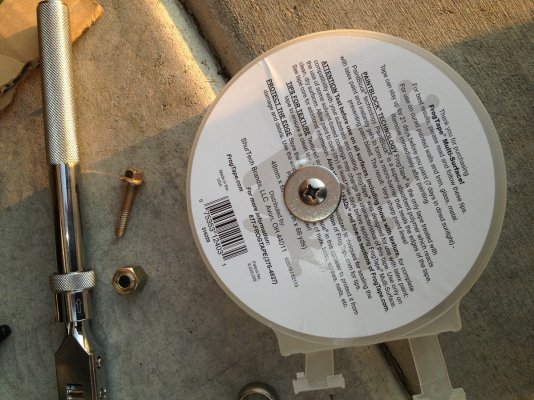
Speaking of fastening hardware, use stainless steel bolts and washers to prevent rust. Washers are optional but I used them to increase the contact area of my bolts, making the flap fastening points stronger.
Ok, time to get dirty. First thing I did was cut down my Rally Armor mud flaps to size. Dry fitting the mud flaps in the wheel wells shows that they cover up some OEM cracks between panels. I wanted to cut these so that debris/dirt/mud didn't collect behind the mud flaps after installed.
I first created a facsimile of the final mud flap in cardboard. Trace the mud flap on a sheet of cardboard, cut it out, and then adjust the cutout as necessary to follow the existing lines and cracks on your fender well.
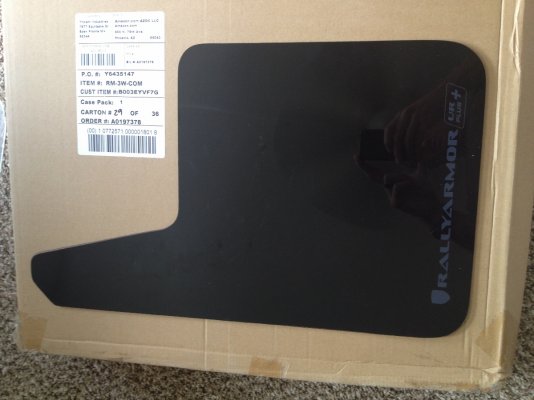
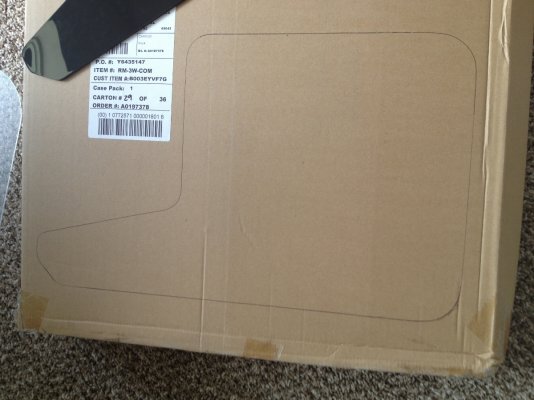
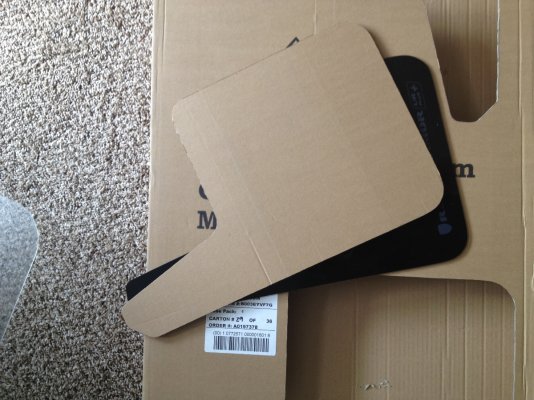
I created a cardboard facsimile for both the front and rear, one for each, since they have different lines and cracks in the fender wells to work around. To work out what to cut off of the flaps to get them to conform I taped a bubble level to the bottom part of the facsimile, dry-fitted it to the truck (measuring height off the ground with a tape measurer to keep it uniform). Once the facsimile represented where I wanted the final flaps to sit, I traced the line of the fender well onto the cardboard.
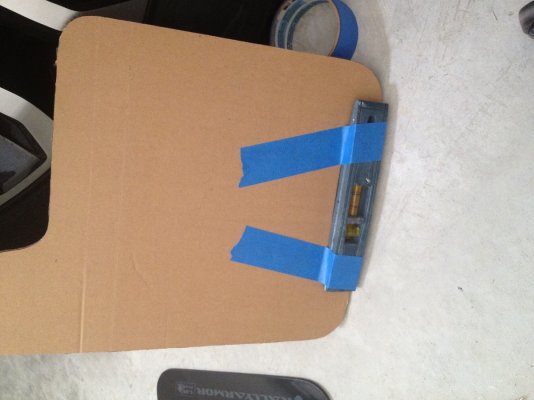
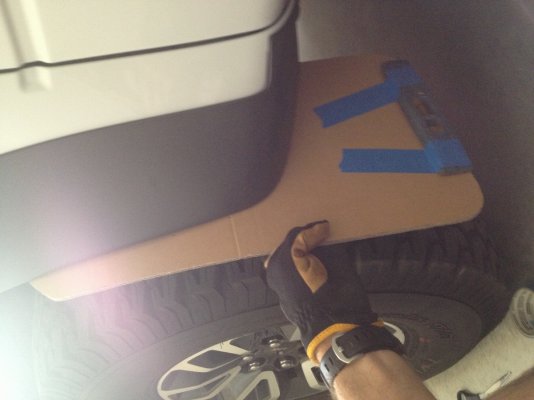
After the lines were drawn, I used toothpicks to puncture through the cardboard, making it easier to dry-fit on a whim. Leave the toothpicks in the cardboard sticking out perpendicular, and it will be easier to align the facsimile to the fender well when you dry fit it. I used this method to dry-fit both sides for both facsimiles. When I was satisfied with the placement, I cut the facsimile to match the OEM lines and cracks of the fender well. Here's how it compared to the urethane mud flap after cutting:
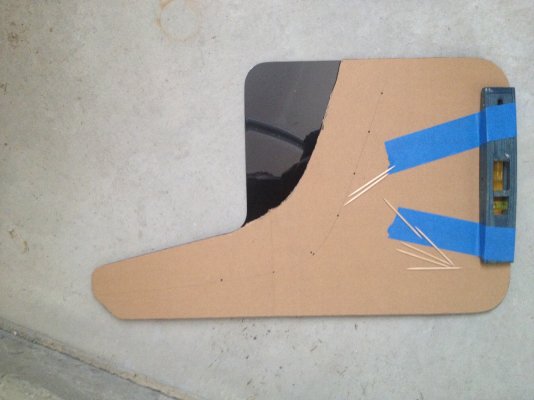
After finalizing the cuts on the facsimile, it was time to work out where the drill holes would go.
Looking behind, under, and generally all around the gray fender flares, I worked out where there would be enough space for a rivet nut and bolt to exist. As you travel up the fender flare it takes more guess work, but I was able to safely judge that I would have about 1.5 inches of "safe zone" (enough space for rivet nut and bolt behind fender flare). I transferred this 'safe zone' onto the facsimiles with a dotted line. I then used a pencil and washers to plot evenly spaced drill holes within the safe zone, while avoiding areas that I determined wouldn't fit a rivet nut (as marked with X's).
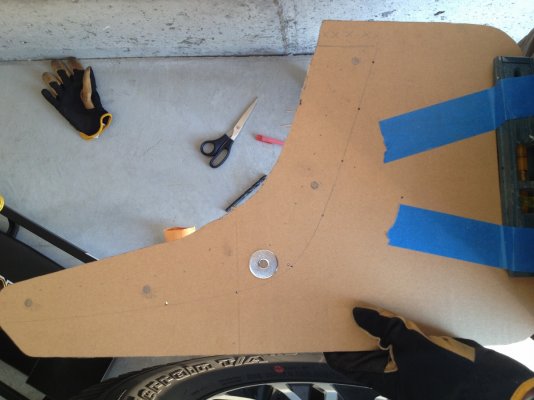
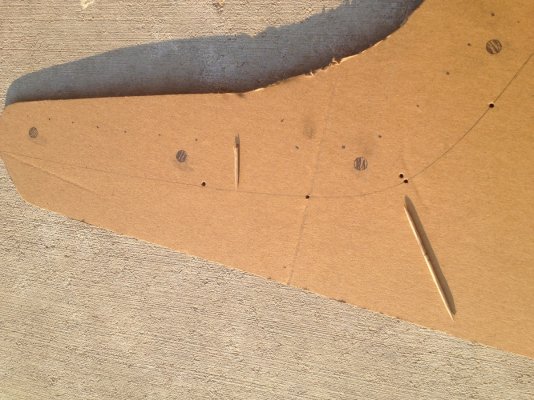
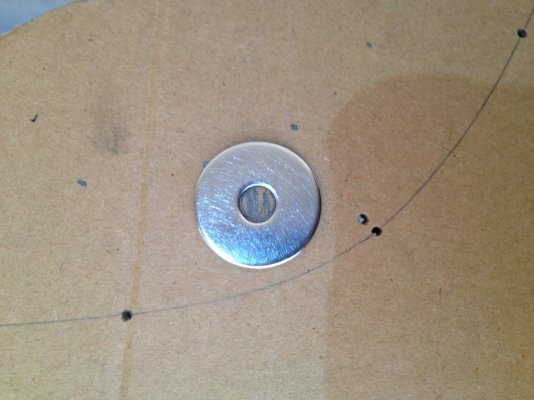
Facsimiles complete! At this point, we have a complete blueprint of the final size and fitment, as well as where to drill on the flaps and fender flare.
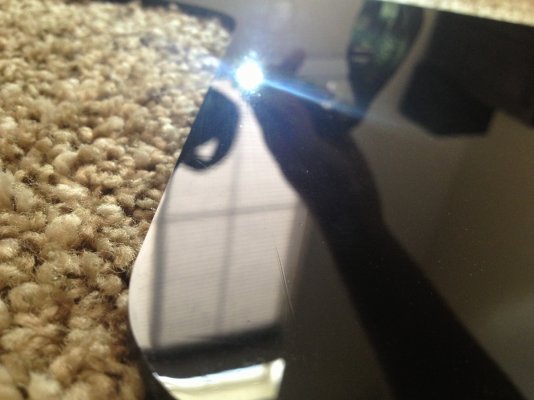
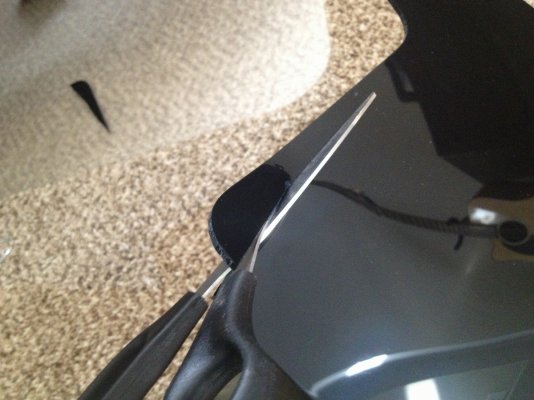
Cut your urethane flaps to match the facsimile. I used a straight razor to trace the line onto the urethane flap, and then cut it with scissors.
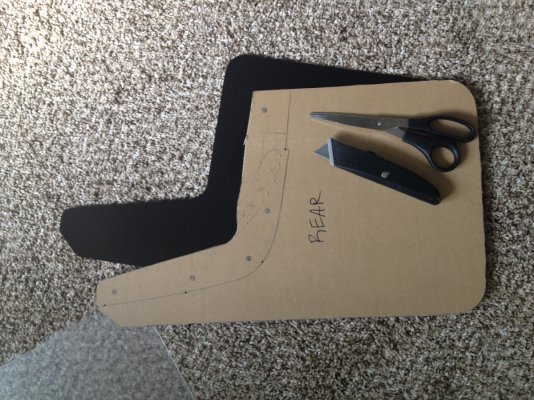
Trace line:
Cutting:
Flaps cut. Now mark the drill holes with a sharpie and drill 'em out. I found it beneficial to use a drill bit bigger than your fastening bolts. The urethane shrinks the hole a bit after you drill it.
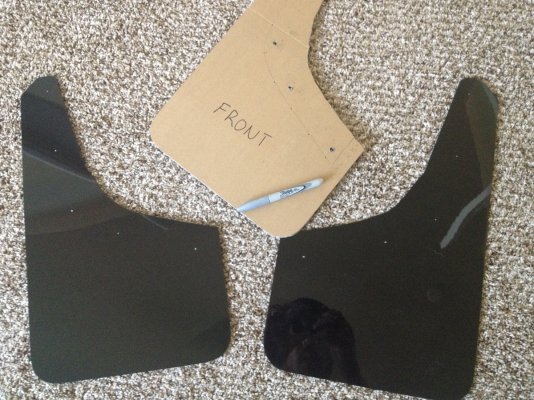
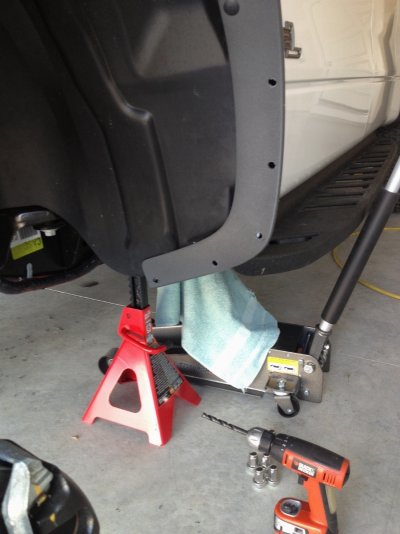
Your flaps are done, and ready for install. Time to drill out the fender flares. I used the cardboard facsimiles + toothpicks method to re-align my facsimiles to the fender flares, where I then marked the drill holes with liquid chalk. I didn't want to use a sharpie here, since these marks may move around a bit before final drilling. Note: On the rear flaps, one hole (on each side) is drilled into the thin plastic inner wheel well due to the limited length of the fender flare.
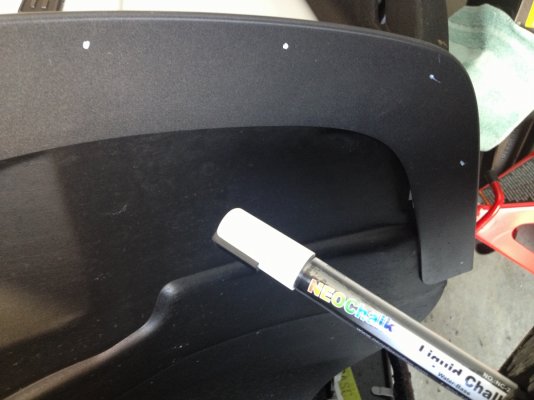
Yes, I took off the wheels for the hole-marking and install. You're going to have to remove the wheels to drill anyways, so you might as well get them off early and utilize the extra space as early as possible.
After I marked the holes with chalk, I triple checked the fitment of both the facsimile and the flaps themselves. You don't want any surprises after you have holes in your fender. Make sure all the holes align, that the placement is perfect between the fender, facsimile, and flaps. If any of the three are off, you're going to have an issue.
Here's my fender holes drilled out to the specified diameter of the rivet nut, ready to receive the rivet nuts themselves:
See that bit of white behind the third hole?
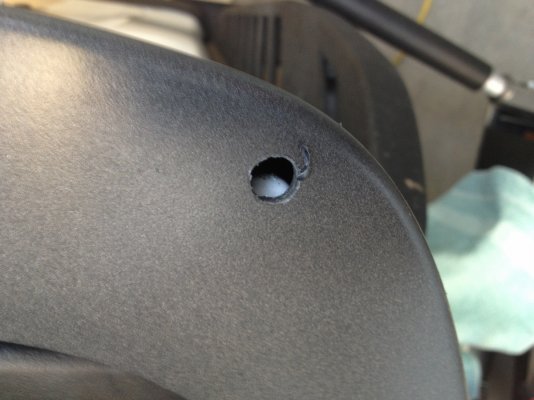
That's the fiberglass fender behind the fender flare. My "safe zone" was very close right there, but it still accepted the rivet nut in the end.
After your holes are drilled, install the rivet nuts as prescribed in the demo above. Those suckers grip HARD at around 2 full turns. I actually smashed a crap socket in the process.
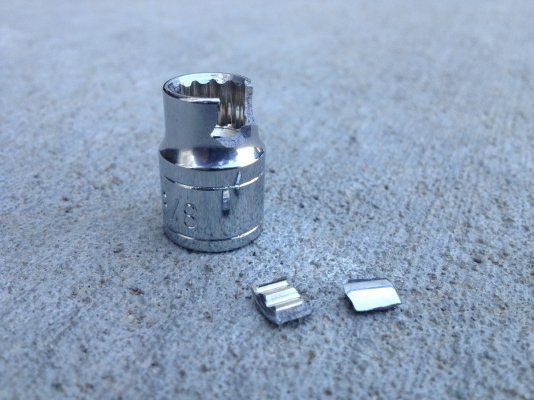
It also greatly helps to have someone hold the box wrench while you are torquing down on the socket. Otherwise, you have to keep one in place while applying great force to the other, which is tricky. Alternatively, you can buy a proper thread setter kit online, which doesn't require you to turn a wrench, but pull a trigger on a rivet nut gun instead. I've never used them, but I do know that a rivet gun is not the same as a rivet nut gun. YMMV, experiment first.
When your rivets are installed, it's just a matter of bolting your mud flaps to the rivet nuts. You can easily paint the stainless hardware to blend in with the flaps as well, as I have done for half of mine.
Thread locker is optional for fastening. Half of mine use blue thread locker, half don't, and I haven't lost any hardware or experienced any hardware dancing its way loose.
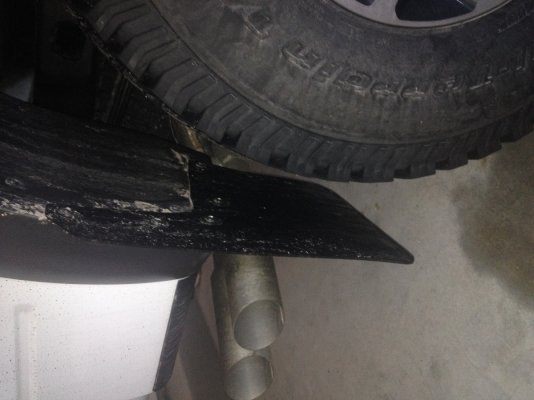
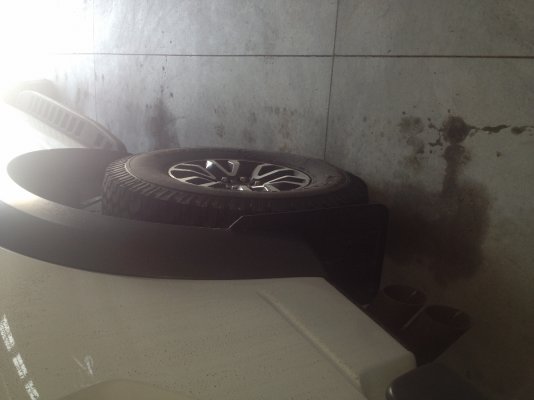
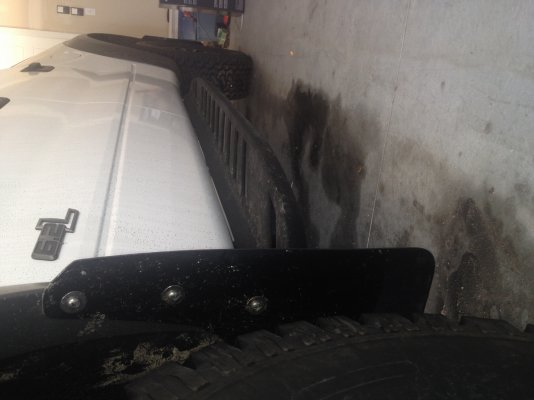
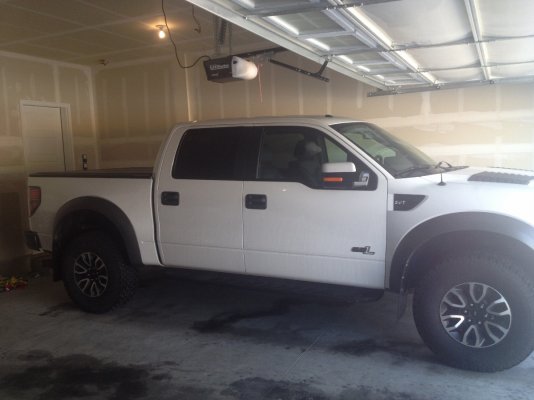
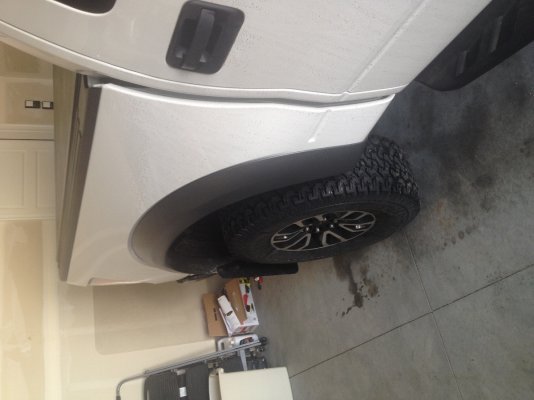
End result, pictures taken after months of trouble-free use on pavement, dirt, mud, and snow without any new chips or dings caused from my tires chucking rocks:
Objective: Protect paint from rocks.
Solution: Custom fitted urethane mud flaps, removable via rivet nuts.
Difficulty: 7/10. Lots of precision work.
Time: ~8 hours. Not including acquiring hardware or specialty tools.
Cost: ~$160, depending on what tools you already have.
Needed:
- 4 Rally Armor Urethane UR Plus Universal Mud Flaps (or cut your own from a sheet of thick urethane)
- 20 aluminum rivet nuts/thread setters
- 1 rivet nut install tool, specific to rivet nut size
- 20 stainless steel bolts that fit your rivet nut. Mine were
- 20 stainless steel washers
- Assortment of tools. Depends on rivet nut size you get. Sockets, box wrenches, ratcheting wrenches.
- Cardboard
- Drill
- Drill bit specific to your rivet nut required hole size
- Drafting tools (pens, sharpies, straight edges, blades)
- Toothpicks
- Tape
- Primer & paint (optional)
When I bought my truck in the summer of 2013, I had no intention of adding mud flaps. I didn't like the look of them, and most available options seem flimsy and brittle. 2 weeks later, my tire lugs decided to chuck a large stone at my passenger door, hitting it right on the corner of the horizontal bevel, chipping the paint off down to the metal. I can live with scratches in the clear coat and swirl marks, but if it's damaging down to the metal I cannot abide.

So I decided to add mudflaps, but I still refused to buy any of the commonly available options. I didn't like the hard plastic, their small size, the look of vents on some of them, and I definitely didn't like the idea of using a small self-tapping screw as a means of securing them. I decided to look elsewhere, and when I didn't find anything I decided to go my own route.
My requirements:
- Removable. I wanted to be able to remove them for whatever reason.
- Durable material, preferably flexible and forgiving. No plastic for me.
- Strong attachment points.
- OEM look. Ideally, something larger than commonly available options.
- Rust proof hardware.
During blueprinting, I really came to appreciate how they do it in rally sports. They use heavy duty urethane, bolts, and they are oversized so that they stick out laterally from the wheel wells, which makes it more functional and drastically improves the appearance IMO (if done right).

It was only natural that this research led me to Rally Armor, a well-respected and popular brand in the rally sport industry for mud flaps. It only helped that they are made in the USA and that I am a fan of the WRC and had seen them used during races before (Rhys Millen for one). Unfortunately Rally Armor doesn't make a mud flap kit for the F-150 or Raptor. In fact, they don't make flaps for trucks at all. They do however, make "universal" urethane flaps. I bought the "Universal UR Plus Mud flap Grey logo" for $128, which includes 4 flaps. I made sure to get the "UR Plus" version, because they are the larger of the two universal options.
Once I had them in my hands, it was only a matter of working out how to attach them with durable fasteners than are completely removable. No big deal.
I don't quite remember how I found them, but I discovered hardware called "thread setters" or "rivet nuts" somewhere in my research. They are essentially rivets that are hollowed out and threaded on the inside. If you have installed the EZ Down Tailgate Assist, you have already used them before. They require some special tools, but nothing too crazy. Just a specified drill bit, a rivet nut, and the rivet nut tools: a special nut and a regular bolt.

Here's how I worked it out:
You first measure the thickness of your object to be drilled, in this case the gray fenders. My digital caliper measured the fender thickness to be between 0.14-0.15 inches thick. From there, I found an all-aluminum rivet nut at my local Ace Hardware that had a "grip-range" that included my fender thickness. While I was there, I picked up the necessary 'insert tool nut' to set the rivet nut, and a bolt that fit the 'tool.'

As seen in the picture above, my rivet nuts require a 25/64" hole, which I had to buy a special drill bit for. Usually when you buy your rivet nuts, they tell you how big the hole needs to be. Don't think you can get by with a drill bit that's 'close enough.' The principles behind a rivet nut require very exact tolerances to work properly.
Time for a test to see these babies in action before drilling holes in my $50k truck. First I drilled a hole and inserted the rivet nut. Perfect fit.

Next, put the 'tool' (nut) on the face of the rivet nut, with the beveled-face side of the tool touching the face of the rivet nut. Thread the tool's bolt through the two of them, and you'll have this:

While holding the 'tool' in place with a box wrench, use a ratchet to tighten the bolt.

Here's the opposite side, showing that as I am tightening the rivet nut, it is crimping back on the object that you drilled through:


I found that 2.5 fulls turns of the bolt tightened my rivet nuts perfectly. Here's the rivet nut set in its final resting place, ready to receive your fastening hardware:


Speaking of fastening hardware, use stainless steel bolts and washers to prevent rust. Washers are optional but I used them to increase the contact area of my bolts, making the flap fastening points stronger.
Ok, time to get dirty. First thing I did was cut down my Rally Armor mud flaps to size. Dry fitting the mud flaps in the wheel wells shows that they cover up some OEM cracks between panels. I wanted to cut these so that debris/dirt/mud didn't collect behind the mud flaps after installed.
I first created a facsimile of the final mud flap in cardboard. Trace the mud flap on a sheet of cardboard, cut it out, and then adjust the cutout as necessary to follow the existing lines and cracks on your fender well.


I created a cardboard facsimile for both the front and rear, one for each, since they have different lines and cracks in the fender wells to work around. To work out what to cut off of the flaps to get them to conform I taped a bubble level to the bottom part of the facsimile, dry-fitted it to the truck (measuring height off the ground with a tape measurer to keep it uniform). Once the facsimile represented where I wanted the final flaps to sit, I traced the line of the fender well onto the cardboard.


After the lines were drawn, I used toothpicks to puncture through the cardboard, making it easier to dry-fit on a whim. Leave the toothpicks in the cardboard sticking out perpendicular, and it will be easier to align the facsimile to the fender well when you dry fit it. I used this method to dry-fit both sides for both facsimiles. When I was satisfied with the placement, I cut the facsimile to match the OEM lines and cracks of the fender well. Here's how it compared to the urethane mud flap after cutting:

After finalizing the cuts on the facsimile, it was time to work out where the drill holes would go.
Looking behind, under, and generally all around the gray fender flares, I worked out where there would be enough space for a rivet nut and bolt to exist. As you travel up the fender flare it takes more guess work, but I was able to safely judge that I would have about 1.5 inches of "safe zone" (enough space for rivet nut and bolt behind fender flare). I transferred this 'safe zone' onto the facsimiles with a dotted line. I then used a pencil and washers to plot evenly spaced drill holes within the safe zone, while avoiding areas that I determined wouldn't fit a rivet nut (as marked with X's).


Facsimiles complete! At this point, we have a complete blueprint of the final size and fitment, as well as where to drill on the flaps and fender flare.
Cut your urethane flaps to match the facsimile. I used a straight razor to trace the line onto the urethane flap, and then cut it with scissors.

Trace line:

Cutting:

Flaps cut. Now mark the drill holes with a sharpie and drill 'em out. I found it beneficial to use a drill bit bigger than your fastening bolts. The urethane shrinks the hole a bit after you drill it.

Your flaps are done, and ready for install. Time to drill out the fender flares. I used the cardboard facsimiles + toothpicks method to re-align my facsimiles to the fender flares, where I then marked the drill holes with liquid chalk. I didn't want to use a sharpie here, since these marks may move around a bit before final drilling. Note: On the rear flaps, one hole (on each side) is drilled into the thin plastic inner wheel well due to the limited length of the fender flare.

Yes, I took off the wheels for the hole-marking and install. You're going to have to remove the wheels to drill anyways, so you might as well get them off early and utilize the extra space as early as possible.
After I marked the holes with chalk, I triple checked the fitment of both the facsimile and the flaps themselves. You don't want any surprises after you have holes in your fender. Make sure all the holes align, that the placement is perfect between the fender, facsimile, and flaps. If any of the three are off, you're going to have an issue.
Here's my fender holes drilled out to the specified diameter of the rivet nut, ready to receive the rivet nuts themselves:

See that bit of white behind the third hole?

That's the fiberglass fender behind the fender flare. My "safe zone" was very close right there, but it still accepted the rivet nut in the end.
After your holes are drilled, install the rivet nuts as prescribed in the demo above. Those suckers grip HARD at around 2 full turns. I actually smashed a crap socket in the process.

It also greatly helps to have someone hold the box wrench while you are torquing down on the socket. Otherwise, you have to keep one in place while applying great force to the other, which is tricky. Alternatively, you can buy a proper thread setter kit online, which doesn't require you to turn a wrench, but pull a trigger on a rivet nut gun instead. I've never used them, but I do know that a rivet gun is not the same as a rivet nut gun. YMMV, experiment first.
When your rivets are installed, it's just a matter of bolting your mud flaps to the rivet nuts. You can easily paint the stainless hardware to blend in with the flaps as well, as I have done for half of mine.
Thread locker is optional for fastening. Half of mine use blue thread locker, half don't, and I haven't lost any hardware or experienced any hardware dancing its way loose.
End result, pictures taken after months of trouble-free use on pavement, dirt, mud, and snow without any new chips or dings caused from my tires chucking rocks:


Last edited:


