Comprehensive Ford Raptor Supercab Subwoofer/Amp installation Instructions

Disclaimer: Links on this page pointing to Amazon, eBay and other sites may include affiliate code. If you click them and make a purchase, we may earn a small commission.

Harblar

Full Access Member
Joined
Oct 28, 2012
Posts
466
Reaction score
371
Location
Aberdeen, SD
$450 to put in a pioneer nav unit you already have? Just do it! Cost me $500 to get a processor just so I could keep the factory nav. (Main reason I'm staying factory is because I still want to be able to use my heated/cooled seats. Damn MFT) It'll be worth it in the long run if you upgrade amps/speakers etc, as it will make everything much easier.

Do some checking, but you could probably find all the needed parts for cheaper with a little bit of looking online.
 

lockman

Full Access Member
Joined
Oct 15, 2012
Posts
73
Reaction score
4
yea only if I knew what they are all called I would search for them I know the audio place charges an outragous amout for their stuff I can get on line cheaper.
 

Harblar

Full Access Member
Joined
Oct 28, 2012
Posts
466
Reaction score
371
Location
Aberdeen, SD
Talk to Noah at the car stereo company. He should be able to hook you up with everything you need for a pretty reasonable price.
 
OP
OP
BIRDMAN

BIRDMAN

Birdministrator
Joined
May 16, 2010
Posts
12,915
Reaction score
6,196
Location
Boston
Ok so I finally got around to installing my sub/amp in my 2013 and would like to report 2 changes to the install process.

1. The signal wires to the factory SONY subwoofer in my 2013 are now high-level (amped) inputs directly from the main audio amp. In my 2010, there was a separate amp mounted to the bottom of the subwoofer, therefore the wires going to it were low-level (not-amped) signal wires that could just be spliced in to RCA cables. *To determine which you have, remove your factory sub and look at the bottom. If you see a silver amplifier mounted to the bottom of the subwoofer housing, use the RCA splice method. If you do not see an amplifier, you need a Line Out Converter. I bought a PAC SNI-35 at a local car audio shop since Best Buy was "out of stock" - although they do sell them at Best Buy. I got hosed down for $35 for this part, don't pay that much. I needed it and couldn't find it anywhere else locally.
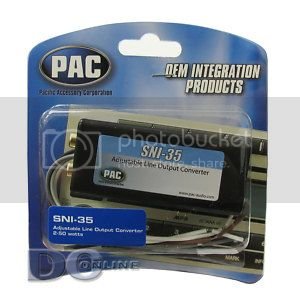
pac-line-out_zps69a0bfa5.jpg

There are 4 wires going to the harness from the factory amplifier, 2 sets of +/- signal wires meant for the factory dual voice coil subwoofer.

The wire colors are as follows:

1. purple/green (+), green/white (-)
2. green/purple (+), grey (-)
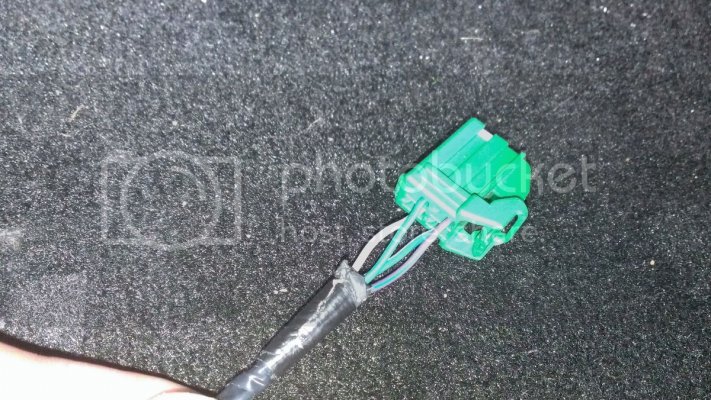
IMAG0147_zpsb9ffae5e.jpg

Cut and splice them to the corresponding positive and negative inputs on your line out converter. Then the line out converter will have RCA outputs which you will connect to your amp. Just follow the instructions for your line output converter, it isn't difficult.

2. The fuse panel in the passenger side front kick panel no longer takes mini-blade fuses like it did on my 2010. I don't know what year Ford made the change, but the panel now takes the low-profile mini fuses. So, my "tap-a-circuit" method outlined in the first post for powering your remote turn-on wire won't work because I just couldn't find a circuit tap with the new type of fuse input.

So, we're going to the accessory trigger wire in the steering column. Easy stuff too. Thanks to Noah at The Car Stereo Company for the advice on where to find the wire.

- Remove the steering wheel shroud. There are 3 5.5mm bolts on the bottom of the shroud that you need to remove.
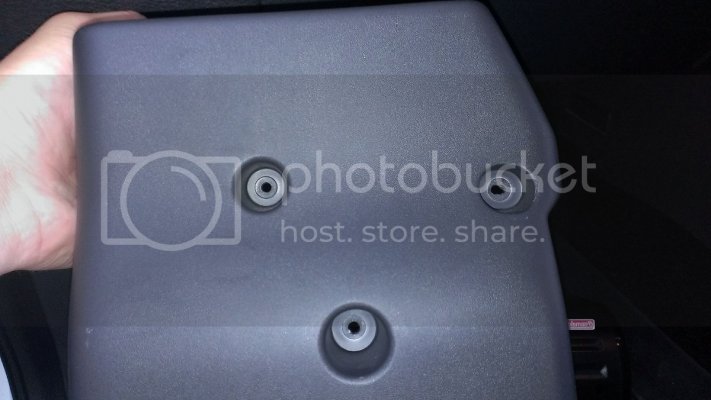
IMAG0156_zps143388d2.jpg


Once removed, you will be able to separate the top and bottom halves of the shroud on the side closest to the steering wheel. You will see where they're attached to each other on the front by small latch clips. You can use a small flat head to push the latch clip in to release it. Be careful not to pull the back apart because the top and bottom are hooked together with flimsy plastic hooks.

Once you have the front part of the shroud separated, you will be able to lift the top half slightly and maneuver the bottom half around the steering wheel controls and ignition cylinder. Then you will see the hooks holding the back side of the shroud together. Just slide them apart. See hook location below:
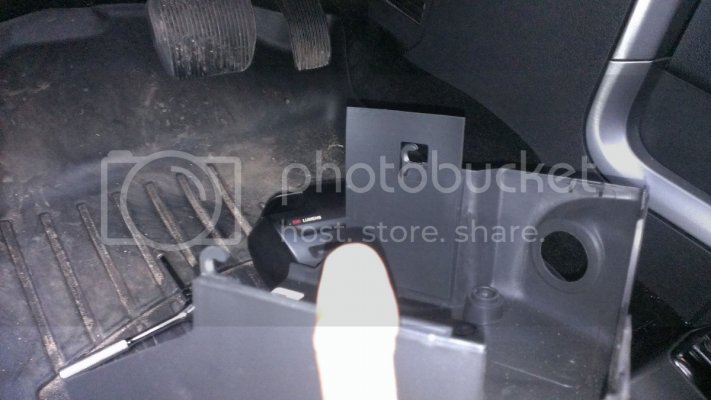
IMAG0155_zpsaa3bb585.jpg

Ok, now on the left side you will see a 7-wire harness. You want to unplug it and go after the accessory trigger wire which is the purple/green wire.
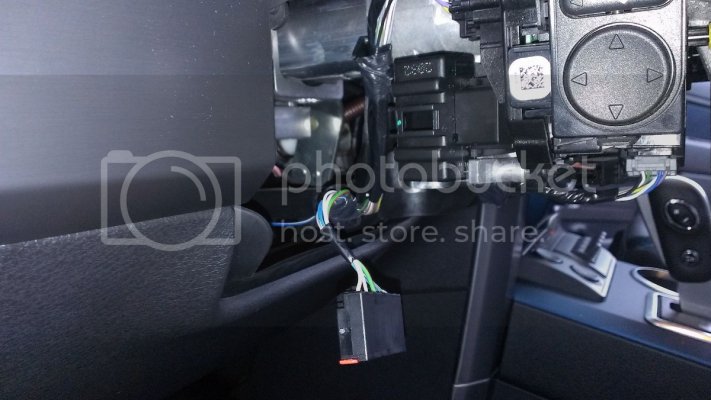
IMAG0157_zpsbb59fdb2.jpg

Just cut that wire and splice in your remote turn on wire for your aftermarket amp. Solder if you would like but a 18-22 ga seamless butt connector should be good enough.

I used a waterproof butt connector with the shrink wrap ends. I spliced in my remote turn on wire with one end of the accessory wire and reconnected the other end.
*Tip, strip the lone accessory wire side a little long and fold/twist it on its self to make the wire a little thicker. It's a really skinny wire and to use a butt connector big enough to accept both wires on one side, it could be a little sketchy with the tiny 22ga wire alone on the other side.
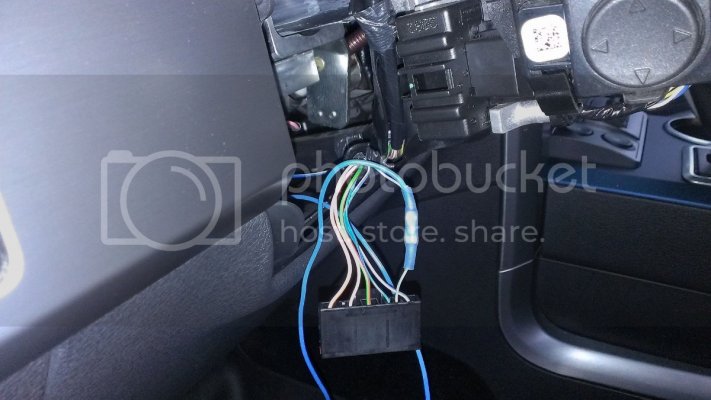
IMAG0159_zpseefb47db.jpg

I taped my connection tight and when wrapped the entire harness for good measure. Then used a zip tie on the closest harness to make sure my new wire wouldn't move and potentially get pulled out.
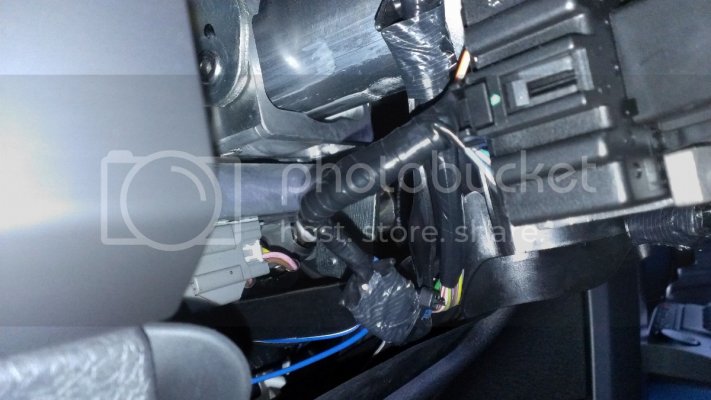
IMAG0161_zpsd312094a.jpg

After that, run your new remote turn-on wire under your drivers side dash and run it down the door sill trim. I already had the passenger door sill panel off from running my main power wire so I just snaked my remote turn on wire behind the console, under the passenger side carpet, in to the kick panel and down the door sill panel since my amp is on my passenger side.
 

IA_Raptor

Member
Joined
Feb 26, 2013
Posts
14
Reaction score
1
When I installed mine in my 13, I used a Monoprice Hi/Low Converter with Remote Out. I can't find it on their site anymore though. It eliminated the need to run a remote wire. I did have to jump power from the amp to it though. It uses the speaker signal to determine when to provide power to the remote wire. Hope this helps someone.
 
OP
OP
BIRDMAN

BIRDMAN

Birdministrator
Joined
May 16, 2010
Posts
12,915
Reaction score
6,196
Location
Boston
When I installed mine in my 13, I used a Monoprice Hi/Low Converter with Remote Out. I can't find it on their site anymore though. It eliminated the need to run a remote wire. I did have to jump power from the amp to it though. It uses the speaker signal to determine when to provide power to the remote wire. Hope this helps someone.

My amp has built in signal sensing, but it only worked sometimes. Have you had any issues with the setup you mentioned?
 

IA_Raptor

Member
Joined
Feb 26, 2013
Posts
14
Reaction score
1
My amp has built in signal sensing, but it only worked sometimes. Have you had any issues with the setup you mentioned?

No issues whatsoever. I also had a similar setup in my 2012 GT500 with 100% reliability. I was skeptical too since I only paid like $5 or something for it.
 

The Car Stereo Company

aka grumpy car stereo guy and frf rolodex
Supporting Member
Joined
Jul 8, 2012
Posts
32,529
Reaction score
23,497
Location
here, on frf
we have not had good luck with those converters with the built in amp trigger. a lot of vehicles have active noise cancelling which can be a problem. when you shut your door the sub starts making noise and wont stop. as far as our trucks are concerned, we dont have it. luckily. but those units also do not shut power off right away sometimes. we had a case a couple times where the amp did not shut off and was draining the battery. we prefer a direct connection for an amp turn on. but it seems you have one that works right.
 

GardeDawg

Member
Joined
Jan 30, 2013
Posts
3
Reaction score
1
Location
Las Vegas
Thank you a ton for this. I made a custom box that will take up the entire space under the seat. Im putting 2 8in pyle's for now and a 1400 watt amp. Ive bought everything for the install and tomorrow Im gonna hook it up.
 

Frank L

Full Access Member
Joined
Feb 4, 2013
Posts
51
Reaction score
14
I ended up with the same high level converter in my 2013 screw. And I used a fuse tap in the pass kick panel. It was difficult to find one that actually switched off with the ignition but its in there. The amp does switch off with the ignition but keeps the battery from being drained too.
BTW there was more than 1 call to The Car Stereo Company with tons of helpful tips.
 
Last edited:
Top