You are using an out of date browser. It may not display this or other websites correctly.
You should upgrade or use an alternative browser.
You should upgrade or use an alternative browser.
Carbon fiber parts from Covid boredom
- Thread starter EL Snagadore
- Start date
Disclaimer: Links on this page pointing to Amazon, eBay and other sites may include affiliate code. If you click them and make a purchase, we may earn a small commission.
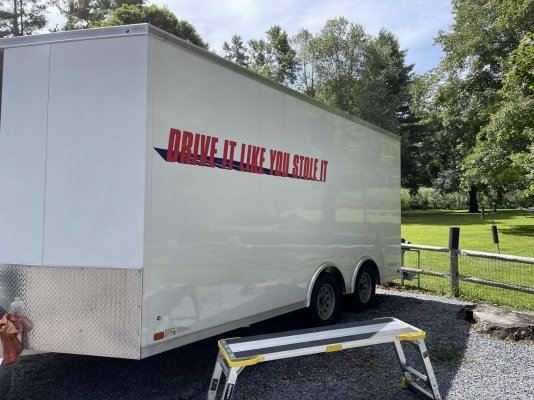
So beginning of this year did a favor for a person I’d never met, only conversed with on CanAm forum. His X3 was ready to be picked up but his tranny on his van gave out so couldn’t pull his trailer. I drove about 100 miles north, met him, drove another 50 miles north to get it. On way turning into pkg lot, I got too tight and scratched my new trailer on a big dumpster. Yeah, I’m not that talented driving a trailer but I try. So here’s the corny decal I had made to cover the damage.
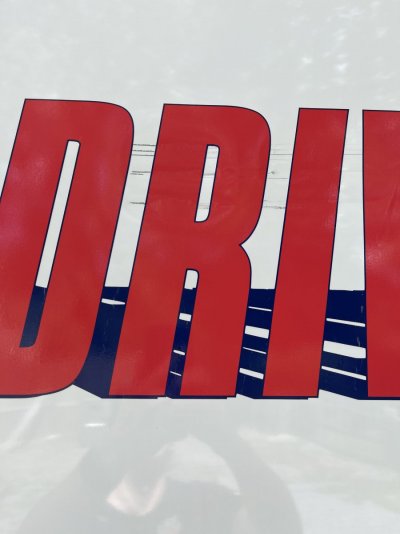
Apparently I’m not that talented at placing the part of decal where it would cover.
Apparently I’m not that talented at placing the part of decal where it would cover.
Attachments
Your safe it wont be coming this weekend. bunch of my friends have Montana street legal kits on their sidxsides, but I don't get it... They are awful on the road. You put a load on the front corner going into a corner hard its like you have marshmellows for dampeners, rightfully so that's what they are intended for. We need to come up with an Anti-Dive set up... I can jack one from work off the car and we can start connecting wires and see what happens ;-)I hear ya loud and clear. Aye Aye, sir.
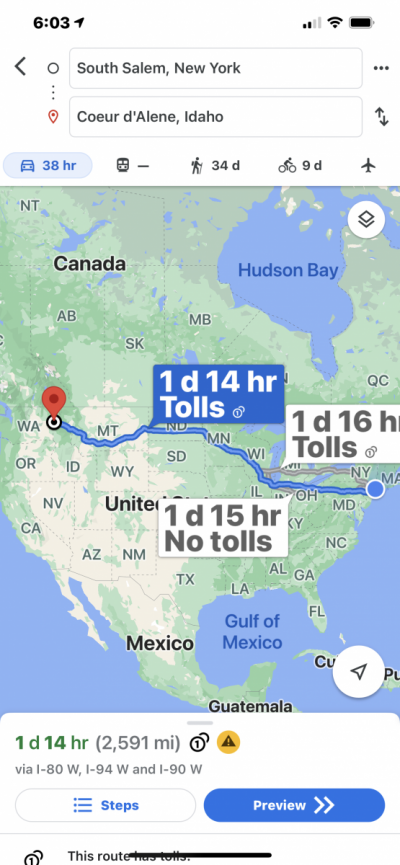
my luck. It will come this weekend when I’m tooling offroad in Nh, first in my Raptor while my CanAm X3 is serviced and registered up there, north of Gorham, NH, or it will arrive after 9/13 when we traverse this GREAT Country of ours, pulling my trailer with the X3 all the way to Couer d’Alene, Idaho to Mac Custom Tie Down where they will install tracks in my trailer while Corbin Customworks nearby installs a street legal kit on the UTV. Then time to ride.
Nope, one of us is confused and at my age probably me. When I say street legal kit on X3 I merely mean signal lights, a horn, and maybe a lighted rear plate holder though I won’t have a plate, only a sticker registration from NH.Your safe it wont be coming this weekend. bunch of my friends have Montana street legal kits on their sidxsides, but I don't get it... They are awful on the road. You put a load on the front corner going into a corner hard its like you have marshmellows for dampeners, rightfully so that's what they are intended for. We need to come up with an Anti-Dive set up... I can jack one from work off the car and we can start connecting wires and see what happens ;-)
people down here
people drive them on the streets like it's their car. they register it in Montana with an LLC and they get a tag... Can't you do the same thing in Vermont?Nope, one of us is confused and at my age probably me. When I say street legal kit on X3 I merely mean signal lights, a horn, and maybe a lighted rear plate holder though I won’t have a plate, only a sticker registration from NH.
ok ok not bad.....at a quick glance you probably cant even tell
- Joined
- Dec 16, 2016
- Posts
- 18,109
- Reaction score
- 28,353
meh. not enough bling.
- Joined
- Dec 16, 2016
- Posts
- 18,109
- Reaction score
- 28,353
C/F hood vent installed:
Some notes. By my estimate, this is a 3 pint job, maybe 4.
First things first, I’m going to shamelessly echo ‘Snag’s instruction video link here: https://www.icloud.com/iclouddrive/0fAZXPoI8CmgCkoxhN8-NTQRA#CF_Install
starting around IMG_4383, there are helpful videos, in short sections.
Using this instruction set, I first removed the hood insulation, exposing the under side of the hood, 5x 10mm nuts. There are supposed to be 6, my truck had 5. I rummaged and found a replacement. I found these were basically hand tight. Caution warranted here: It’s easy to dump one of these nuts into the hood to never be seen again, but heard until you get rid of the truck. I had to fish the first one out with a grab all. You’ve been warned.
Next, you remove the push connectors. You need to compress the sides, push forward until they’re ‘free’.

If you’re a little over exuberant, you’d better pick up some spares first. Some of these are a real reach, no matter where you are. I had a ladder and used the new light bar I installed last month, both front tires and at one point I was kneeling in front of the lifted hood in the engine bay. I managed to mess up one side of one of these connectors, but it appeared salvageable so I pressed forward. After fighting these stinkers, finish off your first pint.

Raptors are made to get dirty.
Note the adhesive strip on the rear; double sided tape. You will need some, I picked mine up at O’Reilly. Once all the nuts and plastic connectors are ‘free’, you lower the hood and begin prying with your body removal tools. You may be tempted to improvise, maybe use a large flat head screw driver.
DON’T.
While the louver is only held in place by these plastic fittings, I can promise you that you will absolutely F*ck up your paint with the wrong tool. I got an entire body panel removal kit for like 25 bucks. I’ve used it at least a dozen times on the Raptor. Don’t screw up your 60k+ dollar truck paint job with an improper tool. When you get to the part where you lift up on the front of the stock louver and it is supposed to just pop out like the video, pause, and make sure your rear bolts are clear. I broke one of the bolt mounts off the stock piece, it looks like it’s just spot glued ! get those bolts free by using the body panel tools, then lift and pop off that double sided tape.
Pro-tip: have a secure hold on that vent when you pop that double sided tape loose !
You should be about midway through pint #2 here.
At this point, I can foresee trouble coming. The carbon piece is not only lighter, it’s much thinner. The above connectors are very, very, very loose in the carbon piece. Some of them simply slide in the slots to hold them and fall right back out.
Now, I don’t know how things go in your garage. I suspect a far sight more smooth than mine, but when I do things like this, the little connectors disappear into the engine bay, never to be found again. Looking at my magic 8 ball app for a few minutes I determined what would likely happen and stopped. Few things can’t be fixed with Gorilla Tape, so I tore several thin strips of G/T, and lined each push pin mount. This dramatically improved the top to bottom play and kept the pins securely in place. They can still be removed, the tape merely makes up thickness the carbon lacks.

Contrary to the ‘Snag video, none of my bolts mounted and stayed in the carbon slots. All of them would fall out. I again used small Gorilla tape strips to hold the bolts in place. Now all the connectors are on the new vent and it’s time to pop the cap on the 3rd pint.
I did not polish off the old 2x side tape, but I did even it out, taping it down to the truck side first, then removing the top side of the tape.
Line up the bolt holes and push pins and gently click the new hood vent into place. Pause. Admire handiwork, consume more of pint 3, but not all.

I then went at the bolts first. Since I was missing one and they were only hand tight, I added blue loctite to the nuts and reinstalled. reinstall the hood insulation, close the hood and invite friends over to drool over your carbon fiber bits. Finish out the 3rd pint.

Apologies for my nephew’s peasant car getting in the way here.
Some notes. By my estimate, this is a 3 pint job, maybe 4.
First things first, I’m going to shamelessly echo ‘Snag’s instruction video link here: https://www.icloud.com/iclouddrive/0fAZXPoI8CmgCkoxhN8-NTQRA#CF_Install
starting around IMG_4383, there are helpful videos, in short sections.
Using this instruction set, I first removed the hood insulation, exposing the under side of the hood, 5x 10mm nuts. There are supposed to be 6, my truck had 5. I rummaged and found a replacement. I found these were basically hand tight. Caution warranted here: It’s easy to dump one of these nuts into the hood to never be seen again, but heard until you get rid of the truck. I had to fish the first one out with a grab all. You’ve been warned.
Next, you remove the push connectors. You need to compress the sides, push forward until they’re ‘free’.

If you’re a little over exuberant, you’d better pick up some spares first. Some of these are a real reach, no matter where you are. I had a ladder and used the new light bar I installed last month, both front tires and at one point I was kneeling in front of the lifted hood in the engine bay. I managed to mess up one side of one of these connectors, but it appeared salvageable so I pressed forward. After fighting these stinkers, finish off your first pint.

Raptors are made to get dirty.
Note the adhesive strip on the rear; double sided tape. You will need some, I picked mine up at O’Reilly. Once all the nuts and plastic connectors are ‘free’, you lower the hood and begin prying with your body removal tools. You may be tempted to improvise, maybe use a large flat head screw driver.
DON’T.
While the louver is only held in place by these plastic fittings, I can promise you that you will absolutely F*ck up your paint with the wrong tool. I got an entire body panel removal kit for like 25 bucks. I’ve used it at least a dozen times on the Raptor. Don’t screw up your 60k+ dollar truck paint job with an improper tool. When you get to the part where you lift up on the front of the stock louver and it is supposed to just pop out like the video, pause, and make sure your rear bolts are clear. I broke one of the bolt mounts off the stock piece, it looks like it’s just spot glued ! get those bolts free by using the body panel tools, then lift and pop off that double sided tape.
Pro-tip: have a secure hold on that vent when you pop that double sided tape loose !
You should be about midway through pint #2 here.
At this point, I can foresee trouble coming. The carbon piece is not only lighter, it’s much thinner. The above connectors are very, very, very loose in the carbon piece. Some of them simply slide in the slots to hold them and fall right back out.
Now, I don’t know how things go in your garage. I suspect a far sight more smooth than mine, but when I do things like this, the little connectors disappear into the engine bay, never to be found again. Looking at my magic 8 ball app for a few minutes I determined what would likely happen and stopped. Few things can’t be fixed with Gorilla Tape, so I tore several thin strips of G/T, and lined each push pin mount. This dramatically improved the top to bottom play and kept the pins securely in place. They can still be removed, the tape merely makes up thickness the carbon lacks.

Contrary to the ‘Snag video, none of my bolts mounted and stayed in the carbon slots. All of them would fall out. I again used small Gorilla tape strips to hold the bolts in place. Now all the connectors are on the new vent and it’s time to pop the cap on the 3rd pint.
I did not polish off the old 2x side tape, but I did even it out, taping it down to the truck side first, then removing the top side of the tape.
Line up the bolt holes and push pins and gently click the new hood vent into place. Pause. Admire handiwork, consume more of pint 3, but not all.

I then went at the bolts first. Since I was missing one and they were only hand tight, I added blue loctite to the nuts and reinstalled. reinstall the hood insulation, close the hood and invite friends over to drool over your carbon fiber bits. Finish out the 3rd pint.

Apologies for my nephew’s peasant car getting in the way here.
Similar threads
- Replies
- 1
- Views
- 489
- Replies
- 21
- Views
- 6K
- Replies
- 1
- Views
- 863
Members online
- ChrisP1
- Cory s
- Former FatBoy
- mcastle4
- Rob O
- colticus
- One_Blue_Raptor
- taquitos
- CoolrainRaptor
- OGSJ_Raptor
- Bozz
- MEIRONMAN207
- Shane361
- jwineco5
- scg149
- MasonF
- Drivin2Fst
- RAPTOR9one6
- elpechedepeche
- Roush2568
- FGHT ON
- HORN HIGH ACES
- aFallenTree
- 10SpdsOfFury
- KAJRIP
- ToadSmasher2K1
- StuartR
- iwish97
- vintagemario88
- Evasive
- dj30417
- John813
- 8AV8
- kocher93
- GordoJay
- Khoifish
- MOT26
- jAKe47
- Torn11
- matrix243
- Sozzy12
- pastorwug
- Dinoman
- chivpar
- SuplexTreatment
- brettmess24
- Daneger
- Idaho
- stevengreene310
- Reaper308
Total: 2,766 (members: 101, guests: 2,665)


