

GP@PPG
Member
- Joined
- Sep 13, 2012
- Posts
- 44
- Reaction score
- 6
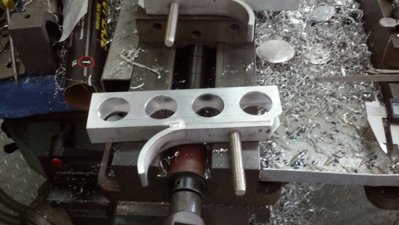
1st pic
I was so inspired by the recent jack mounts a guy that posts here made recently and glad he shared his photos of it! I had my jack for 4-5 years wrapped in rubber just tied down in my old truck. Still like new though. So I started with pieces of 6061 laying aroud the shop and started what I MEANT to be quick and simple into a 4 hour job nearly! You can see I used some rectangular tube stock and meaty flat stock for the support.
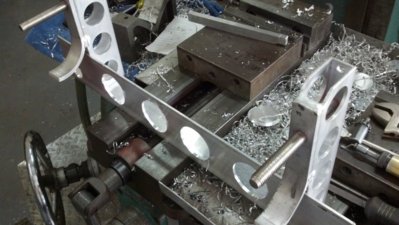
2nd pic
Here we are sizing up exactly where I need to cut the nice rubber/plastic slip-on holders. We want enough to silence the pieces, and keep them in place.
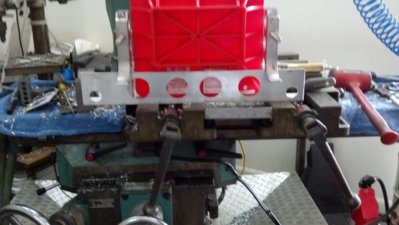
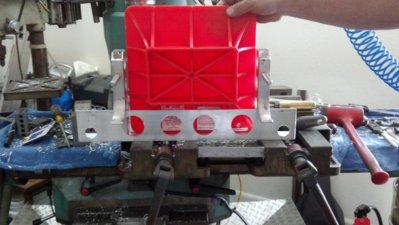
3rd pic
Now making a place for the large foot of the jack. It tucks in nice and tight behind the light weight yet uber strong new bracket.
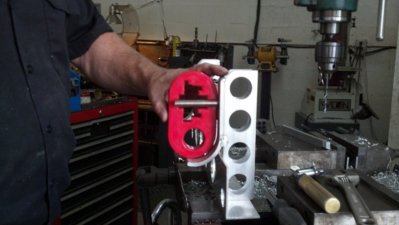
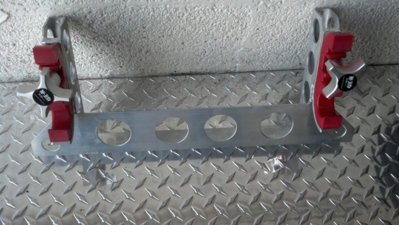
4th pic
Well there you have it. Kinda grimmy. Time to clean it up and mount it.
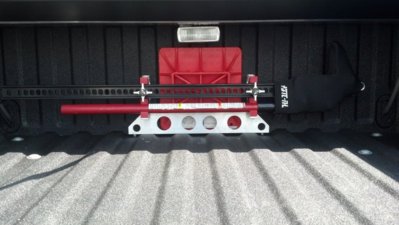
5th pic
There it is all installed. I used riv-nuts for the female threads and a couple of spacers under where the bed strakes are so it tightens down nice tight and flat.
I also used those nifty Hi Lift knobs on the studs to hold the jack in place used their neoprene boot to keep it clean and help with no rattles. I placed it there due to the "dead area" under the RollnLock. Didn't give much thought to access when the bed is filled with stuff! LOL! TOO Late now. It was more work than I planned but it came out pretty good and it's as quiet as a mouse!
I was so inspired by the recent jack mounts a guy that posts here made recently and glad he shared his photos of it! I had my jack for 4-5 years wrapped in rubber just tied down in my old truck. Still like new though. So I started with pieces of 6061 laying aroud the shop and started what I MEANT to be quick and simple into a 4 hour job nearly! You can see I used some rectangular tube stock and meaty flat stock for the support.
2nd pic
Here we are sizing up exactly where I need to cut the nice rubber/plastic slip-on holders. We want enough to silence the pieces, and keep them in place.
3rd pic
Now making a place for the large foot of the jack. It tucks in nice and tight behind the light weight yet uber strong new bracket.
4th pic
Well there you have it. Kinda grimmy. Time to clean it up and mount it.
5th pic
There it is all installed. I used riv-nuts for the female threads and a couple of spacers under where the bed strakes are so it tightens down nice tight and flat.
I also used those nifty Hi Lift knobs on the studs to hold the jack in place used their neoprene boot to keep it clean and help with no rattles. I placed it there due to the "dead area" under the RollnLock. Didn't give much thought to access when the bed is filled with stuff! LOL! TOO Late now. It was more work than I planned but it came out pretty good and it's as quiet as a mouse!
Attachments
Last edited:
