Baja Designs: General Discussion Thread - GEN 2

Disclaimer: Links on this page pointing to Amazon, eBay and other sites may include affiliate code. If you click them and make a purchase, we may earn a small commission.

raptor36

Full Access Member
Joined
Jan 3, 2016
Posts
495
Reaction score
173
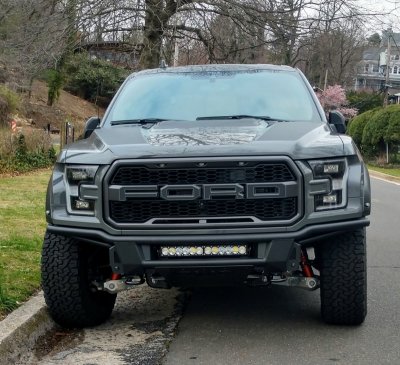
The light bar in my bumper is an ONX6+ by BD.

Good choice! I have a 20” ONX+ mounted low in my bumper also. Initially I opted for the combo. I switched that lens to all wide cornering. I recommend you do the same. Game changer. Especially if your XL80’s are all spot. Thank me later :)


Sent from my iPhone using Tapatalk
 

tom wansor

Full Access Member
Joined
Nov 13, 2019
Posts
272
Reaction score
135
Location
new york
Good choice! I have a 20” ONX+ mounted low in my bumper also. Initially I opted for the combo. I switched that lens to all wide cornering. I recommend you do the same. Game changer. Especially if your XL80’s are all spot. Thank me later :)


Sent from my iPhone using Tapatalk
Is it just a simple bolt on replacement?
 

raptor36

Full Access Member
Joined
Jan 3, 2016
Posts
495
Reaction score
173
Is it just a simple bolt on replacement?
BD products have a feature called “U service.” It allows you to easily switch out the polycarbonate lens on your light. I recommend buying a quality Allen wrench that isn’t rounded off. The screws are some what soft and and I have come close to stripping a few. Screws can be easily replaced if they see wear but it’s a hassle I would rather avoid. God speed :)


Sent from my iPhone using Tapatalk
 

4x4TruckLEDs.com

Supporting Vendor
Supporting Vendor
Joined
Jul 18, 2017
Posts
2,977
Reaction score
1,391
Shout out to 4x4TruckLEDS.com for the killer deal on a pair of XL80s and SDHQ a-pillar mounts! Great addition to the set up! The free T-shirt and sweet treats in the box were a nice touch!
Sent from my iPhone using Tapatalk

Glad to help and thanks for the business!


Thanks to Adam at 4x4TruckLEDS.com for the bumper and 20 inch ONX+ BD. Excellent customer service.
View attachment 140612

Looks great. Glad you finally got everything installed. And course, thanks as well for the business and support.
 
OP
OP
Baja Designs

Baja Designs

Supporting Vendor
Supporting Vendor
Joined
Apr 12, 2012
Posts
1,779
Reaction score
1,257
For those Raptor owners, that own a Polaris RZR! Here's a new product drop. :)

NEW PRODUCT ANNOUNCEMENT

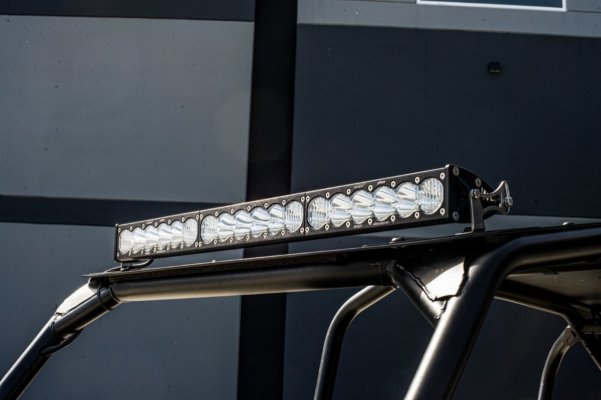
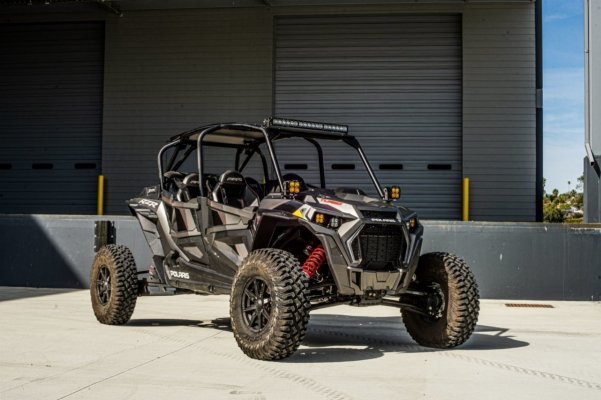
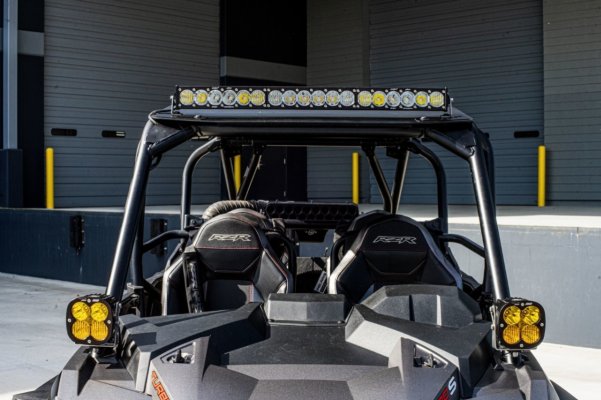
Polaris RZR Turbo/S 16+, XP1000 14+, XP900 15+, 30” Roof Mount Kits

Introducing a clean and simple bolt on solution for the Polaris RZR Turbo S (18-On), Turbo (16-On), RZR XP 1000 (14-On), and RZR XP 900 (15-On). Our standard light bar brackets line up perfectly to the Turbo S OEM roof mounting locations, so this will be a big seller based on the user-friendly installation and price point. This kit comes plug and play with all the necessary hardware components, wiring harnesses and light bar. For the S8 option, we will be including a Polaris RZR specific add-on wiring adapter that will enable users to activate the amber backlit LEDs with a keyed power source. Service technicians and DIY customers alike can breathe a sigh of relief with this race ready light bar setup.

Configurations:
44-7181 | Polaris RZR Turbo/S 16+, XP1000 14+, XP900 15+, 30" S8 Kit, Retail: $919.95
44-7182 | Polaris RZR Turbo/S 16+, XP1000 14+, XP900 15+, 30" OnX6+ Kit, Retail: $1,149.95


hr1-jpg.jpg

hr2-jpg.jpg

hr3-jpg.jpg
 

slowyellow

Active Member
Joined
Apr 8, 2020
Posts
75
Reaction score
19
Location
Norfolk, VA
I just installed the sportsman kit and for the life of me I can’t find a post that talks about aiming all of the lights. I’ve seen a lot about height, but very little as far as how close together to aim them when shooting on a wall. And help would be much appreciated!
 

4x4TruckLEDs.com

Supporting Vendor
Supporting Vendor
Joined
Jul 18, 2017
Posts
2,977
Reaction score
1,391
Found the thread: https://www.fordraptorforum.com/threads/properly-aiming-my-new-fogs.75066/

Here are my comments from that thread:

What we do at the shop that works well is..

-Park the truck about 20-25' from a solid wall (try and do this on level ground)
-Turn your headlights on and now take some painters tape, and put a piece of tape on the bottom most part of the low beams cut-off. Do this on each side, and put the tape in the center of the output (you only need about a 2" piece of take or so)
-Turn your headlights off

-Wide Cornering: If you plan to use these on public roads, I like to make sure the light gets centered for each side (driver's side, centered [left and right] on driver's side low beam tape). Make the top of the wide cornering pattern right at or below the tape mark you made. This ensures you have full coverage from your wide cornering and then up to the low beams. IF you don't plan to use them on public roads, you can go a little higher if you want, but i like my wide cornering to cover the road in front of the truck

-Spots: Centered left to right, centered vertically (you may need to turn the headlights back on which makes this part easier to dial that spot pattern centered, maybe SLIGHTLY higher so that it goes upwards a tiny bit)

-Driving/Combo: Same as the spots actually. I try and keep the spot pattern dead center so that the wide cornering sits a little lower (you won't get the wide cornering portion of a driving/combo as low as a 100% wide cornering light).


That'll ensure everything works perfect.
 
Top