OrangeAddict
FRF Addict
Not quite sure where this goes but this seems like a logical place.
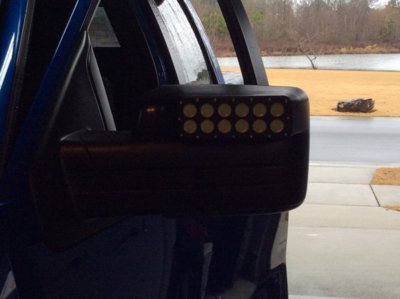
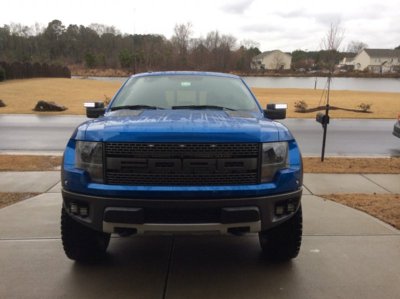
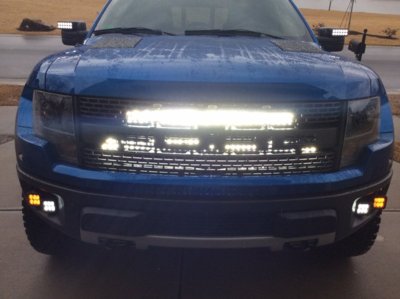
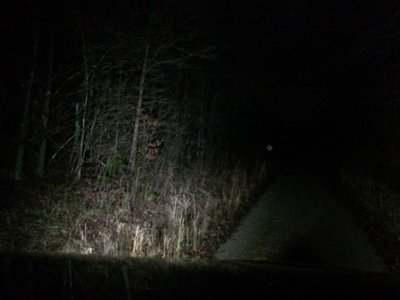
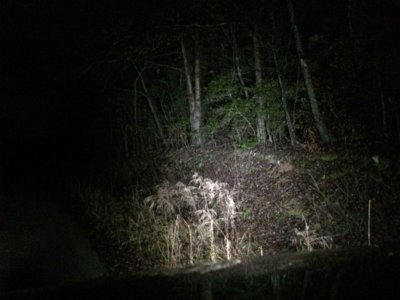
I purchased these ORACLE Ford F150 Raptor Off Road Mirrors Lights from Jason Lader at Lexmotorsports after seeing them listed on this forum after SEMA. Here is the install video that they have for these lights:
Ford F-150/ SVT Raptor Truck ORACLE LED Off-Road Mirror Installation DIY Video - YouTube
INSTALL:
The install video from these is a bit misleading since it does not seem to cover any of the wiring side. I would first like to thanks many threads on this forum and posts/youtube video's from users of the this forum. I have tried hard to take enough pictures of this.
1. Remove the Mirror from the mirror housing. Make sure you hold on to the mirror to make sure you don't drop it on the floor. The Video covers this part pretty good. Basically move the mirror all the way in and then take a thin flat head screwdriver and gently pry the mirror away to release it from the mirror housing.
2. Since you are going to have to run the wiring through the door I found it easier to remove the entire mirror housing to work on it on the bench. So to start the removal you must first remove the door panel. I took some of these steps from this post ->http://www.fordraptorforum.com/f11/...ers-rear-facing-puddle-lights-6658/#post99666
3. Disconnect the mirror wiring harness.
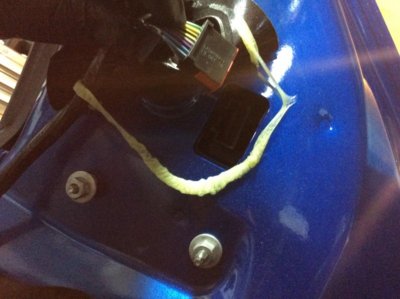
4. remove the 3 nuts that hold the mirror and remove the mirror housing.
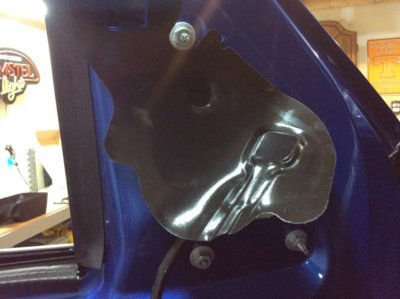
5. Remove the 4 T20 screws to separate the front from the back.
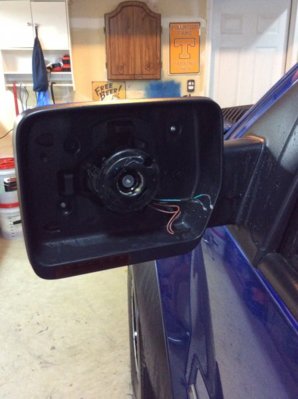
6. Separate the back part of the housing from the front. I found it easier if the mirror was folded in on itself.
7. No need in disconnecting the puddle light but you can if it makes it easier.
8. Press the 4 tabs on the body color panel and remove the body color panel.
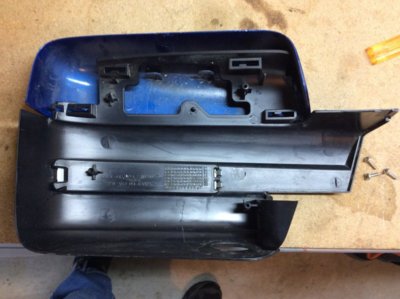
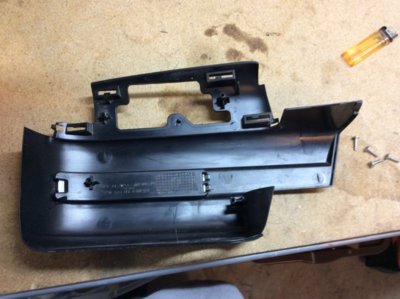
9. Route the wire in from the light via the big hole in the middle and attach the light panel with the 4 screws and washers supplied.
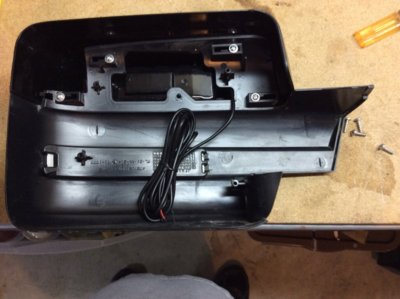
Front Look:
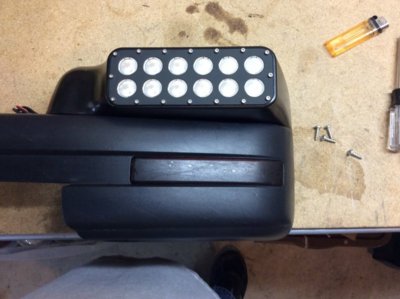
10. Turn the mirror housing upside down and use a flat head screwdriver to remove the bottom panel of the light to allow you to run the wiring.
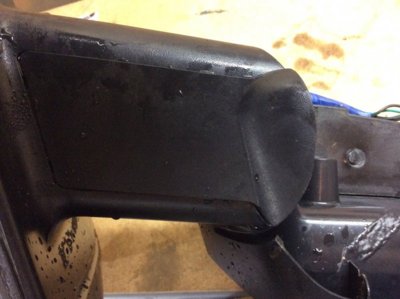
11. Remove the foam gasket that goes in between the mirror housing and the door.
12. Now run the wire for the light along side the stock mirror wiring through the center pivot point and out below the mirror wiring harness connector.
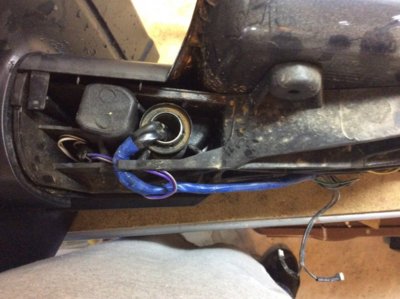
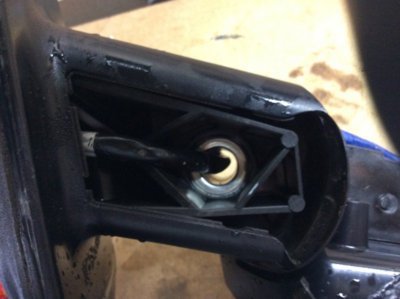
13. Replace the Front and Back pieces of the mirror. Press together to make sure everything fits together snug. and replace the 4 T20 screws.
14. Remove excess slack from the wiring through the normal wiring route.
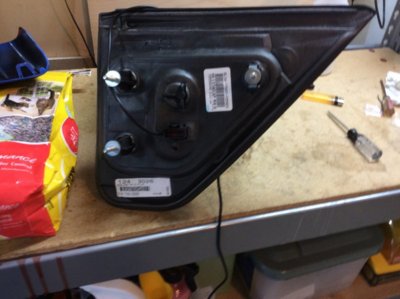
15. Replace the foam gasket on the mirror or housing routing the wire out just below the Mirror wiring harness location. (Pic 1 below)
16. Run wire through the hole that the Mirror wiring harness goes and replace the mirror housing. securing withe the 3 bolts.
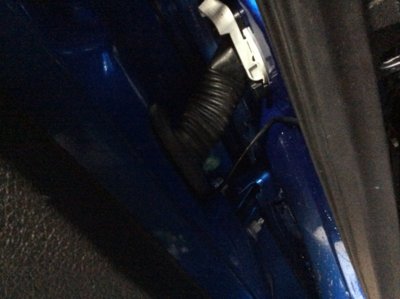
17. I chose to run my wire down behind the sound material and through a hole in the door and out beside the door wiring harness location. (Pics 2 below)
18. I bridged the gap between the door and the wiring behind the door seal. For those who think "I will just run it in side that gasket.", Don't do it If you do manage to disconnect the door from the farm there it is a hard plastic connection and you will likely screw up a plug.
19. Replace the Door panel reversing the steps described in step 2.
20. Repeat steps 1-19 for the other side.
21. I choose to run a wire for hot and ground from the drivers side over to the passenger side and join up with the hot and ground from the passenger side.
22. I also wired these lights up to outfitter 4. inside the cab. (Finally a reason for leaving the pass through wires disconnected from the factory.) :loll:
Continued in Post 2.
I purchased these ORACLE Ford F150 Raptor Off Road Mirrors Lights from Jason Lader at Lexmotorsports after seeing them listed on this forum after SEMA. Here is the install video that they have for these lights:
Ford F-150/ SVT Raptor Truck ORACLE LED Off-Road Mirror Installation DIY Video - YouTube
INSTALL:
The install video from these is a bit misleading since it does not seem to cover any of the wiring side. I would first like to thanks many threads on this forum and posts/youtube video's from users of the this forum. I have tried hard to take enough pictures of this.
1. Remove the Mirror from the mirror housing. Make sure you hold on to the mirror to make sure you don't drop it on the floor. The Video covers this part pretty good. Basically move the mirror all the way in and then take a thin flat head screwdriver and gently pry the mirror away to release it from the mirror housing.
2. Since you are going to have to run the wiring through the door I found it easier to remove the entire mirror housing to work on it on the bench. So to start the removal you must first remove the door panel. I took some of these steps from this post ->http://www.fordraptorforum.com/f11/...ers-rear-facing-puddle-lights-6658/#post99666
2a. Remove the 2 6mm screws at the Bottom of the panel.
2b. Remove the panel in the handle.
2c. Remove panel behind door latch.
2d. Remove the 2 8mm screws that where below the 2 panels.
2e. Lift and remove panel.
2f. You can just let the panel hang if you want. I removed it on the first side since I was un aware how I was going to run the wiring at first. On the second side I just let it hang.
3. Disconnect the mirror wiring harness.

4. remove the 3 nuts that hold the mirror and remove the mirror housing.

5. Remove the 4 T20 screws to separate the front from the back.

6. Separate the back part of the housing from the front. I found it easier if the mirror was folded in on itself.
7. No need in disconnecting the puddle light but you can if it makes it easier.
8. Press the 4 tabs on the body color panel and remove the body color panel.


9. Route the wire in from the light via the big hole in the middle and attach the light panel with the 4 screws and washers supplied.

Front Look:

10. Turn the mirror housing upside down and use a flat head screwdriver to remove the bottom panel of the light to allow you to run the wiring.

11. Remove the foam gasket that goes in between the mirror housing and the door.
12. Now run the wire for the light along side the stock mirror wiring through the center pivot point and out below the mirror wiring harness connector.


13. Replace the Front and Back pieces of the mirror. Press together to make sure everything fits together snug. and replace the 4 T20 screws.
14. Remove excess slack from the wiring through the normal wiring route.
15. Replace the foam gasket on the mirror or housing routing the wire out just below the Mirror wiring harness location. (Pic 1 below)
16. Run wire through the hole that the Mirror wiring harness goes and replace the mirror housing. securing withe the 3 bolts.
17. I chose to run my wire down behind the sound material and through a hole in the door and out beside the door wiring harness location. (Pics 2 below)
18. I bridged the gap between the door and the wiring behind the door seal. For those who think "I will just run it in side that gasket.", Don't do it If you do manage to disconnect the door from the farm there it is a hard plastic connection and you will likely screw up a plug.
19. Replace the Door panel reversing the steps described in step 2.
20. Repeat steps 1-19 for the other side.
21. I choose to run a wire for hot and ground from the drivers side over to the passenger side and join up with the hot and ground from the passenger side.
22. I also wired these lights up to outfitter 4. inside the cab. (Finally a reason for leaving the pass through wires disconnected from the factory.) :loll:
Continued in Post 2.
Last edited:


