image98
Active Member
LED lights
Thanks. The Rigid midnight series lights look great. My next posts may help you out.
---------- Post added at 07:54 AM ---------- Previous post was at 07:46 AM ----------
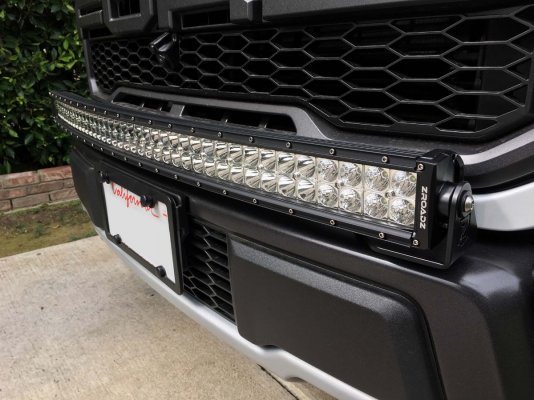
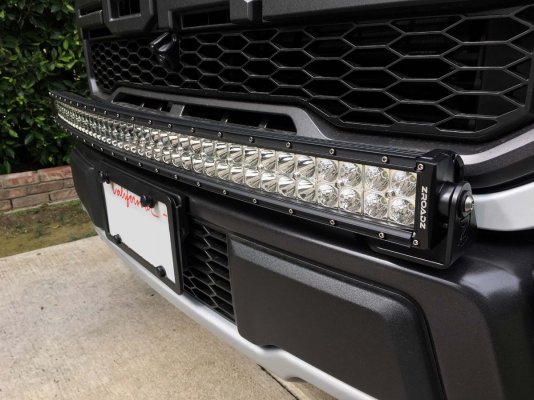
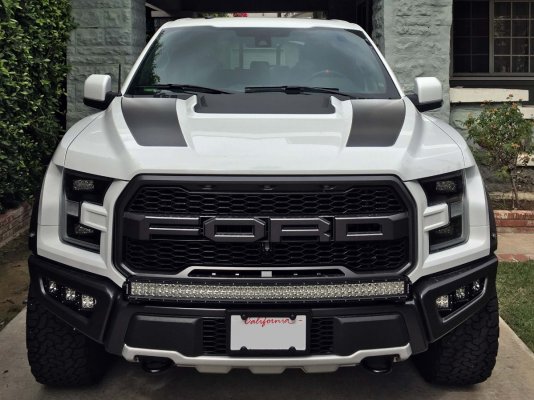
I installed a 40” curved light bar and six 3” pod lights on the front of my truck. The plan is to keep the stock bumper for now. Altogether, the install took about a day and I mixed a number of products from vendors. I love the aesthetic and functionality of this configuration.
My anticipated wiring breakdown.
AUX1 - Green(solid)/Blue(stripe) - EMPTY
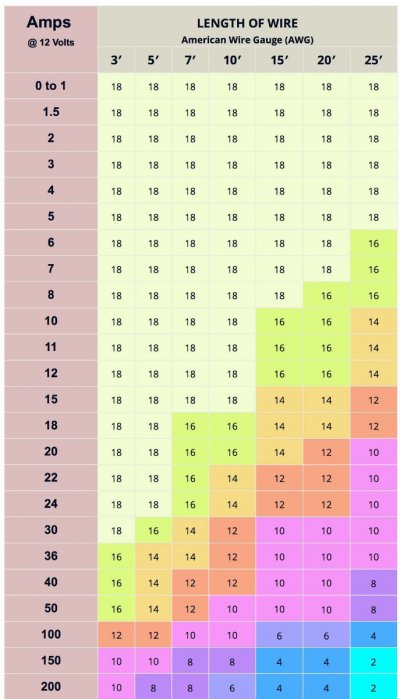
AUX2 - Gray/Yellow - 15A - 15A - FRONT 40” LED light bar with relay (20-25 amp) 10 AWG
AUX3 - Violet/Orange - 10A - 3” front quad flood spots (6.66 amps) 14 AWG
AUX4 - Brown/Blue - 10A - 6” wide pair reverse (7 amps) 14 AWG
AUX5 - Gray/Orange - 5A - 3” reverse pair spots (3.33 amps) 14 AWG
AUX6 - Yellow/Violet - 5A - 3” front pair spots (3.33 amps) 14 AWG
I did some research comparing different light bars and 3” LED light pods. It seems like a lot of the equipment on the market are identical products, but with different branding. I looked at cheaper lights on Ebay and then there’s RIGID. I decided to get my lights through Zroadz and use the majority of their mounts. I realize that there are a lot of great products out there.
| Search Results | ZROADZ
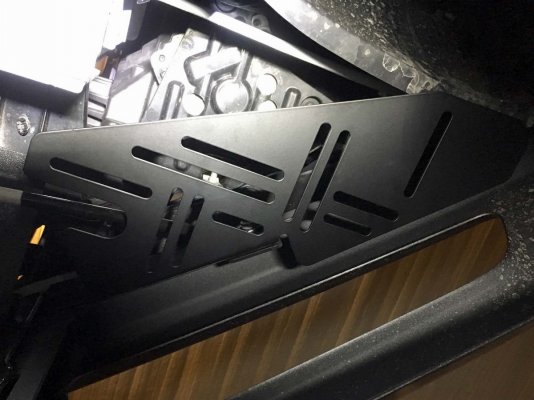
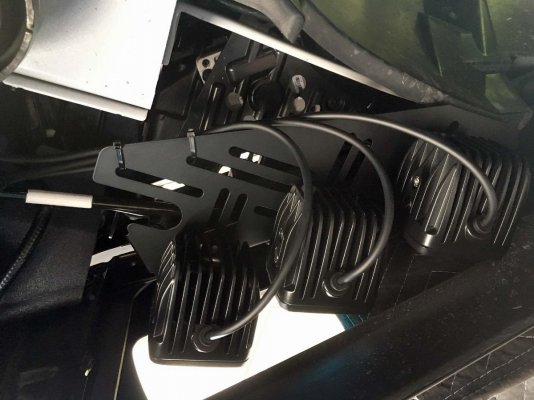
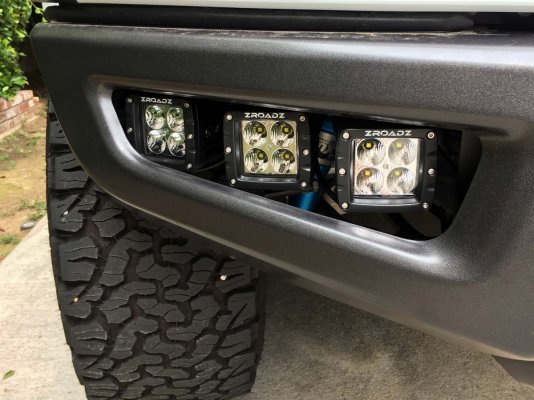
The Zroadz bracket places the 3” light pods in front of the bumper openings. I wanted to mount my lights behind the openings and went with the Raptor Diode Dynamics Fog Bucket Bracket Kit (DD-DD6003). The two center pods are wired to auxiliary #6. The four outer pods I directed for a super wide spread and are wired together to auxiliary #3.
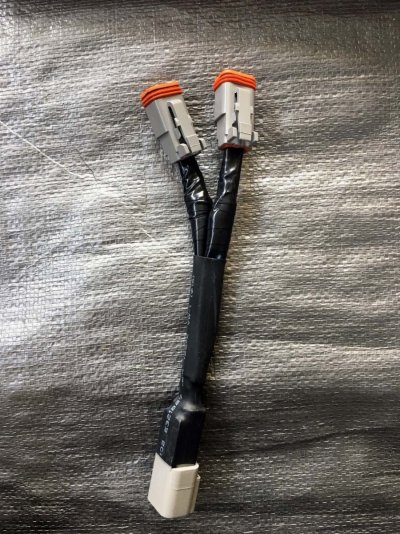
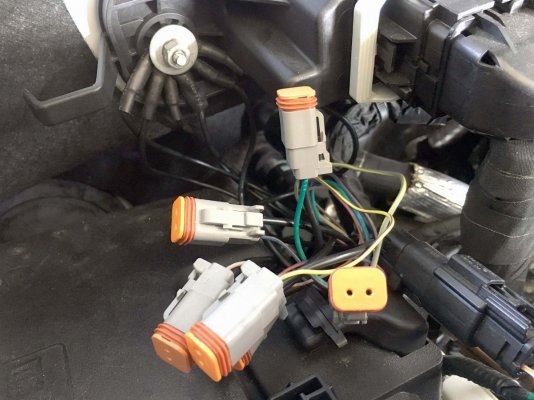
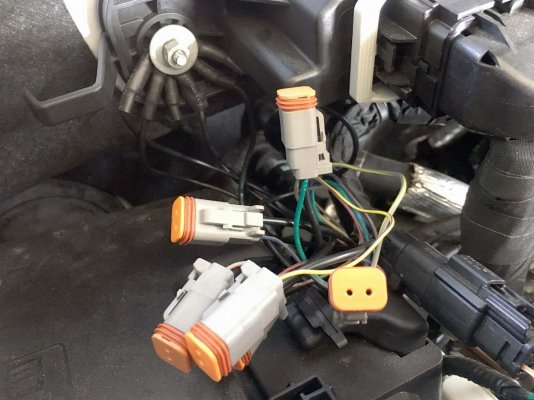
Custom made a couple of Y cables to wire up the four pods to one switch.
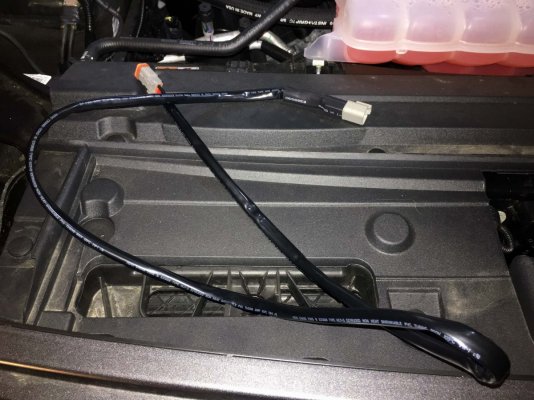
This cable runs up from under the radiator to the upfitter connectors adjacent to the battery.
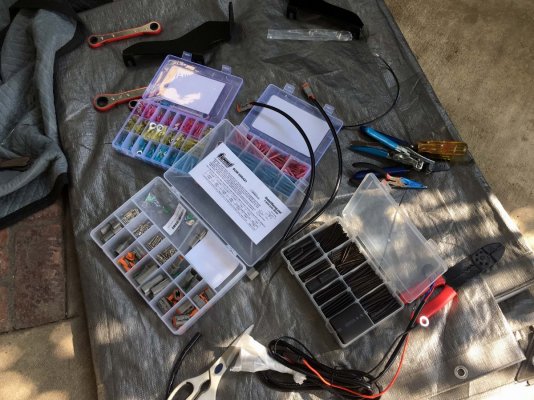
Each Zroad lighting kit comes with a generic relay wiring kit, which ultimately, I modified chopping out the relay, fuse, and switch. Obviously the Raptor already has fused upfitter switches and as long as you stay under the power requirements, a relay switch isn’t required. So I had my crimpers, wire strippers, heat shrink tubing, heat gun, butt connectors, and wire connector kit to assemble my own wiring.
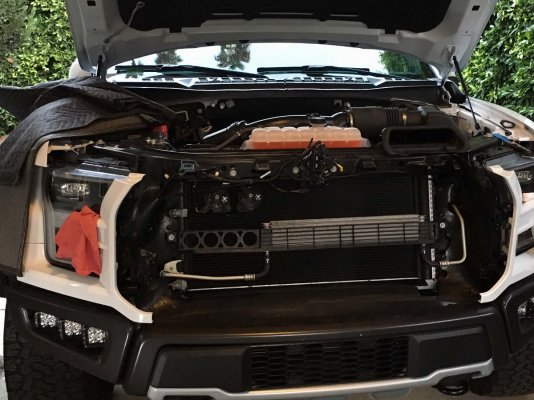
Installing the 40” light bar mounts required the removal of the grill and radiator shutters. The light bar is wired to auxiliary #2, but involves a relay with its own 30amp fuse since the draw exceeds the upfitter switches maximum 15 amps. The wiring for this circuit also required jumping from 14 AWG to 10 AWG wiring. It may be possible to simply bump the stock fuse to 20 amps, but I didn’t want to take the risk.
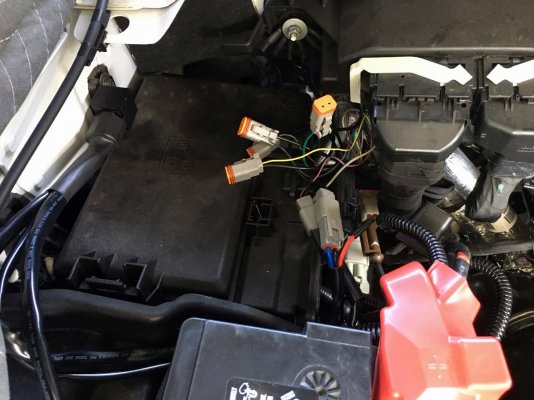
The relay switch for the light bar (240 watts) is mounted to the left. The wiring on the right isn’t finished, but you can see that the relay has a hot (with its own 30 amp fuse) which is wired directly to the battery. I sleeved and protected with taylor convoluted tubing. I eventually wrapped all connectors in heat shrink tubing.
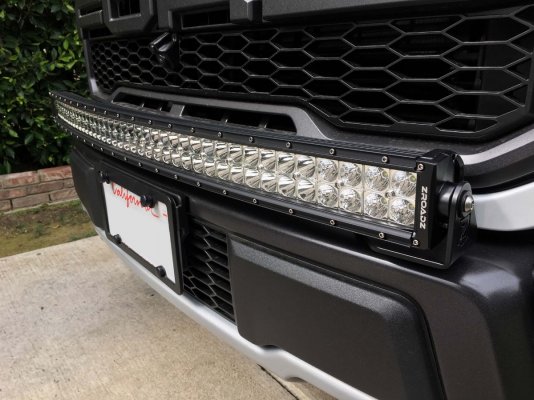
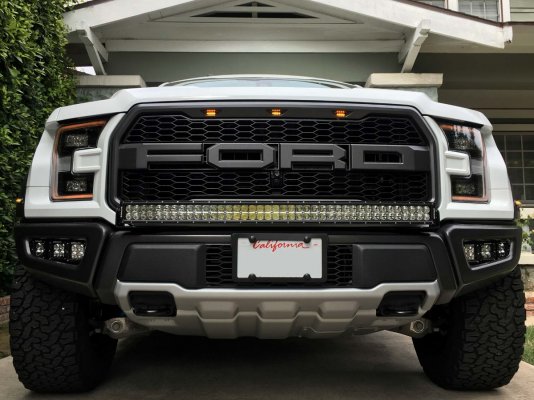
Each upfitter switch light targets a different area around the truck. Eventually I plan to install some lighting under the rear bumper, but that will be for another post. Thanks for reading!
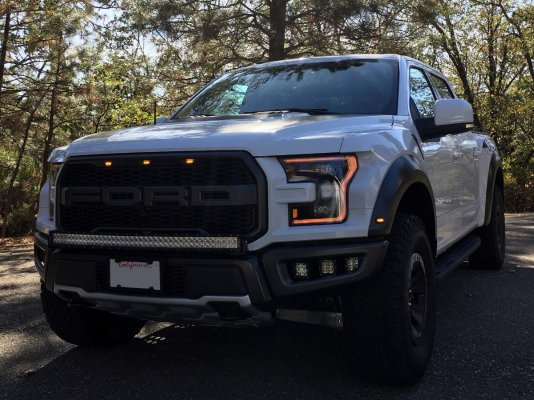
Nice I think I need your help lol you seem pretty handy.
Ordered a Rigid 40" midnight curved light bar for the front bumper and some of their midnight cubes for the fog pockets.
Where ats do you live? I am in Simi Valley. I am good with mounting etc but I have no clue about wiring etc and don't really want to pay a shop to do it.
Good job!
Thanks. The Rigid midnight series lights look great. My next posts may help you out.
---------- Post added at 07:54 AM ---------- Previous post was at 07:46 AM ----------
I installed a 40” curved light bar and six 3” pod lights on the front of my truck. The plan is to keep the stock bumper for now. Altogether, the install took about a day and I mixed a number of products from vendors. I love the aesthetic and functionality of this configuration.

My anticipated wiring breakdown.
AUX1 - Green(solid)/Blue(stripe) - EMPTY
AUX2 - Gray/Yellow - 15A - 15A - FRONT 40” LED light bar with relay (20-25 amp) 10 AWG
AUX3 - Violet/Orange - 10A - 3” front quad flood spots (6.66 amps) 14 AWG
AUX4 - Brown/Blue - 10A - 6” wide pair reverse (7 amps) 14 AWG
AUX5 - Gray/Orange - 5A - 3” reverse pair spots (3.33 amps) 14 AWG
AUX6 - Yellow/Violet - 5A - 3” front pair spots (3.33 amps) 14 AWG
I did some research comparing different light bars and 3” LED light pods. It seems like a lot of the equipment on the market are identical products, but with different branding. I looked at cheaper lights on Ebay and then there’s RIGID. I decided to get my lights through Zroadz and use the majority of their mounts. I realize that there are a lot of great products out there.
| Search Results | ZROADZ


The Zroadz bracket places the 3” light pods in front of the bumper openings. I wanted to mount my lights behind the openings and went with the Raptor Diode Dynamics Fog Bucket Bracket Kit (DD-DD6003). The two center pods are wired to auxiliary #6. The four outer pods I directed for a super wide spread and are wired together to auxiliary #3.


Custom made a couple of Y cables to wire up the four pods to one switch.

This cable runs up from under the radiator to the upfitter connectors adjacent to the battery.
Each Zroad lighting kit comes with a generic relay wiring kit, which ultimately, I modified chopping out the relay, fuse, and switch. Obviously the Raptor already has fused upfitter switches and as long as you stay under the power requirements, a relay switch isn’t required. So I had my crimpers, wire strippers, heat shrink tubing, heat gun, butt connectors, and wire connector kit to assemble my own wiring.

Installing the 40” light bar mounts required the removal of the grill and radiator shutters. The light bar is wired to auxiliary #2, but involves a relay with its own 30amp fuse since the draw exceeds the upfitter switches maximum 15 amps. The wiring for this circuit also required jumping from 14 AWG to 10 AWG wiring. It may be possible to simply bump the stock fuse to 20 amps, but I didn’t want to take the risk.

The relay switch for the light bar (240 watts) is mounted to the left. The wiring on the right isn’t finished, but you can see that the relay has a hot (with its own 30 amp fuse) which is wired directly to the battery. I sleeved and protected with taylor convoluted tubing. I eventually wrapped all connectors in heat shrink tubing.


Each upfitter switch light targets a different area around the truck. Eventually I plan to install some lighting under the rear bumper, but that will be for another post. Thanks for reading!


