Jamie Wise
Member
Myself and a couple of friends (both engineers) tackled the install this weekend. Even before purchasing the light bar, I found very little information on the web about it, so I thought I'd share my observations and also tips on the install, so that hopefully you guys can avoid some of the mistakes we made.
Firstly, I have to give a shout out to KC. Their Tech Support was awesome, and the instructions for the most part are clear.
Our biggest mistake came in drilling the holes for the brackets. Simply put, we messed up. Although we measured 3 times and only drilled once, it appears that one of the brackets was not flush against the roof when we measured, thus our holes were well off where they needed to be. I know it seems like a stupid mistake, and it is, but we thought the bracket was flat. With the way the roof and bracket curves, and where you need to line it up, we genuinely thought it was flush.
To fix this, we left the holes where they were, and simply reamed out the holes on the brackets a little more to allow the bracket to mount. Not a huge deal, but certainly took some time to drill it out and repaint.
Secondly. When you drill in to the roof, you're going to notice that it's not all metal. We encountered at least .25-.5" of what seemed like Fiberglass before we touched the sheet metal. When we put the rivnut in, I'm pretty sure it's latched against the Fiberglass, not the sheet metal. The fiberglass will also chip and crack around the Rivnut. This is my biggest concern. Although once we got the bar properly mounted, and preloaded, it feels rock solid, I have my concerns that it will hold up to severe use.
Mounting the bar to the brackets is no issue, but it's going to save you a lot of headache having multiple sets of hands, and will also lessen the chances of you dropping the bar on the hood or windshield.
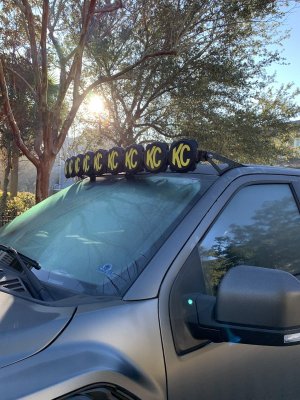
You absolutely need help when you try and preload the bar. One, (preferrably two) people need to pull the bar up and forward, while the other person gets the two rubber stops in to place on the top of the windshield. Done right, this should alleviate a lot of the stress of the brackets, and also stop a lot of movement. I've heard of people complaining that those rubber boots make horrible noises on the roofs, which doesn't surprise me, because they're meant to be mounted on the glass not the roof.
you can cut the wiring harness right at the relay and just use the hot and ground wires with the connector to the light. If you cut right at the relay, you'll have the perfect amount of wire needed.
We ran our wiring down the passengers side of the windshield between the glass and the pillar. We secured it with some black RTV silicone, and it seems to be holding well.
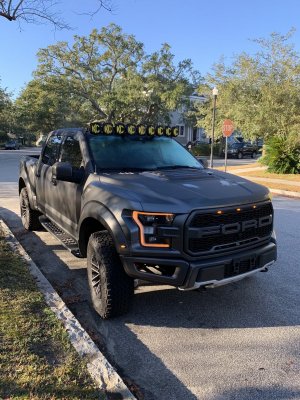
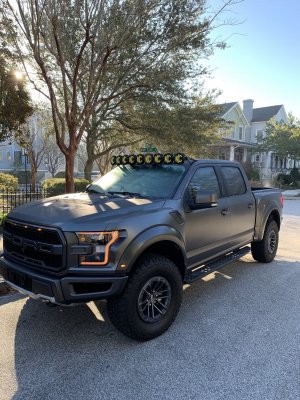
When it's all said and done, the light looks fantastic, and man it's bright too. I'm really happy with it.
After a hundred miles, I will retighten the bolts and then add silicone around the bolts and edges of the brackets to seal it up against any water.
I will keep this thread updated on how the mounts hold up. We were not expecting to encounter a softer material in the roof!


