Hey guys,
Not much info out on this one so thought I'd add some input. Overall not that bad and seems to be easier than the 2" lift version. Instructions are ok but there's not really pics.
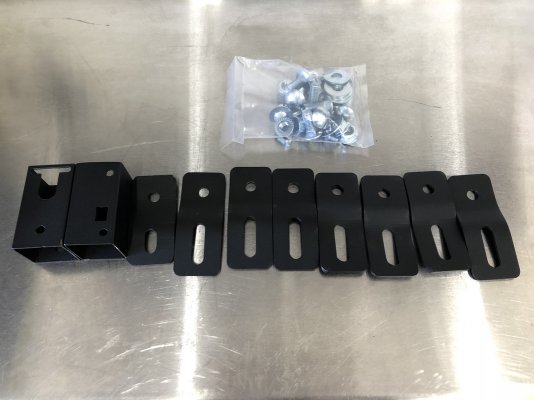
Here is the kit as it comes to you. 7 are the same and the shorty is for seatbelt. Put all studs in brackets before you start. They all orient the same which is hole towards the back and slot facing the windshield. Also these have a lil s bend in them. They all are the with slot raised towards the roof. So yes there is a 1/4-3/8 lift you get out if this kit too.
Start by unbolting the factory B&O sub. Easy 3 bolts. Next up there are 4 large body stubs with nuts behind the seat. Unbolt all 4. Next up there are 4 black bolts in front of the seat. You can't miss them. I didn't get a pic of that but go ahead and take them all out.
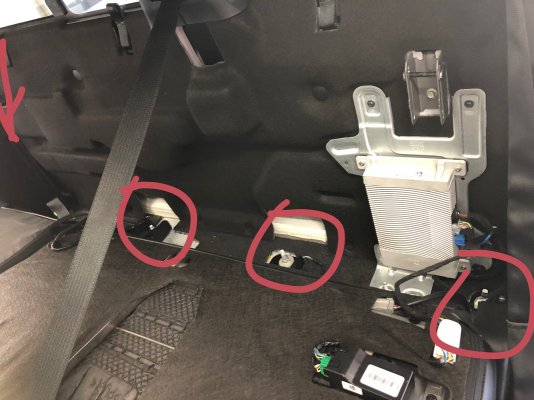
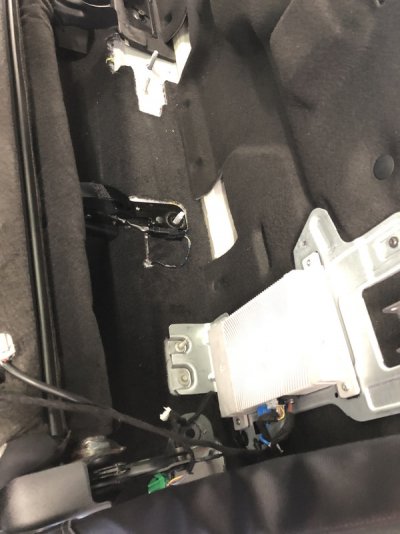
If you have a second person that'd help but not necessary, lift the whole seat up and over the rear studs and move the seat forward 2-3 inches. I did not remove the whole seats from the truck. Not necessary at all. If you have B&O, be careful of the wire attached to back of seat. The seat will want to roll forward a lot putting tension on that wire. I used a rolled up towel under the front middle of the seat to keep it rolled back and relieve some tension off that wire.
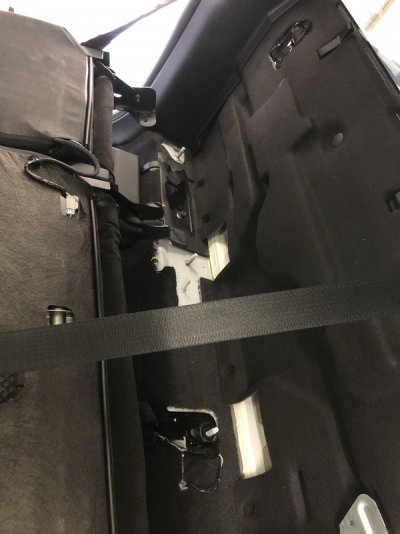
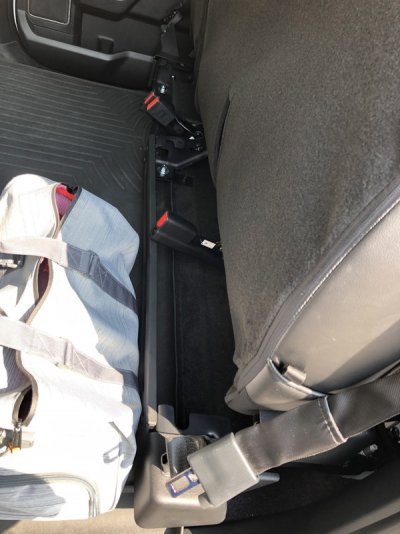
Next bolt down the rear relo backets. One of the tricky parts! On the driver back corner stud and passenger back corner stud you have to do extra work! So under the carpet is a wire, the bracket will smash that wire. On drivers side, I cut the carpet back to reveal a wire hold down tree. You want to cut a tab off that hold down tree and push the wire down the slope. Also cutting the carpet is no biggie, It's a small portion and gets covered up by the bracket anyway.
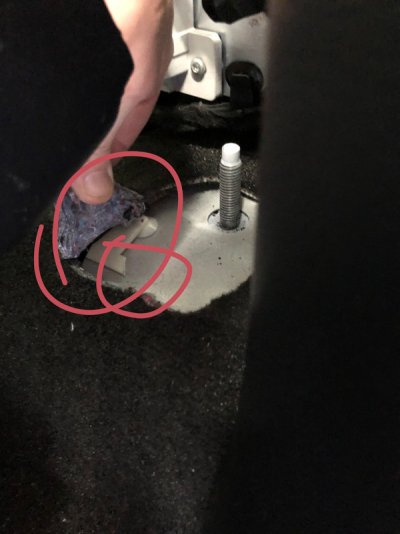
On passenger side you don't have to cut carpet but I pulled it back revealed the tree, cut circiled part off completely to allow the wire to move down the slope too.
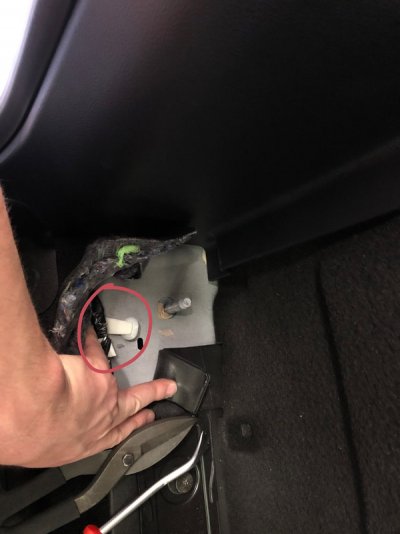
Pro tip: Drill this seatbelt mount out to a perfect 1/2 inch. You'll thank me later. After all that go ahead and torque them and don't leave loose. Orient them precisely straight ahead of factory studs.
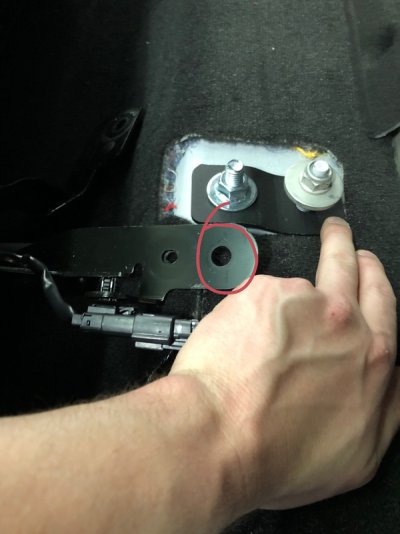
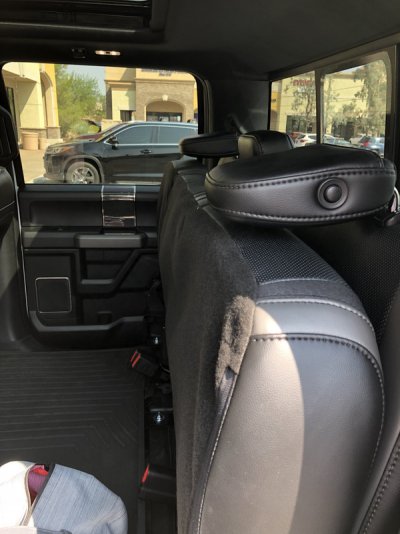
Next make sure and torque all front brackets. No drama with them. After remove all the nuts from the lmi studs, All studs shouldn't go anywhere because their basically touching the body. Lift seat up and over all the studs. Set down on studs and torque all 8 nuts down. Should look like this.
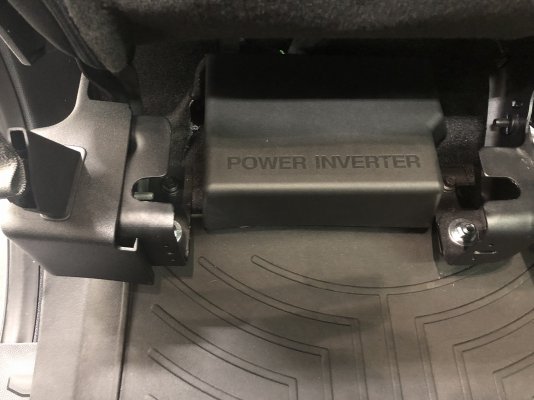
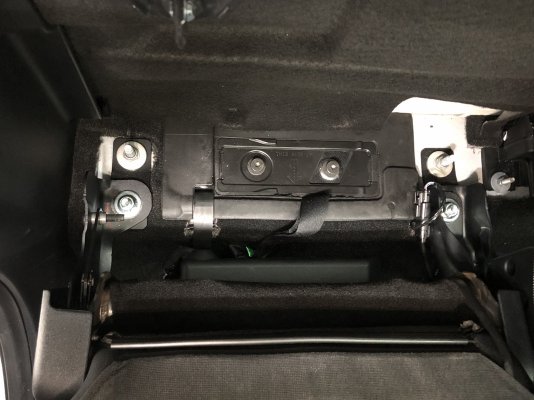
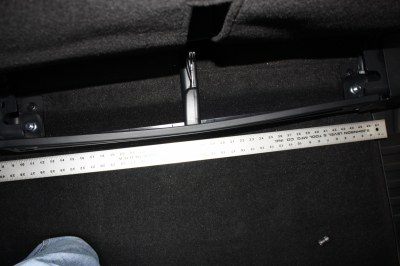
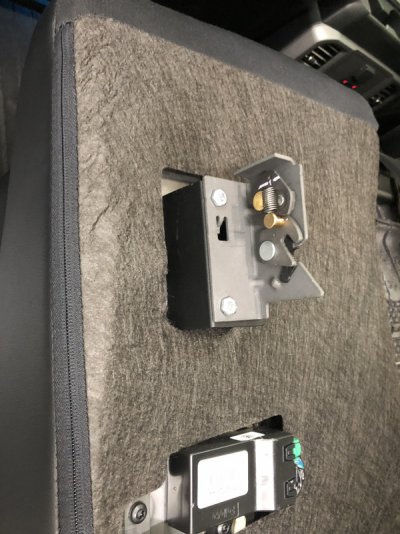
Last is the rear brackets. Yeah these are both like a Japanese puzzle. I'll let you figure out how to bolt down the drivers side but know that the driver mount bolts to back of seat and passenger mount bolts to rear wall. Good luck getting a torx bit in there and bolting it down. I used a bit from nut driver with a 1/4 wrench turning 2 faces at a time. Finished looks like this for driver.
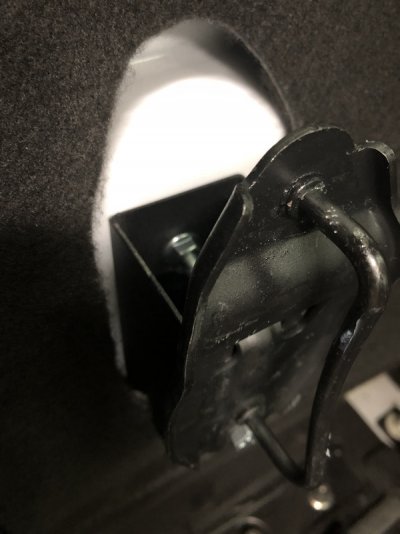
On passenger, there is a bolt with a welded on half moon shaped washer. It goes inside the rear wall with the threads facing the front windshield and washer side closest to tailgate. You have to hold it in there, put bracket through exposed threads, start nut onto threads then leave loose. Then take the factory bolt from the factory bracket off bracket (goodluck getting the safety washer off that btw and start the factory bolt in the factory threaded hole on rear wall. Yes the lmi bracket will secure to back wall with 2 bolts unlike factory using 1. Once their both started torque down the bottom bolt (factory one) first to allow the threads to come through on top to keep top stud from rotating.
Also I had to drill out the factory bracket hole one size larger to allow the slightly bigger lmi bolt to fit through. Once relo wall bracket is torqued, bolting the factory bracket to it is easy. Finished should look like this.
Then your all done! I am happy to report that the truck has no new squeaks or weird noises at all! Awesome!
Not much info out on this one so thought I'd add some input. Overall not that bad and seems to be easier than the 2" lift version. Instructions are ok but there's not really pics.
Here is the kit as it comes to you. 7 are the same and the shorty is for seatbelt. Put all studs in brackets before you start. They all orient the same which is hole towards the back and slot facing the windshield. Also these have a lil s bend in them. They all are the with slot raised towards the roof. So yes there is a 1/4-3/8 lift you get out if this kit too.

Start by unbolting the factory B&O sub. Easy 3 bolts. Next up there are 4 large body stubs with nuts behind the seat. Unbolt all 4. Next up there are 4 black bolts in front of the seat. You can't miss them. I didn't get a pic of that but go ahead and take them all out.


If you have a second person that'd help but not necessary, lift the whole seat up and over the rear studs and move the seat forward 2-3 inches. I did not remove the whole seats from the truck. Not necessary at all. If you have B&O, be careful of the wire attached to back of seat. The seat will want to roll forward a lot putting tension on that wire. I used a rolled up towel under the front middle of the seat to keep it rolled back and relieve some tension off that wire.

Next bolt down the rear relo backets. One of the tricky parts! On the driver back corner stud and passenger back corner stud you have to do extra work! So under the carpet is a wire, the bracket will smash that wire. On drivers side, I cut the carpet back to reveal a wire hold down tree. You want to cut a tab off that hold down tree and push the wire down the slope. Also cutting the carpet is no biggie, It's a small portion and gets covered up by the bracket anyway.

On passenger side you don't have to cut carpet but I pulled it back revealed the tree, cut circiled part off completely to allow the wire to move down the slope too.

Pro tip: Drill this seatbelt mount out to a perfect 1/2 inch. You'll thank me later. After all that go ahead and torque them and don't leave loose. Orient them precisely straight ahead of factory studs.

Next make sure and torque all front brackets. No drama with them. After remove all the nuts from the lmi studs, All studs shouldn't go anywhere because their basically touching the body. Lift seat up and over all the studs. Set down on studs and torque all 8 nuts down. Should look like this.


Last is the rear brackets. Yeah these are both like a Japanese puzzle. I'll let you figure out how to bolt down the drivers side but know that the driver mount bolts to back of seat and passenger mount bolts to rear wall. Good luck getting a torx bit in there and bolting it down. I used a bit from nut driver with a 1/4 wrench turning 2 faces at a time. Finished looks like this for driver.

On passenger, there is a bolt with a welded on half moon shaped washer. It goes inside the rear wall with the threads facing the front windshield and washer side closest to tailgate. You have to hold it in there, put bracket through exposed threads, start nut onto threads then leave loose. Then take the factory bolt from the factory bracket off bracket (goodluck getting the safety washer off that btw
Also I had to drill out the factory bracket hole one size larger to allow the slightly bigger lmi bolt to fit through. Once relo wall bracket is torqued, bolting the factory bracket to it is easy. Finished should look like this.

Then your all done! I am happy to report that the truck has no new squeaks or weird noises at all! Awesome!


