Foreman1967
Member
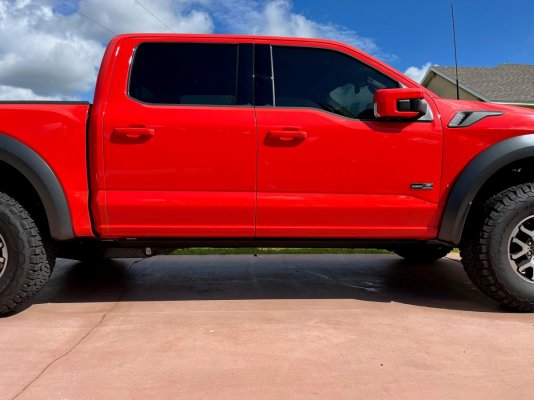
As the title says, this mod is pretty unpopular for Raptors based on their designed usage, but I never change a vehicle to suit every one else. So if like me you like having power side steps even on a Raptor, then here is a review and some install info for the Rough Country E Steps. I ordered them directly through Rough Country as that was the best price I could find with free shipping, with tax they were a little over $1k which I believe is the cheapest out there as far as brands go. These are dual motor on each side and support 300lbs I believe. It did also come with the switch to manually lower or raise them for cleaning etc.
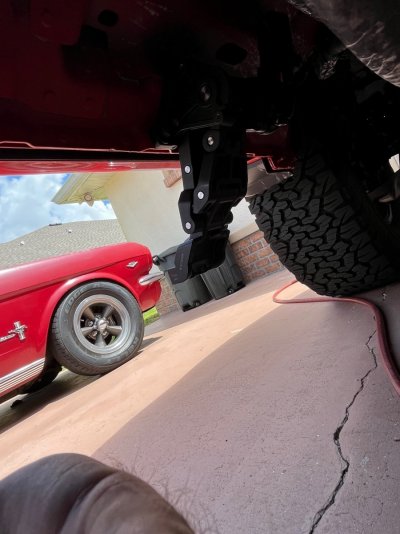
Brackets are heavy duty and have some weight to them - they bolt to the original studs in the rockers and come with hardware, I actually used the original nuts though as I liked them better. They
come with slotted 8 shims which I used on the bottom mounting points (1 per bolt) to level the steps to the ground
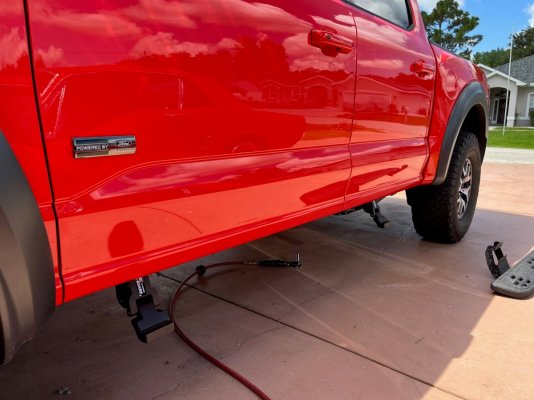
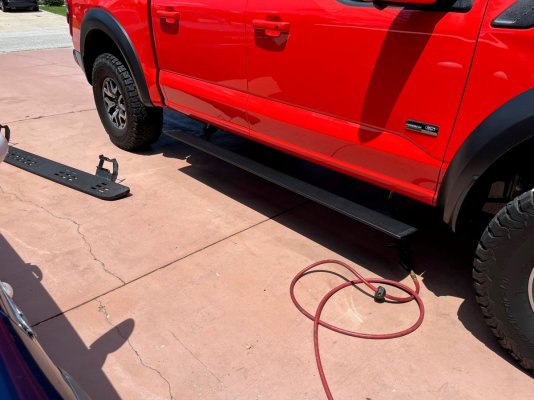
Here is a pic of the passenger side bolted in after final adjustments - the bolting surfaces are made to slide in a channel so you can start the bolts and then slide the steps to the positioning that you prefer - These look very much like the OEM Ford steps and are extruded aluminum with a built in texture. As you can see here they do lower a good bit more than the original steps
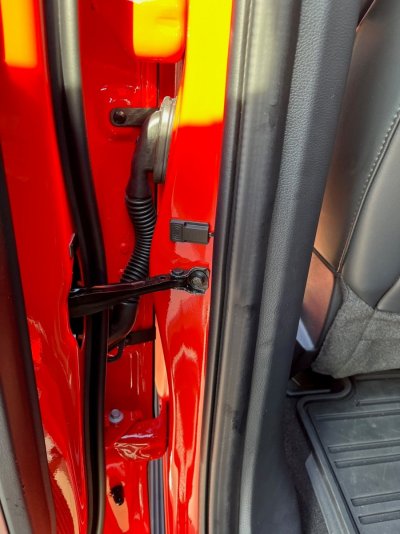
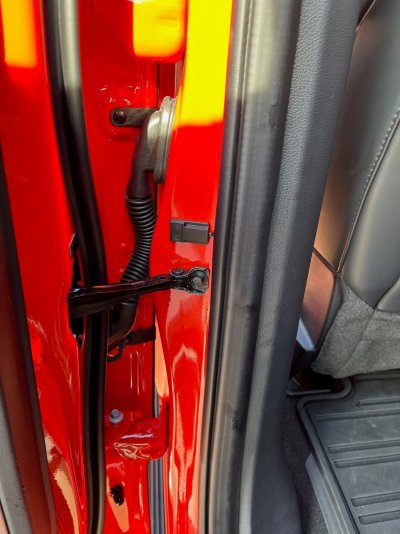
These are operated with magnet switches, one of the main reasons I went with them as I didn't want something plugged into my OBD port all of the time. They switches are linked together and designed to go on each side of the B Pillar. I made a modification here as I wanted them to be less noticeable than that and I cut and extended the wire linking them together (its a single wire) and I put the front switch on the A Pillar just above the detent rod and the rear one in the same spot on the B Pillar for the rear. The side effect of this was it made the magnets very easy to line up:
Prior to assembly
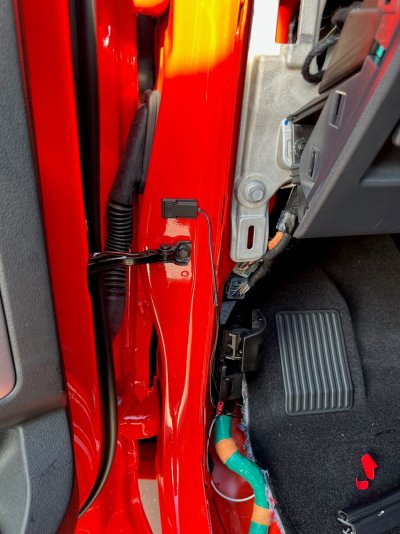
After assembly
The control module mounts on the passenger side to some extra rocker studs that are already present and attach with the supplied hardware, then you have 3 wires that go through the rubber grommet in the passenger floor - 2 of with go to the drivers side. You can snake those under the carpet and in front of the console very easily by removing the console side panels on each side, then you only need to connect the Black and Red to the battery - everything else has weather proof plugs. There is also LED lighting with the kit and I will add more pics later in the thread as you are limited to 5 pics
Brackets are heavy duty and have some weight to them - they bolt to the original studs in the rockers and come with hardware, I actually used the original nuts though as I liked them better. They
come with slotted 8 shims which I used on the bottom mounting points (1 per bolt) to level the steps to the ground


Here is a pic of the passenger side bolted in after final adjustments - the bolting surfaces are made to slide in a channel so you can start the bolts and then slide the steps to the positioning that you prefer - These look very much like the OEM Ford steps and are extruded aluminum with a built in texture. As you can see here they do lower a good bit more than the original steps

These are operated with magnet switches, one of the main reasons I went with them as I didn't want something plugged into my OBD port all of the time. They switches are linked together and designed to go on each side of the B Pillar. I made a modification here as I wanted them to be less noticeable than that and I cut and extended the wire linking them together (its a single wire) and I put the front switch on the A Pillar just above the detent rod and the rear one in the same spot on the B Pillar for the rear. The side effect of this was it made the magnets very easy to line up:
Prior to assembly

After assembly

The control module mounts on the passenger side to some extra rocker studs that are already present and attach with the supplied hardware, then you have 3 wires that go through the rubber grommet in the passenger floor - 2 of with go to the drivers side. You can snake those under the carpet and in front of the console very easily by removing the console side panels on each side, then you only need to connect the Black and Red to the battery - everything else has weather proof plugs. There is also LED lighting with the kit and I will add more pics later in the thread as you are limited to 5 pics


