Gen 3 Diamondback HD Hard Tonneau Cover

Disclaimer: Links on this page pointing to Amazon, eBay and other sites may include affiliate code. If you click them and make a purchase, we may earn a small commission.

RickRed

Full Access Member
Joined
Jul 24, 2021
Posts
114
Reaction score
168
Location
USA
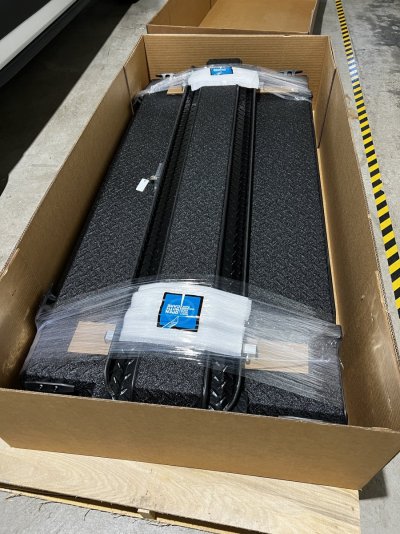
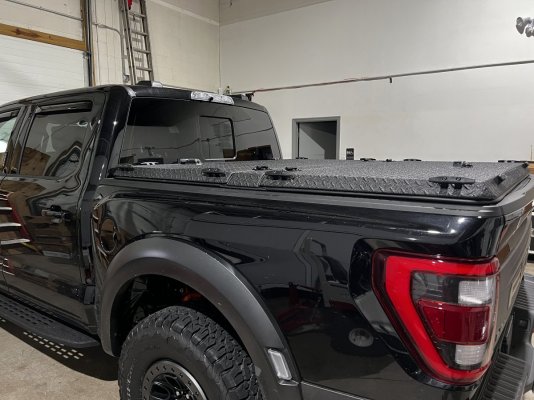
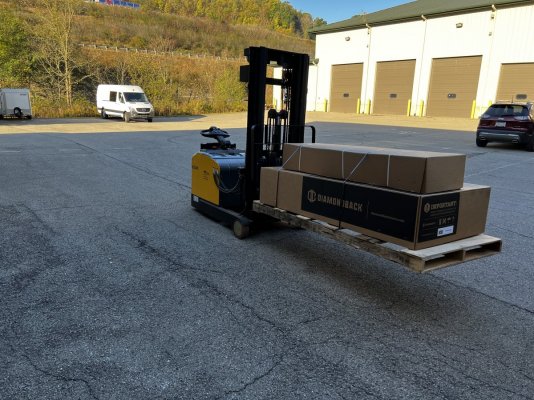
The strangest thing happened this morning, I got an early/ahead of schedule delivery…My diamondback tonneau cover showed up.
In the world of supply chain hell that we are currently in,it was a welcomed unexpected surprise.

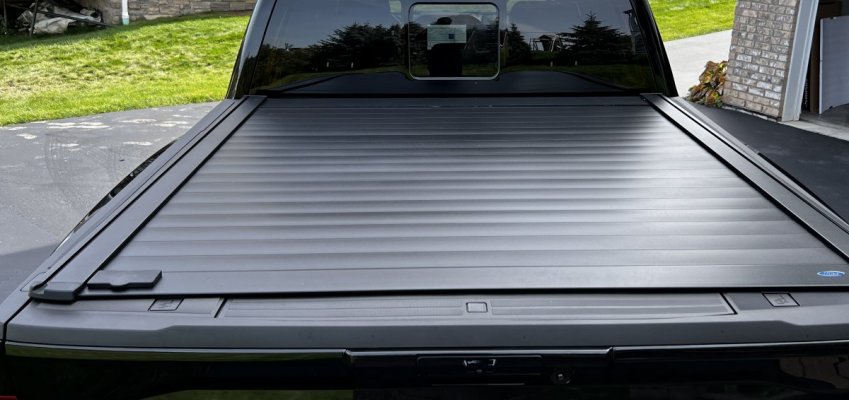
I *had a retraxpro XR/Ford Embark LS on the truck when I took delievery, but ended up having fitment issues and missing parts which ultimately led to it being returned. Which is really a shame because it looked great w/it’s low profile and functionality.

I have had several diamondback covers on various trucks over the years, and have always been extremely happy. Because of the retrax/Embark issue, I had an opportunity to reconsider my options and get a different cover, and I ended up with the Diamondback.

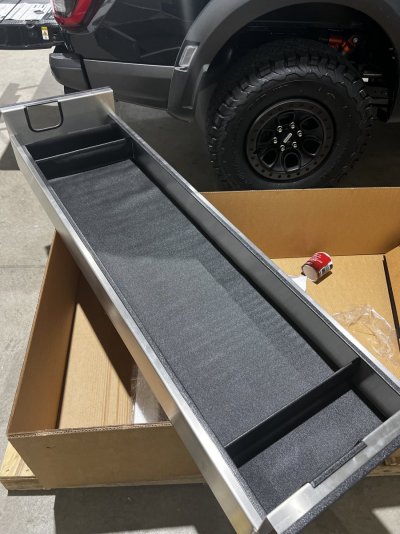
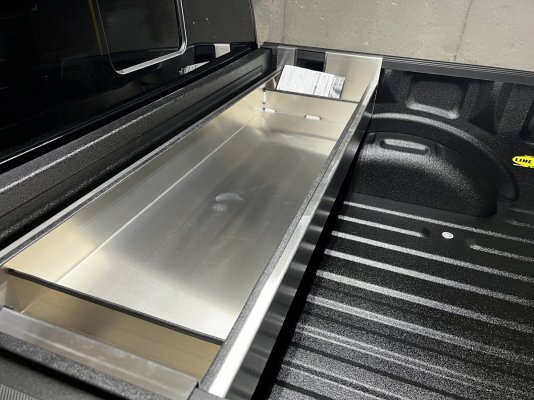
I choose the HD model with the “rugged black“ finish along with the pre-installed cleats. I also opted for the front cross bin 8 storage container.

I’ll be installing this cover weekend, but did test fit the cross bin to ensure it fit.

original Retraxpro XR/Embark LS
B99017C3-FD7B-408A-BF61-7BF5264D50F6.jpeg


Diamondback delivery:
3B96E55D-1255-445F-B517-D576C1B419A0.jpeg59F28F6B-F61B-481A-A864-C0536CBD70BB.jpeg

cross bin test fit:
7408A31B-9105-4D3F-AB0D-3633740E4E97.jpeg
 

RotorOver

Full Access Member
Joined
Jun 28, 2021
Posts
434
Reaction score
688
Location
Greater Atlanta
The strangest thing happened this morning, I got an early/ahead of schedule delivery…My diamondback tonneau cover showed up.
In the world of supply chain hell that we are currently in,it was a welcomed unexpected surprise.

I *had a retraxpro XR/Ford Embark LS on the truck when I took delievery, but ended up having fitment issues and missing parts which ultimately led to it being returned. Which is really a shame because it looked great w/it’s low profile and functionality.

I have had several diamondback covers on various trucks over the years, and have always been extremely happy. Because of the retrax/Embark issue, I had an opportunity to reconsider my options and get a different cover, and I ended up with the Diamondback.

I choose the HD model with the “rugged black“ finish along with the pre-installed cleats. I also opted for the front cross bin 8 storage container.

I’ll be installing this cover weekend, but did test fit the cross bin to ensure it fit.

original Retraxpro XR/Embark LS


Diamondback delivery:

cross bin test fit:
Nice! I went with the SE and Crossbin 13 and have been really happy with them. The only issue I had on install was the way the ribs of the bed lie I couldn't get the clamps in place at the far ends of the center panel as they describe. But despite that, they've held held firm with no issues.

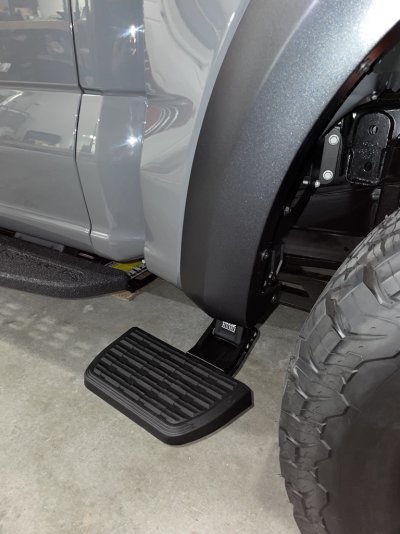
I installed the AMP Research Bedstep 2 on either side, which makes getting into the bin easy and really solidifies the set-up and use cases for the bin and cab panel access. They were a pain in the as# to install, but worth it. Highly recommended.

07768BB1-1CC9-4039-9070-B85870042CC3_1_105_c.jpeg
 
OP
OP
RickRed

RickRed

Full Access Member
Joined
Jul 24, 2021
Posts
114
Reaction score
168
Location
USA
Nice! I went with the SE and Crossbin 13 and have been really happy with them. The only issue I had on install was the way the ribs of the bed lie I couldn't get the clamps in place at the far ends of the center panel as they describe. But despite that, they've held held firm with no issues.

I installed the AMP Research Bedstep 2 on either side, which makes getting into the bin easy and really solidifies the set-up and use cases for the bin and cab panel access. They were a pain in the as# to install, but worth it. Highly recommended.

View attachment 325935
I went back and forth on the SE and HD, honestly I should have saved a few bucks and got the SE, as I’ll probably never need the full weight capacity.

Amp step looks awesome…mind sharing the model # and where you got them?

I Spent a few hours the other night searching for a side step.
And ‘I didn’t see anything listed on amps website for the 21.
def agree that these would make it easier to get into the cross bin

Looking at the frame rails I was curious If you could fit a side step with the link arms right st the frame section.
 

RotorOver

Full Access Member
Joined
Jun 28, 2021
Posts
434
Reaction score
688
Location
Greater Atlanta
I went back and forth on the SE and HD, honestly I should have saved a few bucks and got the SE, as I’ll probably never need the full weight capacity.

Amp step looks awesome…mind sharing the model # and where you got them?

I Spent a few hours the other night searching for a side step.
And ‘I didn’t see anything listed on amps website for the 21.
def agree that these would make it easier to get into the cross bin

Looking at the frame rails I was curious If you could fit a side step with the link arms right st the frame section.
I did the same thing on HD/SE and just couldn’t come up with the use cases for me for the HD, but I definitely see the appeal. I actually went with a smooth version of the SE with the cleats loose to get a cleaner look. I figured if I need them in the future I’d throw them on.

I got the Bedstep 2 from AutoAnything.com (Part #: 75412-01A). If you sign up for their email you can get 15% off also.

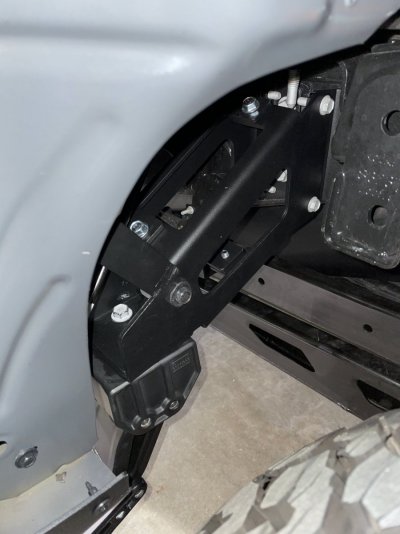
This is what it looks like underneath. You slip four clips into rectangular cut outs in the frame and the fasteners attach to them. You loosely assemble the step frame, mount to the clips and tighten in place. To make the process faster the second time I put the bolts in the step frame as far as I could get them with out restricting play, so there was less tightening/torque in place where they are hard to get to. The other thing to look out for is when you get the clips in place they will have some play in the cut outs and that’s how you know they are in the right position. If they are sticking, but look like they are in place, keep playing with them until they can be jiggled around or you’ll have problems getting the right alignment when bolting the frame down.

You can see in the picture there is a bracket, which attaches behind the fender well to a pre-cut oval hole in the fender. The instructions are poor at describing this.

Make sure you have swivel joints and extensions available for your ratchet and a torque wrench that isn’t too large to fit down there. It would have been an impossible job without those things.

As an aside, I didn’t get the Ford tailgate step and looked at the AMP Bedstep for the rear bumper, but that definitely won’t work on the Raptor due to the position of the exhaust. It doesn’t say that on AMPs website, but it does on the instruction sheet. I learned that the hard way!

8D12491D-65C8-48D2-9172-2321C5F0FDF5.jpeg
 

Attachments

  • A4B9C10D-D893-43EC-9D32-415A3F0D4C52.jpeg
    A4B9C10D-D893-43EC-9D32-415A3F0D4C52.jpeg
    106.9 KB · Views: 37
Last edited:
OP
OP
RickRed

RickRed

Full Access Member
Joined
Jul 24, 2021
Posts
114
Reaction score
168
Location
USA
I did the same thing on HD/SE and just couldn’t come up with the use cases for me for the HD, but I definitely see the appeal. I actually went with a smooth version of the SE with the cleats loose to get a cleaner look. I figured if I need them in the future I’d throw them on.

I got the Bedstep 2 from AutoAnything.com (Part #: 75412-01A). If you sign up for their email you can get 15% off also.

This is what it looks like underneath. You slip four clips into rectangular cut outs in the frame and the fasteners attach to them. You loosely assemble the step frame, mount to the clips and tighten in place. To make the process faster the second time I put the bolts in the step frame as far as I could get them with out restricting play, so there was less tightening/torque in place where they are hard to get to. The other thing to look out for is when you get the clips in place they will have some play in the cut outs and that’s how you know they are in the right position. If they are sticking, but look like they are in place, keep playing with them until they can be jiggled around or you’ll have problems getting the right alignment when bolting the frame down.

You can see in the picture there is a bracket, which attaches behind the fender well to a pre-cut oval hole in the fender. The instructions are poor at describing this.

Make sure you have swivel joints and extensions available for your ratchet and a torque wrench that isn’t too large to fit down there. It would have been an impossible job without those things.

As an aside, I didn’t get the Ford tailgate step and looked at the AMP Bedstep for the rear bumper, but that definitely won’t work on the Raptor due to the position of the exhaust. It doesn’t say that on AMPs website, but it does on the instruction sheet. I learned that the hard way!
I also went back and forth 100000 times with smooth vs rugged. But kept with rugged. Smooth is a cool look.

Really appreciate the write up and pictures, and good call on the discount with auto Anything.
‘not sure what the heck I was doing on Amps website the other day, because today found theme right away. ordering a set tonight. this info will help with the install.

Did you have to do any trimming on the front side of the fender flare. I saw In the instructions they said you might have to, but looked to me to be a standard f150 pieces and not raptors with our larger flares.

throwing the cover on tomorrow.
thanks again @RotorOver
 

RotorOver

Full Access Member
Joined
Jun 28, 2021
Posts
434
Reaction score
688
Location
Greater Atlanta
I also went back and forth 100000 times with smooth vs rugged. But kept with rugged. Smooth is a cool look.

Really appreciate the write up and pictures, and good call on the discount with auto Anything.
‘not sure what the heck I was doing on Amps website the other day, because today found theme right away. ordering a set tonight. this info will help with the install.

Did you have to do any trimming on the front side of the fender flare. I saw In the instructions they said you might have to, but looked to me to be a standard f150 pieces and not raptors with our larger flares.

throwing the cover on tomorrow.
thanks again @RotorOver
No problem, glad I could help!

No trimming on the Raptor. I think you are right- required for the reg F150.

Good luck with the install!
 

DocMarshall

Full Access Member
Joined
Jun 22, 2021
Posts
477
Reaction score
554
Location
WV
As an aside, I didn’t get the Ford tailgate step and looked at the AMP Bedstep for the rear bumper, but that definitely won’t work on the Raptor due to the position of the exhaust. It doesn’t say that on AMPs website, but it does on the instruction sheet. I learned that the hard way!
Yeah I was wondering about the tailgate step and the Raptor exhaust. Thanks for clearing that up.
 
OP
OP
RickRed

RickRed

Full Access Member
Joined
Jul 24, 2021
Posts
114
Reaction score
168
Location
USA
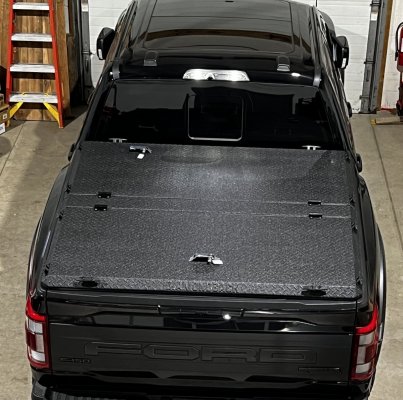
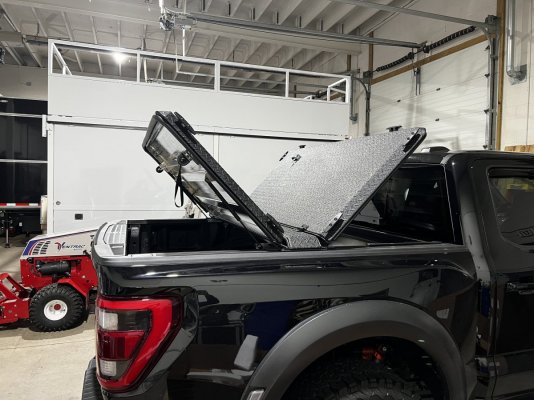
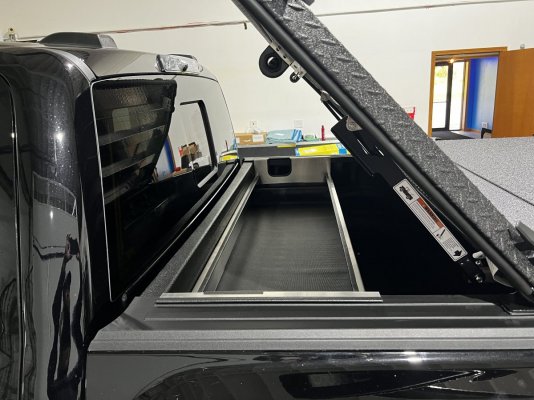
Got the cover installed this afternoon.
Very happy with everything. Perfect fit and tight seal all the way around.

Again I’ve had multiple diamondback covers, but am always impressed with the packaging, overall quality and functionally.

Install took around 2 hours but I was putzin’ around and kept adjusting the placement (just my ocd kicking in)

I was planning on having the crossbin linex’d, but for it always being under the cover, I decided to just put down some tool box drawer liner on the inside. Happy with how it came out.
7B9A91D3-BF96-44A3-A1E5-01AB64D126F1.jpeg
A7285B47-7FA1-4088-A623-7093F54F8003.jpeg

67712E2B-F37D-4036-9D0B-EDB0E67D28BB.jpeg

E6CB3ECA-825C-4878-A07E-BD8DCAC47D4F.jpeg
7025DAC4-96C8-4E6C-833A-17F7A0BF4A66.jpeg
 
Last edited:

JasonSTL

Full Access Member
Joined
Dec 14, 2019
Posts
271
Reaction score
273
Location
St. Louis, MO
Got the cover installed this afternoon.
Very happy with everything. Perfect fit and tight seal all the way around.

Again I’ve had multiple diamondback covers, but am always impressed with the packaging, overall quality and functionally.

Install took around 2 hours but I was putzin’ around and kept adjusting the placement (just my ocd kicking in)

I was planning on having the crossbin linex’d, but for it always being under the cover, I decided to just put down some tool box drawer liner on the inside. Happy with how it came out.
View attachment 326400
View attachment 326401

View attachment 326402

View attachment 326403
View attachment 326404
Sweet Ventrac!
 
Top