dragonass23
Full Access Member
I finally got around to replacing my broken driver's seat heating element this weekend. Wow, it was super easy!!!!
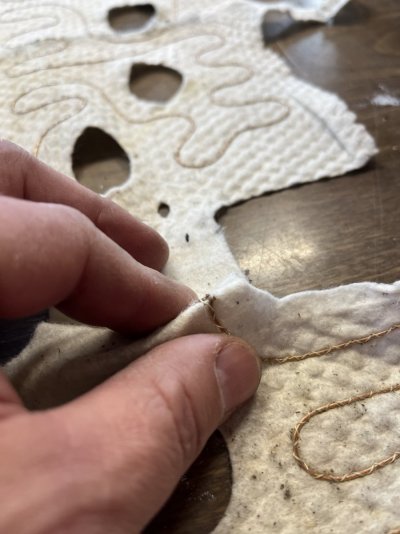
Damage found - one broken copper wire bundle
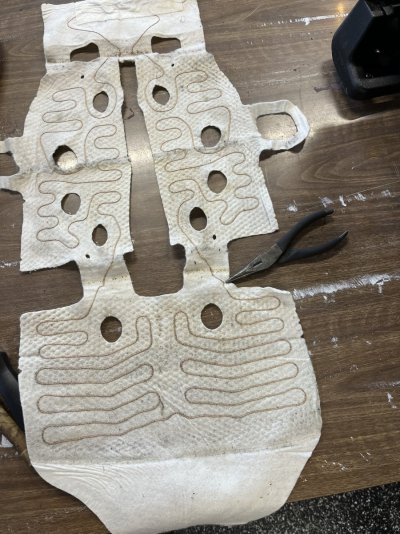
Location of damaged wire pointed out by needle nose pliers. Front of seat is bottom of picture!
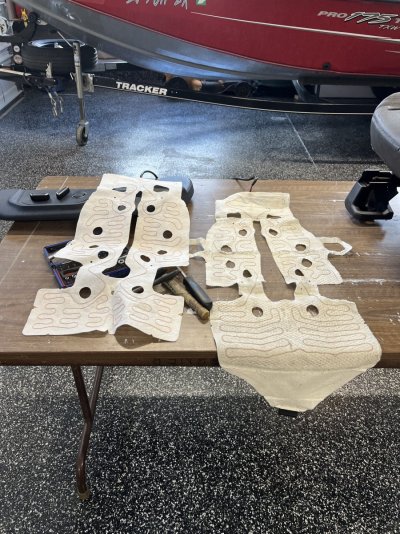
New heater element on left side and old damage heater element on right!
Tools needed:
13mm socket - to remove 4 seat bolts
Pick - to help remove the covers over the seat bolts
t25 torx - to remove two screws that holds the switch cover on the side of the seat that faces the door
Trim tool - to remove tabs, electrical connectors and blue rods as needed
New Heater Element - ford part# - LL3Z-14D696-B 1X
Seat Removal:
1. Using pick, remove the cover to the seat bolts
2. Using the seat controls, move the seat forward and backwards to make access to the seat bolts easier.
3. Using the 13mm socket, remover all 4 seat bolts.
4. With the seat bolts removed, I moved the seat forward and moved the seat back towards the back of the truck to make access to the seat cover easier later!
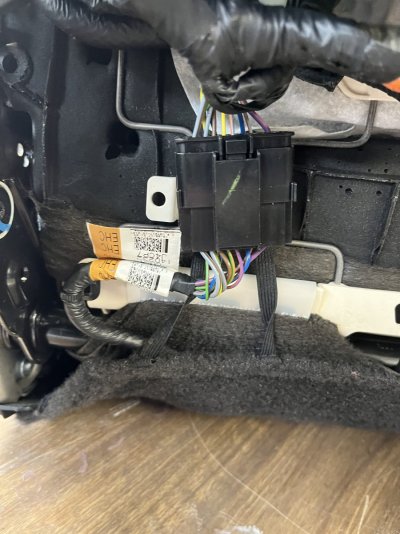
5. Unplug the two wiring plugs in the front of the seat (one on left is easy - just push the tab on top and pull out). The grey one on the right, I used the pick to dislodge the tab and then swing the grey lever towards the read. Then using the trim tool, release the fastner that holds the wiring to the seat bottom.
6. Remove the seat from the truck.
Seat cover removal:
1. Using t25 torx, remove the two screws that hold the switch plate onto the side of the seat. With the two screws removed, the switch plate needs to be pulled up and towards the front to remove it from the seat. This takes some fine touch as there is a tab in the middle that holds the switch plate. This tab faces toward the rear of the seat (that is why the plate needs to be pulled forward). Once the cover is free, disconnect the electrical connector by pressing the tab and pulling apart.
2. There are plastic tabs on all four sides that need to be released. Work your way around. There are two on the console side of the seat, two in the front, 4 on the switch plate side and two in the rear.
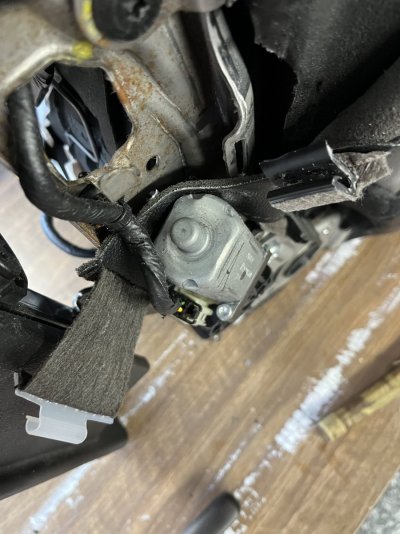
I made special note of how this seat cover clip was routed so I would get it back together properly!
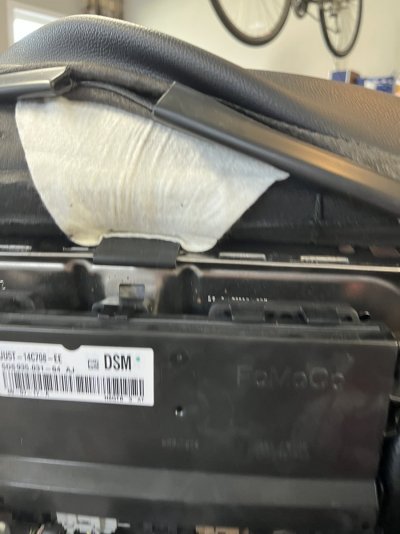
There are also two elastic bands that hold the upper seat cover down. There are two electrial connectors that need to be taken apart and pulled off the seat frame to allow the elastic bands to be removed.
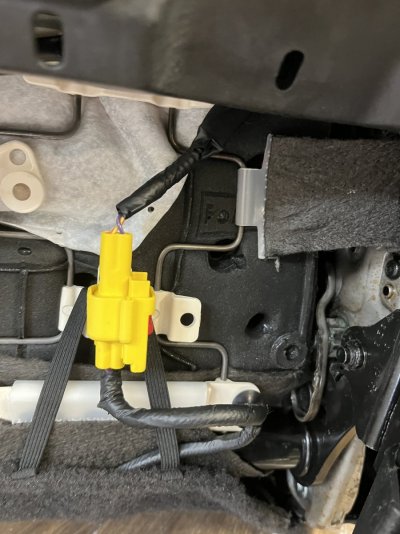
Yellow electrical connector is on the right side (switch side) of the seat at the rear. Disconnect this plug and remove the plug from the seat frame to release the elastic cord. (repeat for the black plug on the console side of the seat).
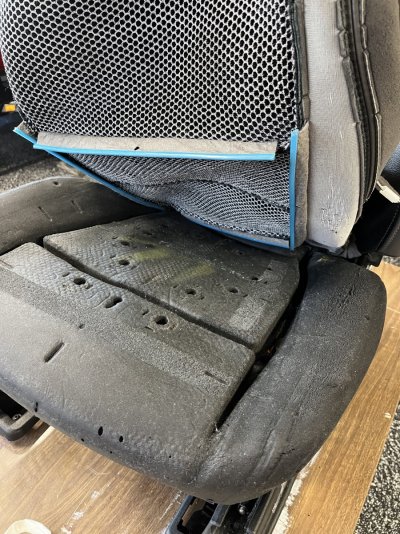
3. Starting at the front of the cover, carefully pull it back until you feel resistance. The cover is held on with blue plastic rods that are clipped into orange fasteners (these orange fasteners are embedded into the foam so be careful not to pull them out of the foam!). There are three on each side and two or three in the two channels that run across the seat (10 or so in total). I used the trim tool to push the orange clips down as I pulled on the blue rod and seat cover.
4. I did not pull the seat cover all the way off. I left the back tucked in as I didn't want to fight the back of the seat. I used a small bungee cord to hold the seat cover up and out of the way.
Removal of the old heater element:
The heater element is held on with adhesive. Easy to pull off. Go slow. Next, I unplugged the heater element (Green plug). Pull the cord through the seat back and remove the heater element.
Install the new heater element:
1. First I put the electrical lead through the seat back, pushed the fastner into the seat base and plugged in the green wire plug. Next, I positioned the element using the holes as a guide. I started in the front. Remove the adhesive backing and stick the front section down. Next, stuff the "bridge" section down into the grove. Line up the middle section, again, using the holes as a guide. I removed the two pieces of adhesive backing on one side and then repeated for the console side. Again, stuff the "bridge" section into the back grove. Lastly, I did the back section.
Replace the seat cover.
1. Working backwards from the instruction above, I removed the bungee cord and started with the blue rod and orange clips in the rear groove. You will feel and hear a distictive click when the blue
rod seats in the orange clip. I next worked along the swith plate side and then the front grove and lastly, the console side.
2. Attached the plastic clips. I started on rear, then switch plate side, the front and lastly the console side.
3. Replace the console cover. At the rear - replace the elastice bands, reattached the two electrical connectors.
Replace and reintall the seat in the truck (instructions should not be needed if you made it this far!!)

Damage found - one broken copper wire bundle

Location of damaged wire pointed out by needle nose pliers. Front of seat is bottom of picture!

New heater element on left side and old damage heater element on right!
Tools needed:
13mm socket - to remove 4 seat bolts
Pick - to help remove the covers over the seat bolts
t25 torx - to remove two screws that holds the switch cover on the side of the seat that faces the door
Trim tool - to remove tabs, electrical connectors and blue rods as needed
New Heater Element - ford part# - LL3Z-14D696-B 1X
Seat Removal:
1. Using pick, remove the cover to the seat bolts
2. Using the seat controls, move the seat forward and backwards to make access to the seat bolts easier.
3. Using the 13mm socket, remover all 4 seat bolts.
4. With the seat bolts removed, I moved the seat forward and moved the seat back towards the back of the truck to make access to the seat cover easier later!
5. Unplug the two wiring plugs in the front of the seat (one on left is easy - just push the tab on top and pull out). The grey one on the right, I used the pick to dislodge the tab and then swing the grey lever towards the read. Then using the trim tool, release the fastner that holds the wiring to the seat bottom.
6. Remove the seat from the truck.
Seat cover removal:
1. Using t25 torx, remove the two screws that hold the switch plate onto the side of the seat. With the two screws removed, the switch plate needs to be pulled up and towards the front to remove it from the seat. This takes some fine touch as there is a tab in the middle that holds the switch plate. This tab faces toward the rear of the seat (that is why the plate needs to be pulled forward). Once the cover is free, disconnect the electrical connector by pressing the tab and pulling apart.
2. There are plastic tabs on all four sides that need to be released. Work your way around. There are two on the console side of the seat, two in the front, 4 on the switch plate side and two in the rear.

I made special note of how this seat cover clip was routed so I would get it back together properly!
There are also two elastic bands that hold the upper seat cover down. There are two electrial connectors that need to be taken apart and pulled off the seat frame to allow the elastic bands to be removed.

Yellow electrical connector is on the right side (switch side) of the seat at the rear. Disconnect this plug and remove the plug from the seat frame to release the elastic cord. (repeat for the black plug on the console side of the seat).
3. Starting at the front of the cover, carefully pull it back until you feel resistance. The cover is held on with blue plastic rods that are clipped into orange fasteners (these orange fasteners are embedded into the foam so be careful not to pull them out of the foam!). There are three on each side and two or three in the two channels that run across the seat (10 or so in total). I used the trim tool to push the orange clips down as I pulled on the blue rod and seat cover.
4. I did not pull the seat cover all the way off. I left the back tucked in as I didn't want to fight the back of the seat. I used a small bungee cord to hold the seat cover up and out of the way.
Removal of the old heater element:
The heater element is held on with adhesive. Easy to pull off. Go slow. Next, I unplugged the heater element (Green plug). Pull the cord through the seat back and remove the heater element.
Install the new heater element:
1. First I put the electrical lead through the seat back, pushed the fastner into the seat base and plugged in the green wire plug. Next, I positioned the element using the holes as a guide. I started in the front. Remove the adhesive backing and stick the front section down. Next, stuff the "bridge" section down into the grove. Line up the middle section, again, using the holes as a guide. I removed the two pieces of adhesive backing on one side and then repeated for the console side. Again, stuff the "bridge" section into the back grove. Lastly, I did the back section.
Replace the seat cover.
1. Working backwards from the instruction above, I removed the bungee cord and started with the blue rod and orange clips in the rear groove. You will feel and hear a distictive click when the blue
rod seats in the orange clip. I next worked along the swith plate side and then the front grove and lastly, the console side.
2. Attached the plastic clips. I started on rear, then switch plate side, the front and lastly the console side.
3. Replace the console cover. At the rear - replace the elastice bands, reattached the two electrical connectors.
Replace and reintall the seat in the truck (instructions should not be needed if you made it this far!!)


