R1jamn
Full Access Member
- Joined
- Jun 18, 2011
- Posts
- 401
- Reaction score
- 299
NOTE: Photo Bucket website has gone to a fee paid service and the pics have been omitted from 3rd party hosting.
Here is a link to Google Drive that will allow you to view the pics.
These will not be in order as the "How To" I posted. You will have to arrange them in order yourself.
Click Google Drive
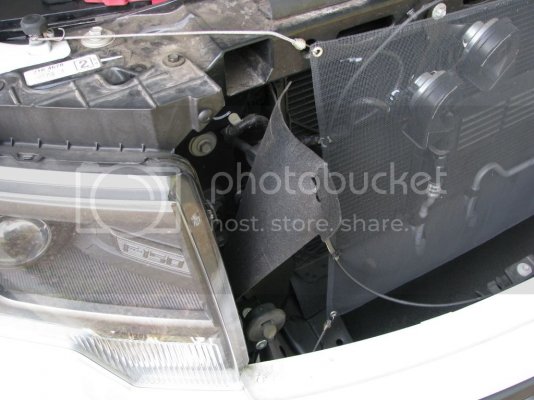
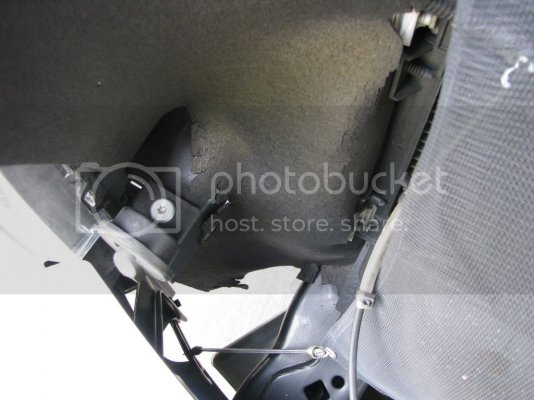
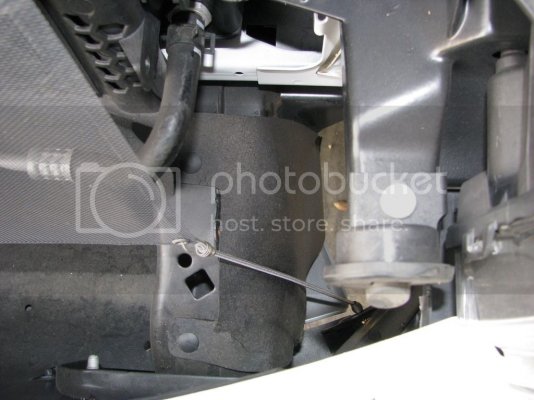
The radiator air deflector panels on my Raptor were deteriorating.
Some of the nylon push pins were no longer retaining the panels because they were cracked and torn from rotting.
I went to my local Ford dealer and had a panel ordered which was covered under warranty.
When I arrived home to install the new panel I then noticed that another panel was needing replacement.
Ford uses a recycled rubber material and longevity is very poor.
So I did not install the new panel I received from Ford.
I decided to fabricate my own panels with a higher grade material rubber.
I selected an oil resistant commercial grade nitrile rubber in black, grade 60A (3/32 thick, same thickness as the Ford OEM panels).
OEM panel that is deteriorating and flopping around.
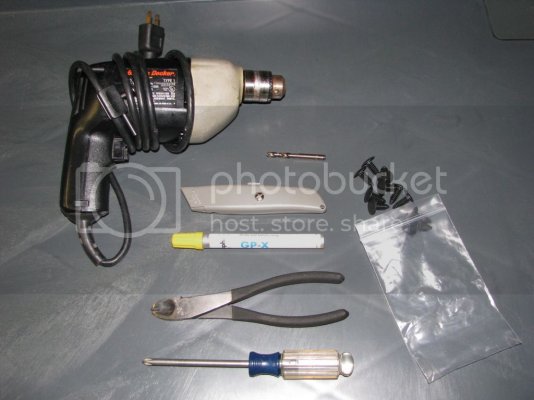
Tools You will Need:
Work bench or work cart (I used a work cart).
Plywood for setting on the work bench or in the work cart.
Phillips screw driver #2.
Paint stick or marker.
Box cutter.
Power drill.
15/64 dia. drill bit.
Diagonal pliers (wire cutter/dikes).
New nylon push pins (Christmas tree style) 1 dozen.
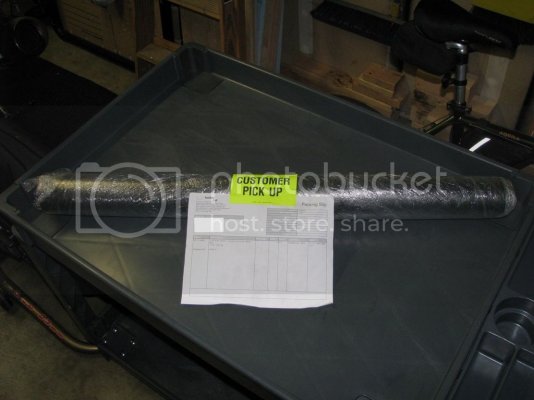
Sheet of nitrile rubber 3/32 thickness (several other rubber options are available too).
I ordered this from rubbercal.com and picked it up as "Will Call".
They have a 3'x5' sheet minimum purchase. "Will Call" cost was $42.55
This is much better quality and far less expensive than Fords recycled rubber panels.
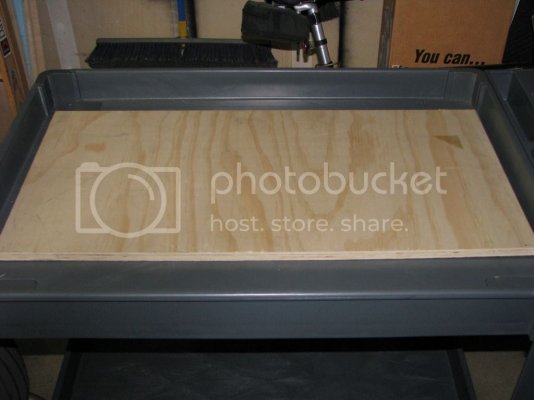
This is a rolled up sheet of 3'x5' nitrile rubber.
It has very good oil and chemical resistance.
Lets get started!
Park your Raptor on a flat surface and make sure the vehicle is set in "Park".
Set the parking brake.
Chock the wheels.
Open the hood and look at the Radiator Air Deflector panels.
There is a total of 5 panels.
I am only removing and fabricating 3 new panels.
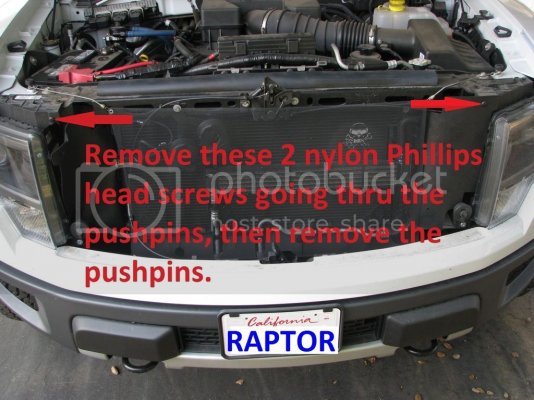
Use the Phillips screw driver and remove the pushpins that are retained with a nylon screw going thru the middle.
There are only 2 of these. One on the left side (drivers side) and one on the right side (passenger side) Both are at the very top of the panels.
Then use the diagonal pliers (dikes) and cut the head off from the rest of the nylon pushpins and remove (Christmas tree style).
Please do not try to force the Christmas tree pushpins out of the plastic retaining tabs with screw drivers or pliers as you may break the plastic tabs.
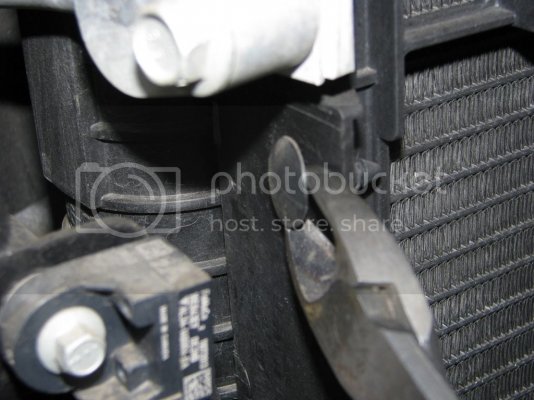
Now remove the old panels (do not discard these yet).
These will be used as templates.
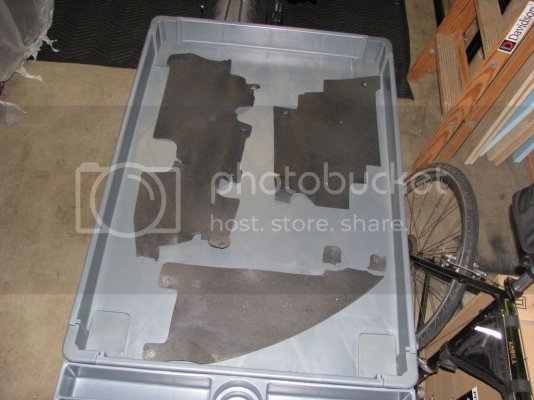
Set the new rubber sheet onto the plywood inside the work cart or work table.
Set one of the old panels on top of the rubber and draw the periphery and holes with the paint stick.
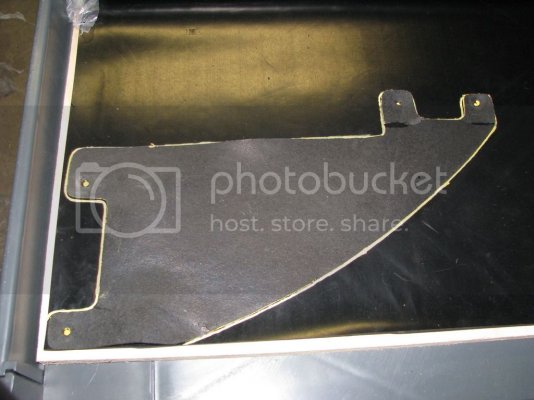
Use the box knife to cleanly cut the profile.
At only 3/32 rubber thickness, the box knife will easily cut thru in one pass.
Please take your time and stay focused as a box knife can cause a severe laceration.
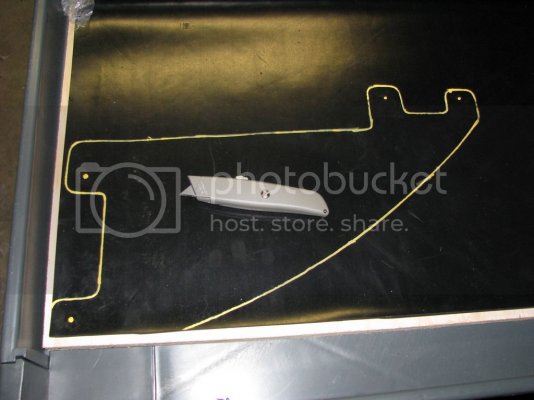
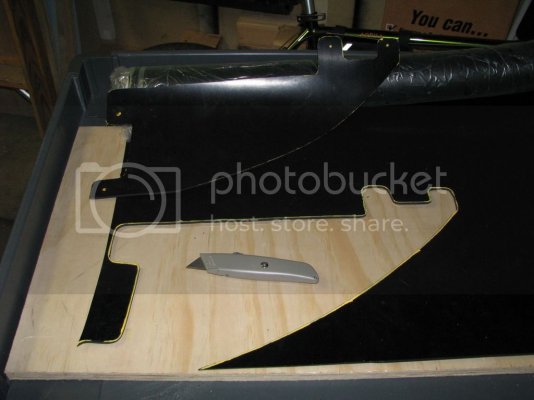
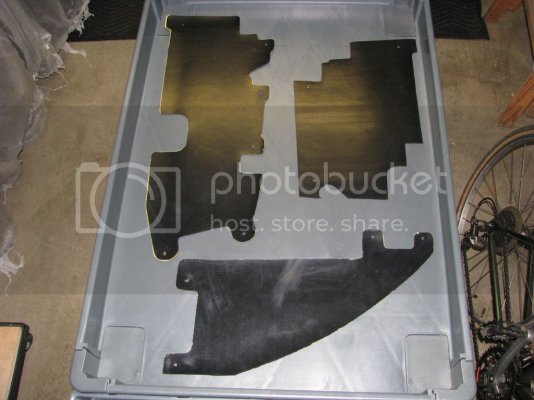
Three new panels are cut.
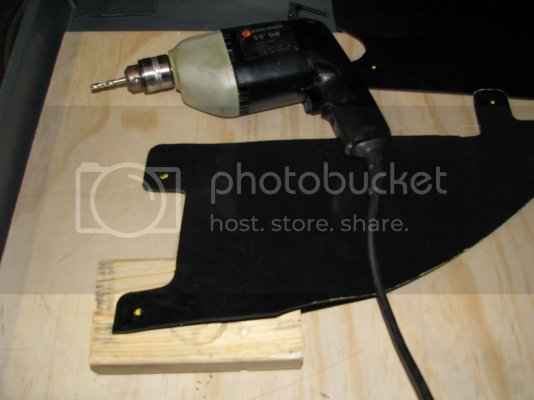
Now drill the thru holes for the location of the nylon push pins with a power drill and a 15/64 drill bit ( I used a 2" x 4" underneath).
Now to install the new panels.
If you have a D-Bug screen then remove the lower bungee cords.
Install the new nylon pushpins into the new panels.
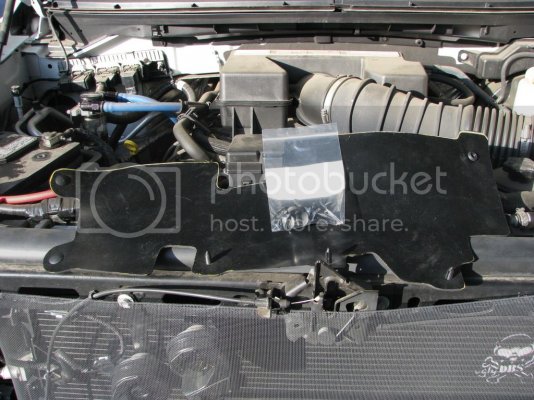
Install the new panels.
Working from the bottom going up is the easiest way.
Right side (passenger side)
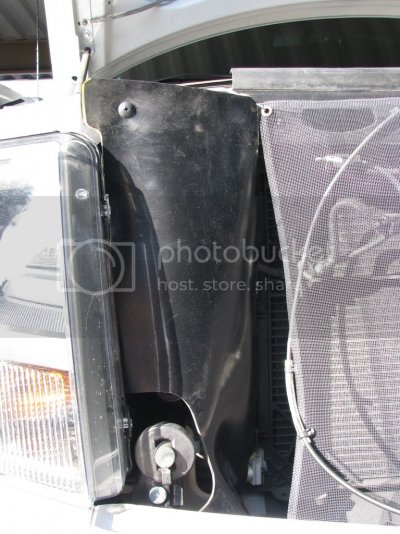
Left side (drivers side bottom panel)
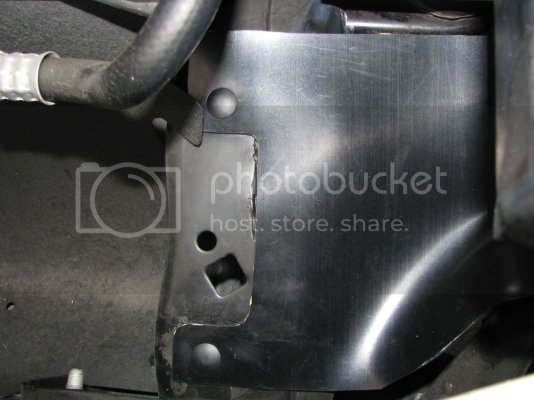
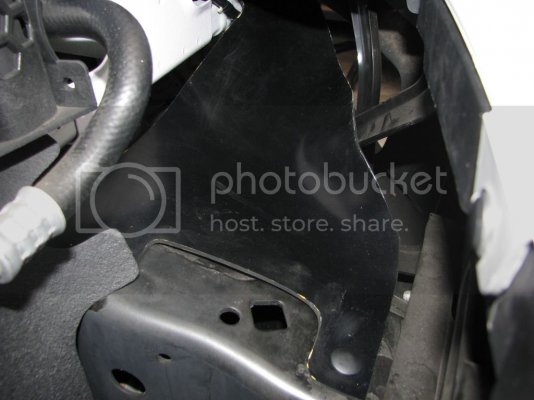
Left side (drivers side top panel)
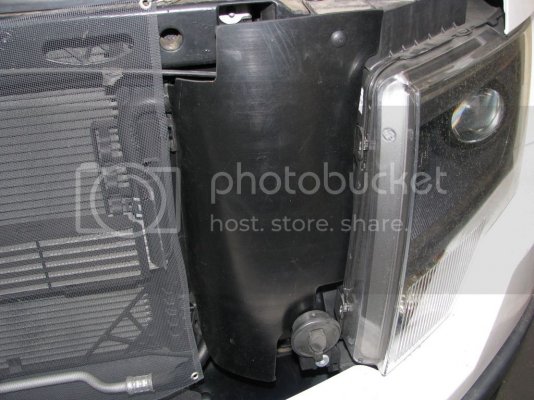
If you have a D-Bug screen installed then reattach the bungee cords
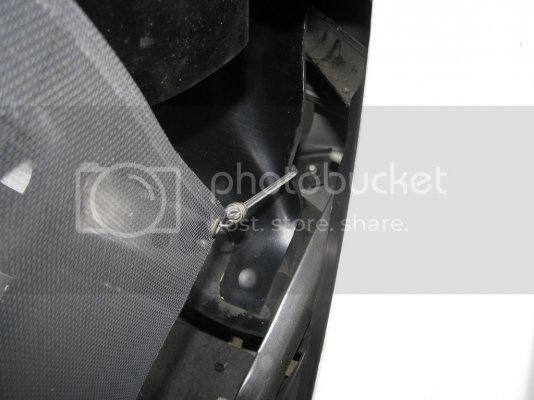
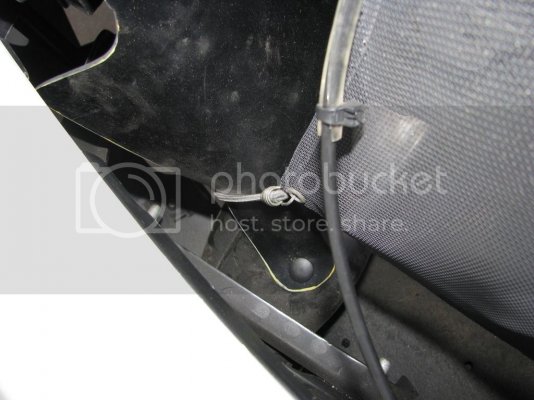
Now double check all of the pushpins are anchored securely and clean everything up.
.
Here is a link to Google Drive that will allow you to view the pics.
These will not be in order as the "How To" I posted. You will have to arrange them in order yourself.
Click Google Drive
The radiator air deflector panels on my Raptor were deteriorating.
Some of the nylon push pins were no longer retaining the panels because they were cracked and torn from rotting.
I went to my local Ford dealer and had a panel ordered which was covered under warranty.
When I arrived home to install the new panel I then noticed that another panel was needing replacement.
Ford uses a recycled rubber material and longevity is very poor.
So I did not install the new panel I received from Ford.
I decided to fabricate my own panels with a higher grade material rubber.
I selected an oil resistant commercial grade nitrile rubber in black, grade 60A (3/32 thick, same thickness as the Ford OEM panels).
OEM panel that is deteriorating and flopping around.


Tools You will Need:
Work bench or work cart (I used a work cart).
Plywood for setting on the work bench or in the work cart.
Phillips screw driver #2.
Paint stick or marker.
Box cutter.
Power drill.
15/64 dia. drill bit.
Diagonal pliers (wire cutter/dikes).
New nylon push pins (Christmas tree style) 1 dozen.
Sheet of nitrile rubber 3/32 thickness (several other rubber options are available too).
I ordered this from rubbercal.com and picked it up as "Will Call".
They have a 3'x5' sheet minimum purchase. "Will Call" cost was $42.55
This is much better quality and far less expensive than Fords recycled rubber panels.


This is a rolled up sheet of 3'x5' nitrile rubber.
It has very good oil and chemical resistance.

Lets get started!
Park your Raptor on a flat surface and make sure the vehicle is set in "Park".
Set the parking brake.
Chock the wheels.
Open the hood and look at the Radiator Air Deflector panels.
There is a total of 5 panels.
I am only removing and fabricating 3 new panels.
Use the Phillips screw driver and remove the pushpins that are retained with a nylon screw going thru the middle.
There are only 2 of these. One on the left side (drivers side) and one on the right side (passenger side) Both are at the very top of the panels.
Then use the diagonal pliers (dikes) and cut the head off from the rest of the nylon pushpins and remove (Christmas tree style).
Please do not try to force the Christmas tree pushpins out of the plastic retaining tabs with screw drivers or pliers as you may break the plastic tabs.


Now remove the old panels (do not discard these yet).
These will be used as templates.

Set the new rubber sheet onto the plywood inside the work cart or work table.
Set one of the old panels on top of the rubber and draw the periphery and holes with the paint stick.

Use the box knife to cleanly cut the profile.
At only 3/32 rubber thickness, the box knife will easily cut thru in one pass.
Please take your time and stay focused as a box knife can cause a severe laceration.


Three new panels are cut.

Now drill the thru holes for the location of the nylon push pins with a power drill and a 15/64 drill bit ( I used a 2" x 4" underneath).

Now to install the new panels.
If you have a D-Bug screen then remove the lower bungee cords.
Install the new nylon pushpins into the new panels.

Install the new panels.
Working from the bottom going up is the easiest way.
Right side (passenger side)

Left side (drivers side bottom panel)


Left side (drivers side top panel)

If you have a D-Bug screen installed then reattach the bungee cords


Now double check all of the pushpins are anchored securely and clean everything up.
.
Last edited:


