I recently received a BedRug liner as part of the promo we're doing with TruckMods.com and BedRug.
I've been interested in a BedRug for quite some time, but my truck came with the factory plastic drop-in liner so I never had a great deal of urgency. I learned through this process that I should have had more urgency in getting rid of the plastic liner (see below).
Difficulty:
1 2 3 4 5 6 7 8 9 10
Tools needed:
Torx T-30
Soap / Water
Rags
Rubbing Alcohol
Install time:
1-3 hours
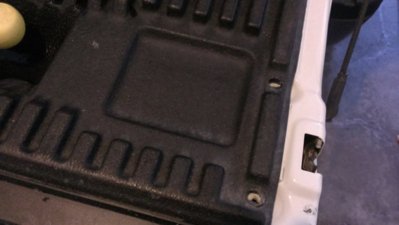
I first started by removing the factory liner. It was pretty simple.
1. Remove the 4 tie downs (8 bolts) with a T-30 torx.
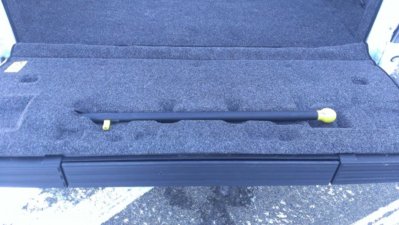
3. Remove the factory bed extender (if applicable).
3. Lift the front lip of the liner off the bulkhead.
4. Grab and lift the center of the liner off the bed floor. This should pull the sides in and down.
5. Pull the sides from under the bed rails and wrestle the bugger out of there.
6. Throw it in the trash or sell on CL.
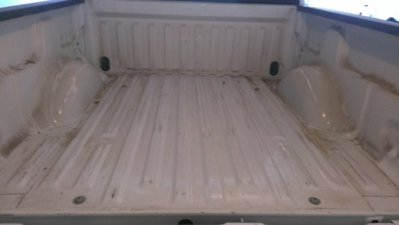
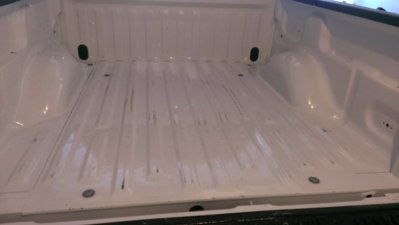
When I removed the factory drop-in liner, I was slightly horrified. I expected the dirt, but the rust came as a surprise. Now I know that drop-in liners are notorious for causing bed rust but I was still surprised to see the extent.
Most of the dark marks you see in the pictures are surface rusted. The rust is a little thicker on the bed sides. I'll be addressing that issue in the spring. The good thing is the BedRug is really easy to remove and reinstall.

Honestly, the hardest part of the install was cleaning all of the dirt and loose rust off the bed. It was about 16* outside, but I headed off to the coin-op car wash to spray out the bed.
By the time I got home, the water was frozen in my bed. I let my truck sit in my garage for a while, and then cleaned the bed thoroughly by hand with hot water and dish soap. This solved the ice problem and also warmed up the surface enough to where the Velcro tape would stick.

The installation is really a breeze once your bed is prepped and clean. Honestly, the instructions are a bit more verbose than they need to be.
I started by assembling the floor and side panels in the bed, and zipped everything up.
I then lined up the tie down holes which are conveniently pre-marked on the back side of the liner. I just poked the holes through with a small screwdriver.
Next, if you have a factory tailgate step, you'll need to remove the screws from the plastic liner on the tailgate using your T-30 again.

Next, you'll slide the tailgate section of the BedRug down the tailgate handle through the pre-cut slit.
The instructions state you need to tuck the flap for the tailgate section underneath the plastic liner. A tip here is to remove all of the screws, and then pull the plastic tailgate liner toward you to free it up from underneath the hinge pin for the tailgate handle. This will allow you to lift the plastic liner up enough to tuck the leading edge of the BedRug underneath.
From there, you're pretty much home free. The installation is pretty simple and the instructions are more than sufficient so there's no need to get into it further.
- Locate and install the Velcro sections outlined in the instructions. It's recommended that you clean the surfaces with alcohol first.
- Extra Velcro strips are included if you need to tighten additional areas up.
- Reinstall the tailgate cover screws.
- Reinstall the tie downs.


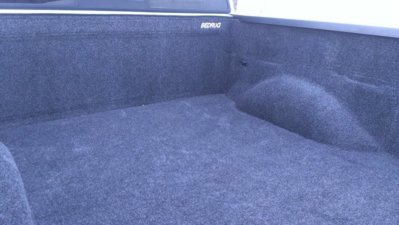
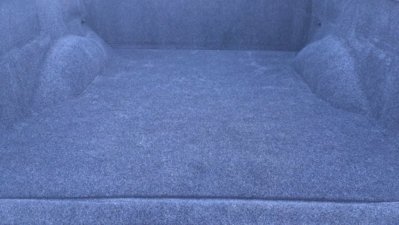
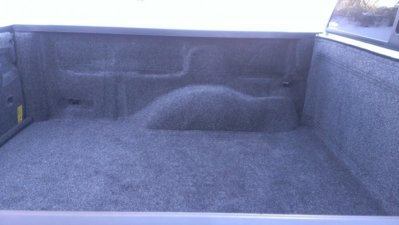
I was extremely impressed with the overall fitment of the BedRug. It seems daunting at first, but everything falls into place quite nicely once you have everything lined up. The only place I could have used some extra support was on the passenger side wheel well hump. I believe/hope it will flatten out once it gets warmer out. The BedRug comes rolled up in a box, so you might experience similar issues in colder climates.
It's definitely a quality MADE IN USA product, as is evident from how form fitting it is with even the smallest of bed contour details.
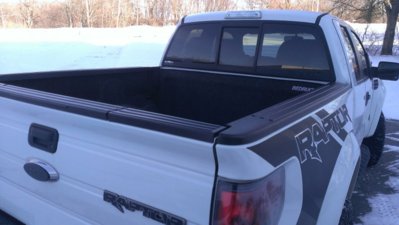
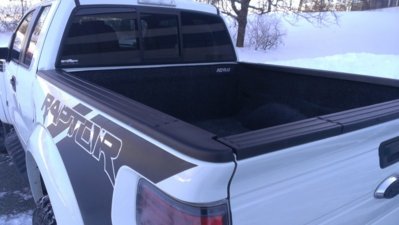
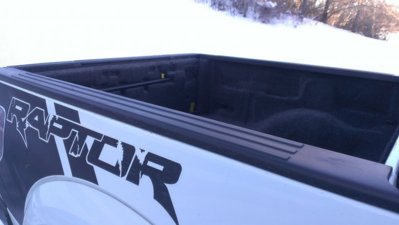
The matte grey finish of the BedRug is really clean looking in person. It adds some nice contrast against the black bed caps and RAPTOR graphics IMO. I'm very happy with this, and don't believe the soft foam base of the BedRug will cause the types of scraping and rubbing issues that lead to the rust with my hard plastic drop-in.
Full info on BedRug website: http://www.bedrug.com/products/bed-liners/bed-rug.html
I've been interested in a BedRug for quite some time, but my truck came with the factory plastic drop-in liner so I never had a great deal of urgency. I learned through this process that I should have had more urgency in getting rid of the plastic liner (see below).
Difficulty:
1 2 3 4 5 6 7 8 9 10
Tools needed:
Torx T-30
Soap / Water
Rags
Rubbing Alcohol
Install time:
1-3 hours
I first started by removing the factory liner. It was pretty simple.
1. Remove the 4 tie downs (8 bolts) with a T-30 torx.
3. Remove the factory bed extender (if applicable).
3. Lift the front lip of the liner off the bulkhead.
4. Grab and lift the center of the liner off the bed floor. This should pull the sides in and down.
5. Pull the sides from under the bed rails and wrestle the bugger out of there.
6. Throw it in the trash or sell on CL.
When I removed the factory drop-in liner, I was slightly horrified. I expected the dirt, but the rust came as a surprise. Now I know that drop-in liners are notorious for causing bed rust but I was still surprised to see the extent.
Most of the dark marks you see in the pictures are surface rusted. The rust is a little thicker on the bed sides. I'll be addressing that issue in the spring. The good thing is the BedRug is really easy to remove and reinstall.

Honestly, the hardest part of the install was cleaning all of the dirt and loose rust off the bed. It was about 16* outside, but I headed off to the coin-op car wash to spray out the bed.
By the time I got home, the water was frozen in my bed.

The installation is really a breeze once your bed is prepped and clean. Honestly, the instructions are a bit more verbose than they need to be.
I started by assembling the floor and side panels in the bed, and zipped everything up.
I then lined up the tie down holes which are conveniently pre-marked on the back side of the liner. I just poked the holes through with a small screwdriver.
Next, if you have a factory tailgate step, you'll need to remove the screws from the plastic liner on the tailgate using your T-30 again.

Next, you'll slide the tailgate section of the BedRug down the tailgate handle through the pre-cut slit.
The instructions state you need to tuck the flap for the tailgate section underneath the plastic liner. A tip here is to remove all of the screws, and then pull the plastic tailgate liner toward you to free it up from underneath the hinge pin for the tailgate handle. This will allow you to lift the plastic liner up enough to tuck the leading edge of the BedRug underneath.
From there, you're pretty much home free. The installation is pretty simple and the instructions are more than sufficient so there's no need to get into it further.
- Locate and install the Velcro sections outlined in the instructions. It's recommended that you clean the surfaces with alcohol first.
- Extra Velcro strips are included if you need to tighten additional areas up.
- Reinstall the tailgate cover screws.
- Reinstall the tie downs.


I was extremely impressed with the overall fitment of the BedRug. It seems daunting at first, but everything falls into place quite nicely once you have everything lined up. The only place I could have used some extra support was on the passenger side wheel well hump. I believe/hope it will flatten out once it gets warmer out. The BedRug comes rolled up in a box, so you might experience similar issues in colder climates.
It's definitely a quality MADE IN USA product, as is evident from how form fitting it is with even the smallest of bed contour details.
The matte grey finish of the BedRug is really clean looking in person. It adds some nice contrast against the black bed caps and RAPTOR graphics IMO. I'm very happy with this, and don't believe the soft foam base of the BedRug will cause the types of scraping and rubbing issues that lead to the rust with my hard plastic drop-in.
Full info on BedRug website: http://www.bedrug.com/products/bed-liners/bed-rug.html
Attachments
-
 IMAG1152.jpg38 KB · Views: 415
 -
 IMAG1153.jpg35.2 KB · Views: 375
 -
 IMAG1164.jpg51.8 KB · Views: 411
 -
 IMAG1170.jpg104.2 KB · Views: 362
 -
 IMAG1173.jpg122.7 KB · Views: 362
 -
 IMAG1175.jpg108.4 KB · Views: 339
 -
 IMAG1177.jpg67.9 KB · Views: 366
 -
 IMAG1179.jpg65.8 KB · Views: 350
 -
 IMAG1180.jpg50.5 KB · Views: 309
 -
 IMAG1181.jpg82.3 KB · Views: 404

