ApicellaAutoSound
Member
Hey everyone, you may remember me from Amantay's thread he posted regarding the sound system upgrade. Well, here is the finished product!
Hey guys, we just finished up this 2019 Ford Raptor that came in for a High-End Sound system and a customer-supplied ALP Laser Jamming System (Radar system already installed). The goals of this install consisted of a few main things. Obviously, a great sounding audio system was a top priority, but very high output capability without cutting up the vehicle. The owner of this vehicle has a long history of clubbing and wanted a similar volume level. Believe it or not, it was achieved. Another necessity was to do a perfect install on the ALP Laser Jamming system, as they are very sensitive to install location, as well as angle. We consulted with ALP directly to get their recommendations and did exactly as recommended. Oh, and last but not least... a REAL 2 SEAT TUNE! More details on that below.
The gear for the sound system is as follows..
. ResoNix Sound Solutions sound treatment material (CLD Squares and CCF 7)
. Nav-TV Zen A2B
. Helix V Twelve all-in-one 14 channel processor/12 channel amplifier with Helix Director
. Helix M One X
. Audiofrog GB10
. Audiofrog GB25
. Audiofrog GS8ND2 (ran off two channels of the V Twelve each)
. Audiofrog GS62
. (2) Audiofrog GB10D4 in an MTI Acoustics enclosure.
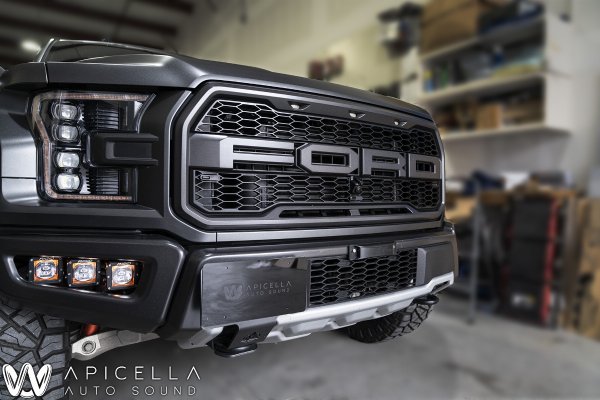
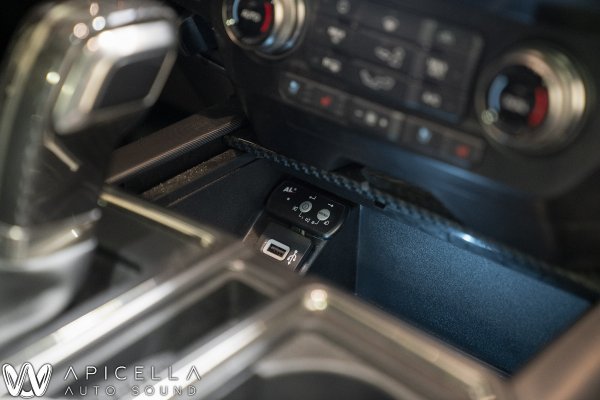
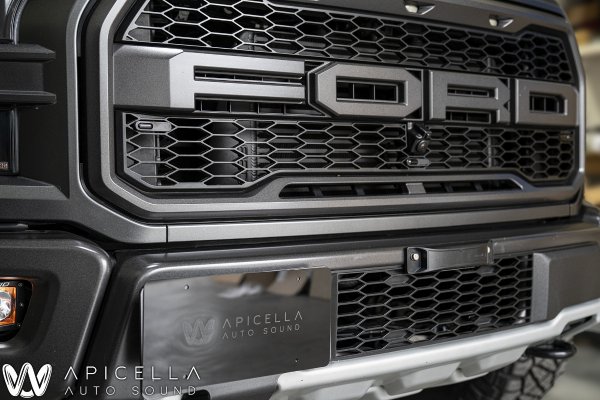
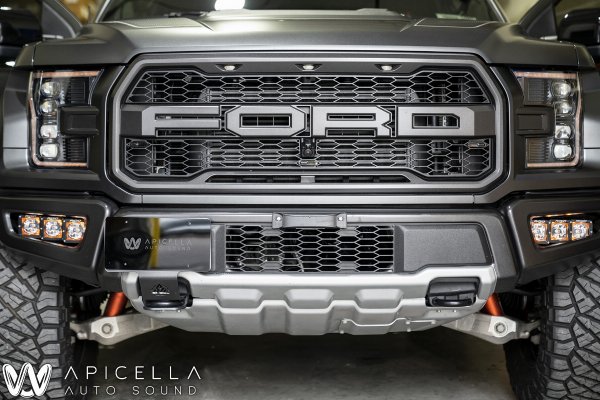
First up is the ALP Laser Jamming system. The controller was installed right above one of the OEM USB ports under the HVAC controls. This was the best location for its uses since it is easy to reach, but could still be hidden and is out of the way and takes nothing away from the OEM aesthetics. The front received 3 ALP RX heads and was installed in locations where not only ALP directly advised us to do so, but the vehicles owner initially requested as well. It worked out perfectly. All of it invisible to the unsuspecting eye.
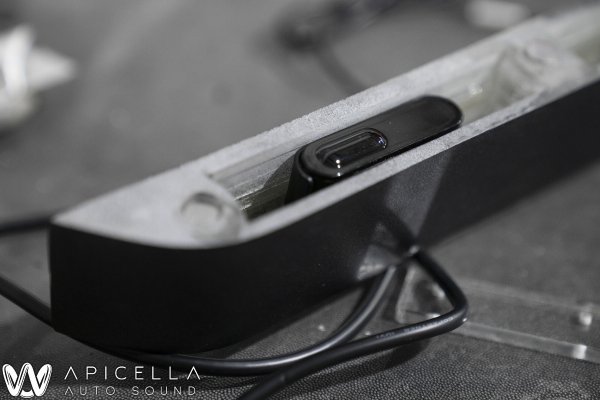
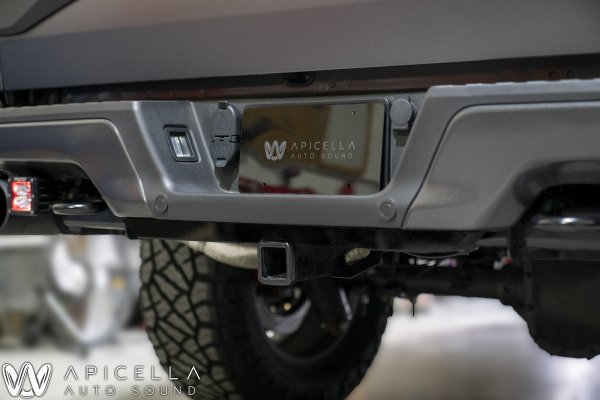
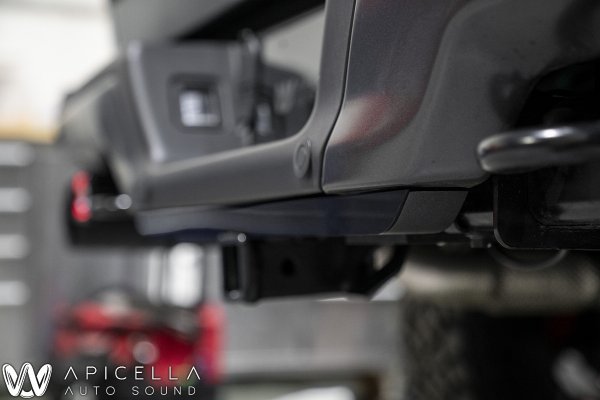
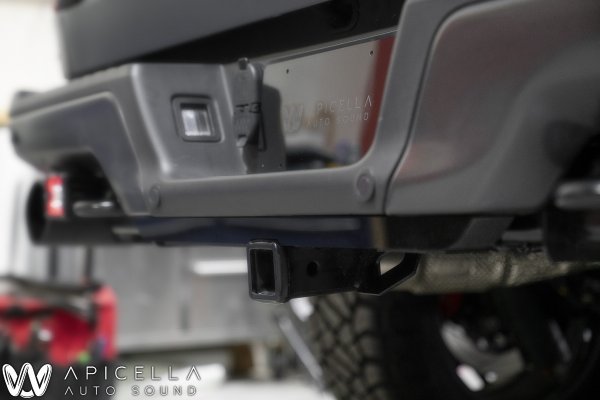
The rear lasers were fun. I didn't like the idea of just having them hang out in the open. At least in the front, there is a grill that they fit right into and blends in. So for the rear, we fabricated an acrylic pod that houses 2 RX heads, and one TX head. The pod was painted the OEM color that we had mixed by a local body shop, and was finished in a low luster clear to match the matte PPF film that is on the entirety of the truck. The laser heads are then hidden by an Infrared Acrylic, aka, an acrylic that looks black but still lets infrared light to travel through it without any degradation. Again, all of it undetectable to any unsuspecting, or even suspecting eye.
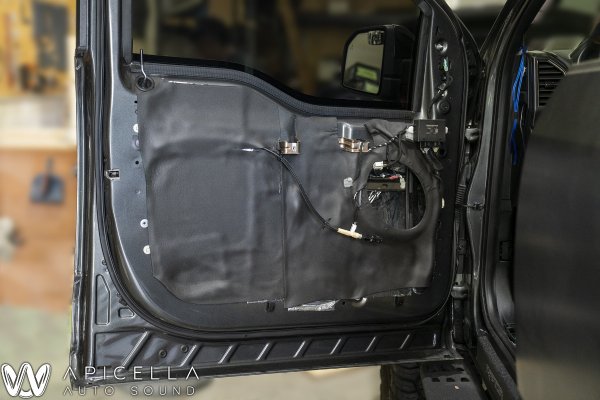
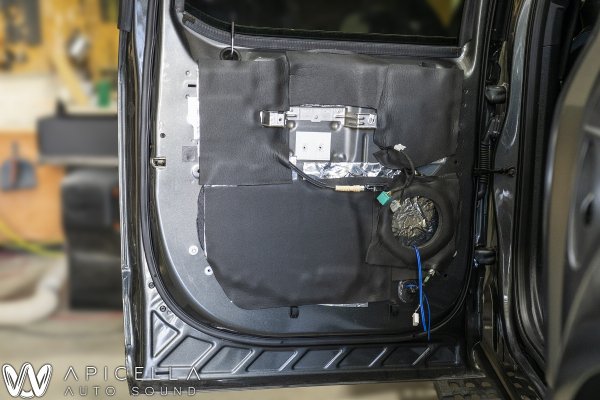
First up with the audio system was sound treating the doors (both front and rear) before installing the Audiofrog GS8ND2's with ResoNix Sound Solutions CLD Squares and CCF Decoupler 7. In almost all installs we do, we do 100% coverage of the outer skin with CLD Squares and use butyl rope in between the crash bars and outer skin, and nearly 100% coverage on the inner skin after sealing all access holes (still removable) and then doing a 100% coverage layer of CCF Decoupler 7. The door panel also gets as much CLD Squares as we see fit, as well as spot-treat with butyl rope and CCF 7. What separates ResoNix from the rest is that it's all actually designed for high-end car audio systems with performance being its most important factor, unlike other products that are frankly, designed to be the most profitable. All ResoNix products are designed by enthusiasts, for enthusiasts. The CLD Squares use the highest quality butyl formula for the application that has NO added fillers (such as CaCO3, clay, bitumen, etc) that make the product look beefy, but offer no actual performance benefits. Just lower cost for "more" material. It is to date, the best constrained layer damper available. The CCF Decoupler 7 is a 7mm thick closed cell foam layer. Pretty simple, right? Well, apparently not. Everything else we have used in the past (you name it, we have used it) was either similar performance but 3x the cost (only one product fit this description), or all used the same rebranded ensolite foam that is too stiff to properly decouple panels, and heavily degrades over time. The ResoNix CCF Decoupler 7 has ideal compression deflection and compression set parameters for car audio applications. Aka, very compressible, and holds its shape pretty well to an extent. Perfect from keeping panels from vibrating against each other without making it too hard to put panels back on, or not doing anything at all. The adhesive is also insane, and the material that its made from does not degrade over time, even in automotive environments. Unfortunately, I forgot to get pictures of the baffle fabrication and speaker install in the doors, but we fabricated PVC speaker baffles that match the OEM speaker shape to use the OEM mounting hardware and mounting points. They are sealed to the inner door skin with CCF 7 in between them, and then a layer of CCF over the top to seal the driver to the baffle. Believe it or not, air leaking out between the baffle and the speakers mounting flange is very common and sounds nasty. This prevents that. We also use a thicker foam to go around the speaker to seal off the speaker from the airspace that is between the door panel and inner door skin. This is very important for 2 reasons. First is lowering resonance and vibration from the door panel by restricting air pressure from getting to the door panel. The second is a by-product of the first, and that is better midbass output since no sound pressure is lost to the space between the door panel and inner skin. Rear doors get the same treatment and were fitted with Audiofrog GS62 coaxial speakers.
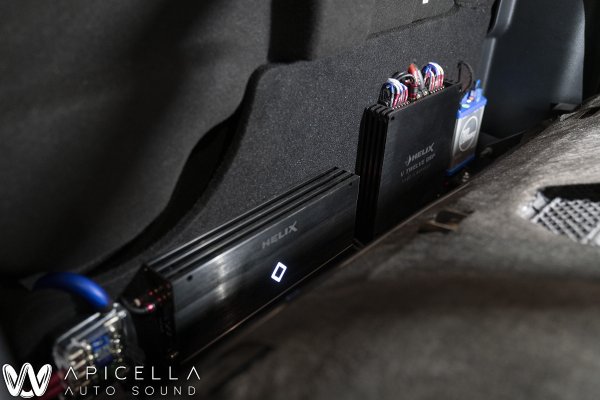
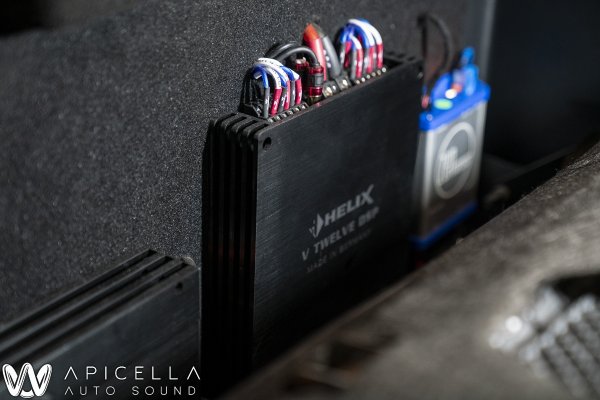
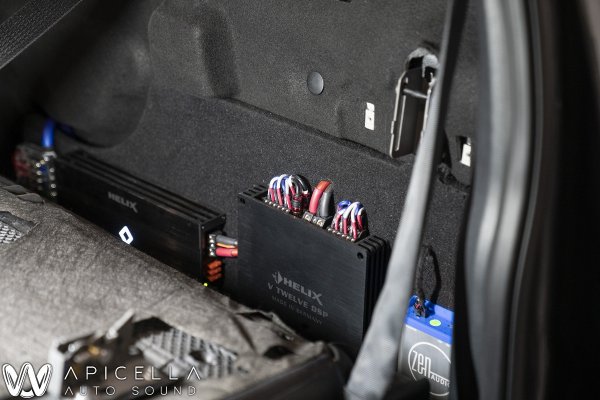
The amp rack houses all of the audio system's electronics. The Nav-TV on the far right is used to grab the A2B signal from before the OEM amplifier. I'm sure you all already know this, but this is the absolute best, and only acceptable way in my opinion to get signal when integrating an audio system in these trucks (which was originally equipped with the B&O system. Obviously it wasn't very good lol). In the middle, the Helix V12 is the star of the show, giving us 14 channels of the car audio markets best processor line, and 12 channels of 75 watt @ 4 ohm, and 150 watt @ 2 ohm amplification. Long story short, the absolute best option for when you need a solution to a problem, with the problem being space, features, number of channels, and power. The subwoofers are being powered by the Helix M One X Amplifier, which powers them with 1000 watts. All wires were appropriately labeled with custom heat shrink and ran cleanly.
Now here is what sets this sound system apart from most... The two-seat tune using a center channel with an upmixer featured in the newest Helix processors. Before I go into how we did this, let me explain what makes this different, special, and most definitely not easy.
It's important that we understand what the word "Stereo" actually means.
"Sound that is directed through two or more speakers so that it seems to surround the listener and to come from more than one source; stereophonic sound."
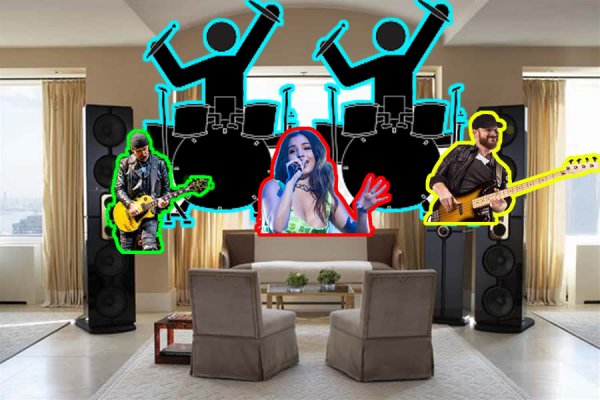
Stereo is when you have two speakers (no, not drivers. drivers are the individual "speakers." A speaker is a device that plays the full range of the audio spectrum), one on the left and one on the right. The left one gets the left signal, and the right one gets the right signal, and they share the common and in between information to varying degrees. When you play a stereo recording on a 2 channel (stereo) setup, you achieve the aforementioned "stereophonic sound." The speakers themselves disappear, and what you hear is a performance that is spread across the space between the two speakers (see image below). The "images" of the individual musicians in the photo are referred to as, well, Imaging, and the space they occupy is referred to as Staging. You guys have probably seen these terms thrown around before, this is their meaning and they are not the same and not interchangeable. Images exist inside the Stage. The images can sound as if they are very small (think the size of a baseball) and can seem like they are located anywhere in between the two speakers. It's pretty neat when you experience it for the first time, and once you do, you will never be able to listen without it.
So, now that we have covered what stereo is, we need to understand what its limitation is. That limitation is simple. There is only ONE exact point in the horizontal plane that is the sweet spot, and it is directly in the middle of the two speakers. If you are off to the side by a few inches, it is not the sweet spot. As you start going further and further from said sweet spot you introduce all sorts of issues. The most notable one is the stereo imaging and staging (as explained before) gets thrown out the window, comb filtering is introduced (nasty repeated logarithmic dips in the frequency response) that are caused by sound waves being out of time where you are located, polar response differing, and reflections being different from side to side. For me, and pretty much anyone, the biggest thing is going to be the imaging/staging getting ruined. This is EXACTLY what happens when we install a stereo in a car and sit in the driver or passenger seat since we are not directly between the two speakers. How does a high-end car audio stereo combat this? With a Digital Signal Processor, aka a DSP. There are MANY reasons to use a DSP in car audio systems, but they are more necessary today than ever before due to OEM's making swapping a radio nearly impossible. Whatever, that's a discussion for a different day. But a DSP will feature many tools to help us get the sound we want, including from our off-center seating positions. This feature is called Signal Delay, sometimes called Time Alignment (which personally, I don't like calling it that. We can not adjust time lol, but we can delay a signal). If we are sitting in the drivers seat (usually on the left side of the car), the sound from the left speaker is going to arrive at us before the sound from the right speaker does. How we fix that is by delaying the left speaker (usually by fractions of milliseconds in a typical car audio system) until the sound from both the left and right speakers arrive at us at the same time. This, along with level adjusting, independent channel eq, etc helps us achieve a stereo presentation in a car audio system. But, even with a DSP, a Stereo system is still Stereo, and the issues mentioned before don't go away. There is still only ONE sweet spot to listen to that system in that car. What if you want your passenger to have a good experience in your vehicle as well? Introducing the Upmixer. An upmixer, very simply put, is an algorithm that takes a given number of audio channels and turns it into more channels. There are many different types of upmixers, and all of them work differently and are usually after achieving a different goal. I'm not going to get into the differences, but we are after something specific with music.. gaining more than one sweet spot that allows for a presentation similar to stereo. How we do this for our purpose is to use an upmixer that separates the correlated signal (mono, center image, etc) from the uncorrelated signal (far left/far right). Frankly, this is not as simple as I'm making it out to be, and there are currently only 2 processors that are available on the car audio market that can do this properly. One is like 12 years old, and the others are the newer models that are a part of the Audiotec Fischer line of DSP's (Brax, Helix, & Match). Aside from them having the absolute best processors on the market hardware and software wise, they are constantly updating their line to include features that are needed/wanted in today's market. They introduced their "Real Center" upmixer last year and their "Virtual Channels" a bit later. Using these features we can create our own upmixer and use a center channel to get an accurate stage with accurate imaging from both the driver and passenger (and even rear) seats. Again, it is a LOT more involved than I just put it, but that is the gist of it.
Things to note for an upmixed center channel in a car audio system:
1) It needs to be able to play just as loud as your side speakers from about 200hz (preferably lower) all the way up to 20khz
2) No, your wimpy factory speaker will not work
3) The center is going to have the main content, so do not skimp and go with a cheaper speaker here
4) No, just summing left and right to a center channel will not get you imaging/staging from both seats. This will actually be detrimental to both seats.
5) You also need the ability to apply all pass filters to individual speakers
6) To be perfectly honest, a 1 seat tune without the center will pretty much definitely sound better in its sweet spot than any 2 seat tune from any of its sweet spots. It could be a drastic difference, but with a good 2 seat setup, it should only be a mild difference. I have only heard two 2-seat setups to date that sounded as good as an equal 1 seat setup. One is Andy Wehmeyer's car (owner of Audiofrog), and the other is Natan Budiono's car (works for Harmon Kardon tuning the OEM Lexus audio systems). This car is the first time I have come very close, which I attribute to sitting down and actually crunching the numbers on how to formulate my own upmixer in the Helix software. Thankfully, that paid off and the 2 seat tune went perfectly without any hiccups.
Stereo system with Staging and Imaging explained. Remember, imaging is the individual "images", and they create and exist inside the "stage"
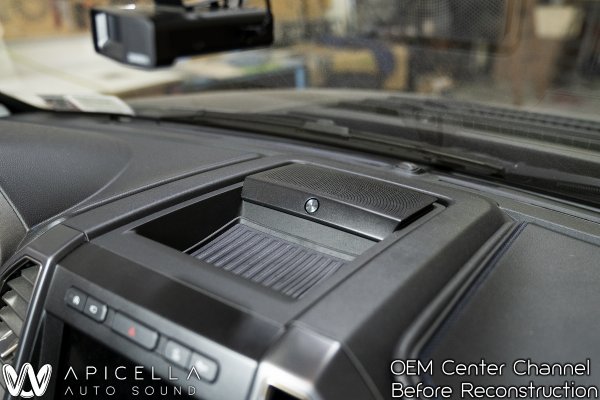
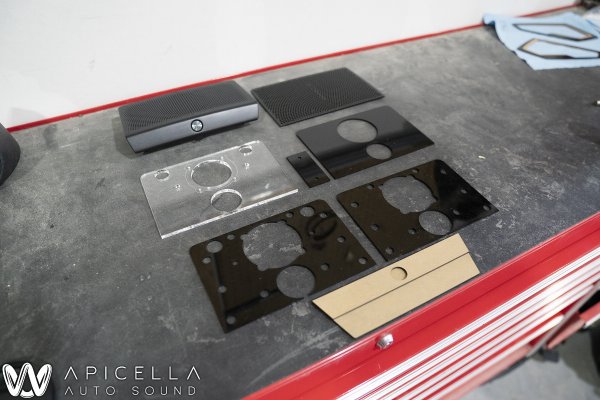
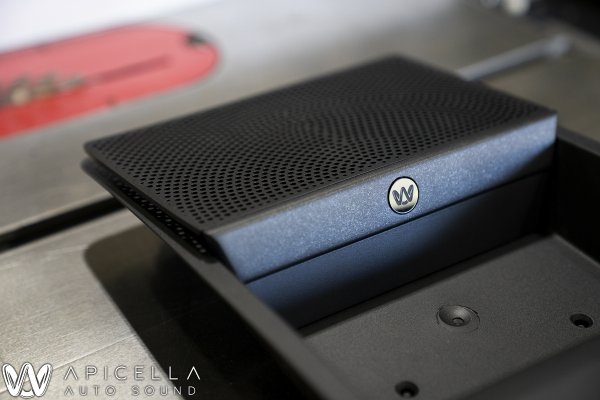
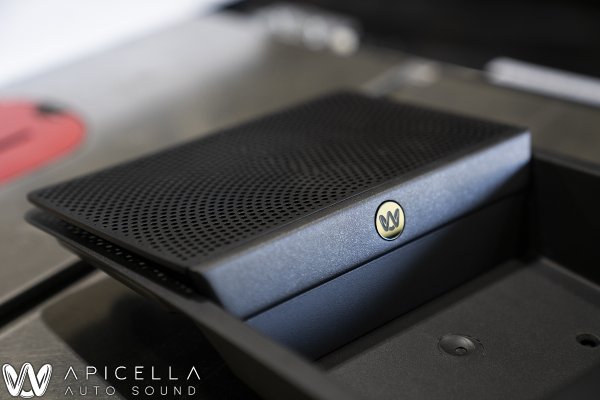
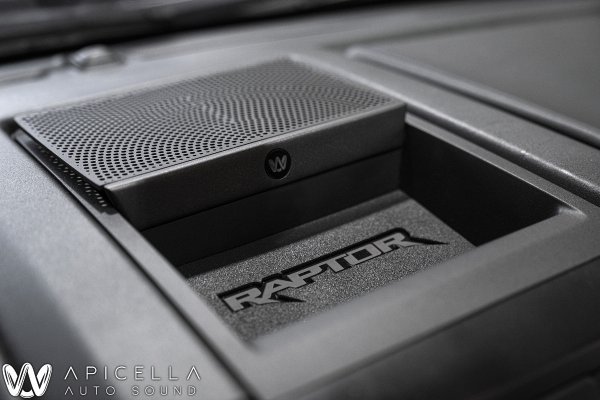
So above you saw the OEM B&O center channel. Unfortunately, it was too small and limited us from installing the right choice in drivers for a center channel. We ended up with Audiofrog GB25 and GB10OE. The GB25, due to its relatively insane xmax for its size (4mm), and incredibly low distortion and high power handling, can play low enough and loud enough to get us over that hurdle of a center channel. My goal here was to fabricate a new center channel "cover" that appeared factory but allowed the fitment of these drivers. Pictured here are all of the layers I designed in a CAD software and cut on the laser. It is secured to the OEM center "bucket" with the OEM hardware and mounting locations, and the grill is held in place with neodymium magnets. So frankly, we can design any configuration of new grills and install them as we please if the customer wants. For this go around, I copied the OEM grill pattern. All of the other layers are attached to each other with Acrylic Cement, which chemically bonds the layers together into one.
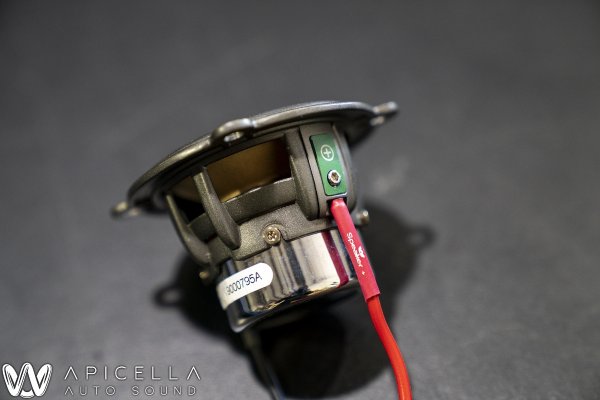
Here we have the Audiofrog GB25, along with our custom heat shrink that we use to label and brand all wires in our sound systems.
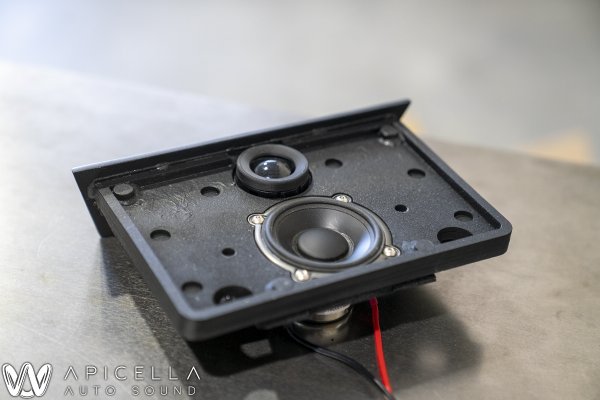
Here is our new center channel assembled and painted. The GB25 is secured with stainless machine screws, and the GB10OE is secured from underneath.
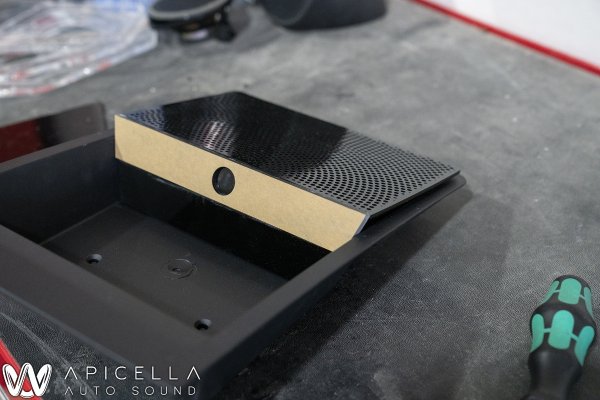
What is hard to see in the first picture showing the OEM center channel, is that the top grill and lower front half are a different color than the upper top half. The grill and lower half are painted black with a low luster clear to mimic the OEM colors for those portions. The top front half was painted the OEM exterior color, as it was on the OEM center channel.
Apicella Auto Sound fabricated, installed, and tuned sound system
Oh, and we added a small touch to the pocket.
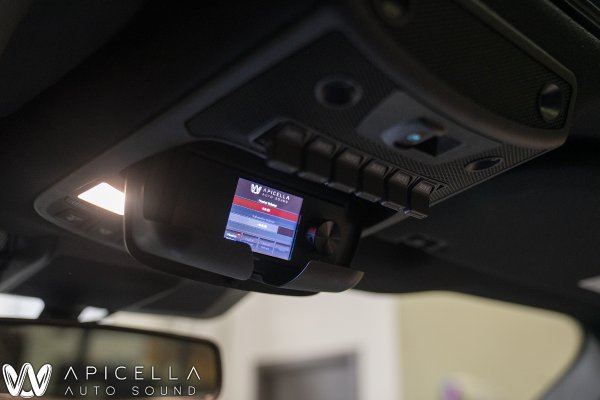
The Helix Director, which controls master and all other source volumes, subwoofer volume, bass and treble adjustment, preset storing and changing, system monitoring, and much more was installed in the sunglass holder. Yes, the sunglass holder can still fold up and latch without any issues or hints that anything is installed there.
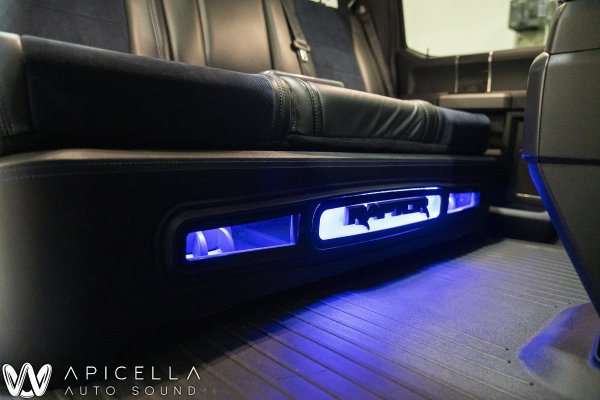
The subwoofer enclosure was built by MTI Acoustics. Frankly, I do not enjoy building truck under-seat enclosures, and theirs are of great quality for a good price.
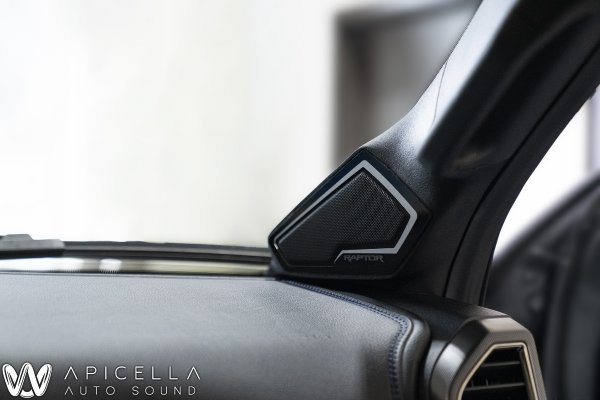
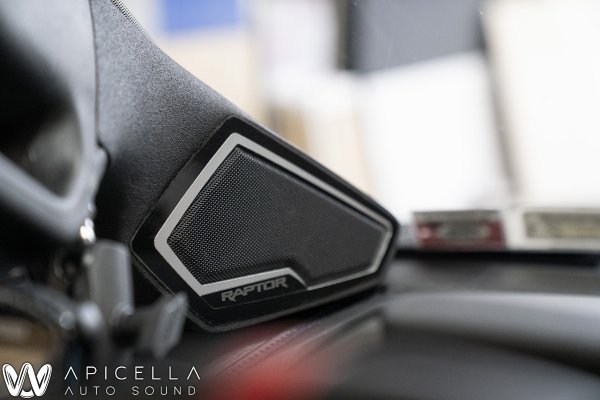
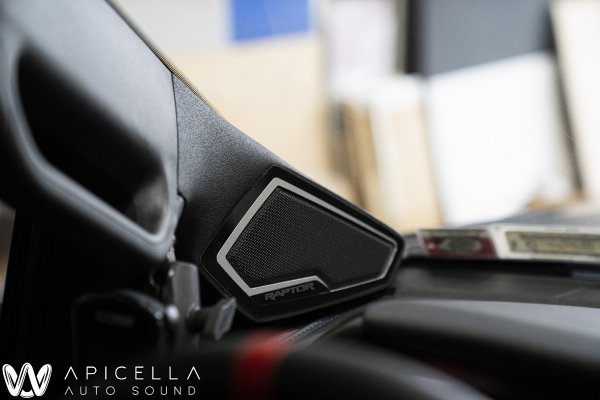
And the star of the eye candy show, the custom A-Pillars. These pillars house the remaining Audiofrog GB25's and GB10's behind a grill that matches the OEM aesthetic while spicing it up a bit.
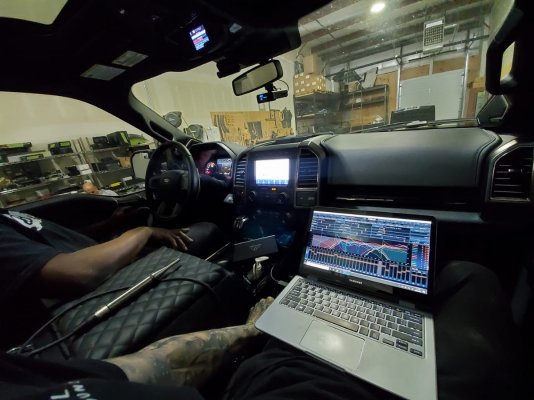
And here is Kevin and I wrapping up the 2-seat tune
Thanks for looking! Once I get to the shop I can post all of the frequency response measurements, which should be interesting for some to see.
Hey guys, we just finished up this 2019 Ford Raptor that came in for a High-End Sound system and a customer-supplied ALP Laser Jamming System (Radar system already installed). The goals of this install consisted of a few main things. Obviously, a great sounding audio system was a top priority, but very high output capability without cutting up the vehicle. The owner of this vehicle has a long history of clubbing and wanted a similar volume level. Believe it or not, it was achieved. Another necessity was to do a perfect install on the ALP Laser Jamming system, as they are very sensitive to install location, as well as angle. We consulted with ALP directly to get their recommendations and did exactly as recommended. Oh, and last but not least... a REAL 2 SEAT TUNE! More details on that below.
The gear for the sound system is as follows..
. ResoNix Sound Solutions sound treatment material (CLD Squares and CCF 7)
. Nav-TV Zen A2B
. Helix V Twelve all-in-one 14 channel processor/12 channel amplifier with Helix Director
. Helix M One X
. Audiofrog GB10
. Audiofrog GB25
. Audiofrog GS8ND2 (ran off two channels of the V Twelve each)
. Audiofrog GS62
. (2) Audiofrog GB10D4 in an MTI Acoustics enclosure.

First up is the ALP Laser Jamming system. The controller was installed right above one of the OEM USB ports under the HVAC controls. This was the best location for its uses since it is easy to reach, but could still be hidden and is out of the way and takes nothing away from the OEM aesthetics. The front received 3 ALP RX heads and was installed in locations where not only ALP directly advised us to do so, but the vehicles owner initially requested as well. It worked out perfectly. All of it invisible to the unsuspecting eye.


The rear lasers were fun. I didn't like the idea of just having them hang out in the open. At least in the front, there is a grill that they fit right into and blends in. So for the rear, we fabricated an acrylic pod that houses 2 RX heads, and one TX head. The pod was painted the OEM color that we had mixed by a local body shop, and was finished in a low luster clear to match the matte PPF film that is on the entirety of the truck. The laser heads are then hidden by an Infrared Acrylic, aka, an acrylic that looks black but still lets infrared light to travel through it without any degradation. Again, all of it undetectable to any unsuspecting, or even suspecting eye.


First up with the audio system was sound treating the doors (both front and rear) before installing the Audiofrog GS8ND2's with ResoNix Sound Solutions CLD Squares and CCF Decoupler 7. In almost all installs we do, we do 100% coverage of the outer skin with CLD Squares and use butyl rope in between the crash bars and outer skin, and nearly 100% coverage on the inner skin after sealing all access holes (still removable) and then doing a 100% coverage layer of CCF Decoupler 7. The door panel also gets as much CLD Squares as we see fit, as well as spot-treat with butyl rope and CCF 7. What separates ResoNix from the rest is that it's all actually designed for high-end car audio systems with performance being its most important factor, unlike other products that are frankly, designed to be the most profitable. All ResoNix products are designed by enthusiasts, for enthusiasts. The CLD Squares use the highest quality butyl formula for the application that has NO added fillers (such as CaCO3, clay, bitumen, etc) that make the product look beefy, but offer no actual performance benefits. Just lower cost for "more" material. It is to date, the best constrained layer damper available. The CCF Decoupler 7 is a 7mm thick closed cell foam layer. Pretty simple, right? Well, apparently not. Everything else we have used in the past (you name it, we have used it) was either similar performance but 3x the cost (only one product fit this description), or all used the same rebranded ensolite foam that is too stiff to properly decouple panels, and heavily degrades over time. The ResoNix CCF Decoupler 7 has ideal compression deflection and compression set parameters for car audio applications. Aka, very compressible, and holds its shape pretty well to an extent. Perfect from keeping panels from vibrating against each other without making it too hard to put panels back on, or not doing anything at all. The adhesive is also insane, and the material that its made from does not degrade over time, even in automotive environments. Unfortunately, I forgot to get pictures of the baffle fabrication and speaker install in the doors, but we fabricated PVC speaker baffles that match the OEM speaker shape to use the OEM mounting hardware and mounting points. They are sealed to the inner door skin with CCF 7 in between them, and then a layer of CCF over the top to seal the driver to the baffle. Believe it or not, air leaking out between the baffle and the speakers mounting flange is very common and sounds nasty. This prevents that. We also use a thicker foam to go around the speaker to seal off the speaker from the airspace that is between the door panel and inner door skin. This is very important for 2 reasons. First is lowering resonance and vibration from the door panel by restricting air pressure from getting to the door panel. The second is a by-product of the first, and that is better midbass output since no sound pressure is lost to the space between the door panel and inner skin. Rear doors get the same treatment and were fitted with Audiofrog GS62 coaxial speakers.


The amp rack houses all of the audio system's electronics. The Nav-TV on the far right is used to grab the A2B signal from before the OEM amplifier. I'm sure you all already know this, but this is the absolute best, and only acceptable way in my opinion to get signal when integrating an audio system in these trucks (which was originally equipped with the B&O system. Obviously it wasn't very good lol). In the middle, the Helix V12 is the star of the show, giving us 14 channels of the car audio markets best processor line, and 12 channels of 75 watt @ 4 ohm, and 150 watt @ 2 ohm amplification. Long story short, the absolute best option for when you need a solution to a problem, with the problem being space, features, number of channels, and power. The subwoofers are being powered by the Helix M One X Amplifier, which powers them with 1000 watts. All wires were appropriately labeled with custom heat shrink and ran cleanly.


Now here is what sets this sound system apart from most... The two-seat tune using a center channel with an upmixer featured in the newest Helix processors. Before I go into how we did this, let me explain what makes this different, special, and most definitely not easy.
It's important that we understand what the word "Stereo" actually means.
"Sound that is directed through two or more speakers so that it seems to surround the listener and to come from more than one source; stereophonic sound."
Stereo is when you have two speakers (no, not drivers. drivers are the individual "speakers." A speaker is a device that plays the full range of the audio spectrum), one on the left and one on the right. The left one gets the left signal, and the right one gets the right signal, and they share the common and in between information to varying degrees. When you play a stereo recording on a 2 channel (stereo) setup, you achieve the aforementioned "stereophonic sound." The speakers themselves disappear, and what you hear is a performance that is spread across the space between the two speakers (see image below). The "images" of the individual musicians in the photo are referred to as, well, Imaging, and the space they occupy is referred to as Staging. You guys have probably seen these terms thrown around before, this is their meaning and they are not the same and not interchangeable. Images exist inside the Stage. The images can sound as if they are very small (think the size of a baseball) and can seem like they are located anywhere in between the two speakers. It's pretty neat when you experience it for the first time, and once you do, you will never be able to listen without it.
So, now that we have covered what stereo is, we need to understand what its limitation is. That limitation is simple. There is only ONE exact point in the horizontal plane that is the sweet spot, and it is directly in the middle of the two speakers. If you are off to the side by a few inches, it is not the sweet spot. As you start going further and further from said sweet spot you introduce all sorts of issues. The most notable one is the stereo imaging and staging (as explained before) gets thrown out the window, comb filtering is introduced (nasty repeated logarithmic dips in the frequency response) that are caused by sound waves being out of time where you are located, polar response differing, and reflections being different from side to side. For me, and pretty much anyone, the biggest thing is going to be the imaging/staging getting ruined. This is EXACTLY what happens when we install a stereo in a car and sit in the driver or passenger seat since we are not directly between the two speakers. How does a high-end car audio stereo combat this? With a Digital Signal Processor, aka a DSP. There are MANY reasons to use a DSP in car audio systems, but they are more necessary today than ever before due to OEM's making swapping a radio nearly impossible. Whatever, that's a discussion for a different day. But a DSP will feature many tools to help us get the sound we want, including from our off-center seating positions. This feature is called Signal Delay, sometimes called Time Alignment (which personally, I don't like calling it that. We can not adjust time lol, but we can delay a signal). If we are sitting in the drivers seat (usually on the left side of the car), the sound from the left speaker is going to arrive at us before the sound from the right speaker does. How we fix that is by delaying the left speaker (usually by fractions of milliseconds in a typical car audio system) until the sound from both the left and right speakers arrive at us at the same time. This, along with level adjusting, independent channel eq, etc helps us achieve a stereo presentation in a car audio system. But, even with a DSP, a Stereo system is still Stereo, and the issues mentioned before don't go away. There is still only ONE sweet spot to listen to that system in that car. What if you want your passenger to have a good experience in your vehicle as well? Introducing the Upmixer. An upmixer, very simply put, is an algorithm that takes a given number of audio channels and turns it into more channels. There are many different types of upmixers, and all of them work differently and are usually after achieving a different goal. I'm not going to get into the differences, but we are after something specific with music.. gaining more than one sweet spot that allows for a presentation similar to stereo. How we do this for our purpose is to use an upmixer that separates the correlated signal (mono, center image, etc) from the uncorrelated signal (far left/far right). Frankly, this is not as simple as I'm making it out to be, and there are currently only 2 processors that are available on the car audio market that can do this properly. One is like 12 years old, and the others are the newer models that are a part of the Audiotec Fischer line of DSP's (Brax, Helix, & Match). Aside from them having the absolute best processors on the market hardware and software wise, they are constantly updating their line to include features that are needed/wanted in today's market. They introduced their "Real Center" upmixer last year and their "Virtual Channels" a bit later. Using these features we can create our own upmixer and use a center channel to get an accurate stage with accurate imaging from both the driver and passenger (and even rear) seats. Again, it is a LOT more involved than I just put it, but that is the gist of it.
Things to note for an upmixed center channel in a car audio system:
1) It needs to be able to play just as loud as your side speakers from about 200hz (preferably lower) all the way up to 20khz
2) No, your wimpy factory speaker will not work
3) The center is going to have the main content, so do not skimp and go with a cheaper speaker here
4) No, just summing left and right to a center channel will not get you imaging/staging from both seats. This will actually be detrimental to both seats.
5) You also need the ability to apply all pass filters to individual speakers
6) To be perfectly honest, a 1 seat tune without the center will pretty much definitely sound better in its sweet spot than any 2 seat tune from any of its sweet spots. It could be a drastic difference, but with a good 2 seat setup, it should only be a mild difference. I have only heard two 2-seat setups to date that sounded as good as an equal 1 seat setup. One is Andy Wehmeyer's car (owner of Audiofrog), and the other is Natan Budiono's car (works for Harmon Kardon tuning the OEM Lexus audio systems). This car is the first time I have come very close, which I attribute to sitting down and actually crunching the numbers on how to formulate my own upmixer in the Helix software. Thankfully, that paid off and the 2 seat tune went perfectly without any hiccups.

Stereo system with Staging and Imaging explained. Remember, imaging is the individual "images", and they create and exist inside the "stage"

So above you saw the OEM B&O center channel. Unfortunately, it was too small and limited us from installing the right choice in drivers for a center channel. We ended up with Audiofrog GB25 and GB10OE. The GB25, due to its relatively insane xmax for its size (4mm), and incredibly low distortion and high power handling, can play low enough and loud enough to get us over that hurdle of a center channel. My goal here was to fabricate a new center channel "cover" that appeared factory but allowed the fitment of these drivers. Pictured here are all of the layers I designed in a CAD software and cut on the laser. It is secured to the OEM center "bucket" with the OEM hardware and mounting locations, and the grill is held in place with neodymium magnets. So frankly, we can design any configuration of new grills and install them as we please if the customer wants. For this go around, I copied the OEM grill pattern. All of the other layers are attached to each other with Acrylic Cement, which chemically bonds the layers together into one.
By the way, I can make these for anyone. Very easy to install.

Here we have the Audiofrog GB25, along with our custom heat shrink that we use to label and brand all wires in our sound systems.

Here is our new center channel assembled and painted. The GB25 is secured with stainless machine screws, and the GB10OE is secured from underneath.


What is hard to see in the first picture showing the OEM center channel, is that the top grill and lower front half are a different color than the upper top half. The grill and lower half are painted black with a low luster clear to mimic the OEM colors for those portions. The top front half was painted the OEM exterior color, as it was on the OEM center channel.
Apicella Auto Sound fabricated, installed, and tuned sound system
Oh, and we added a small touch to the pocket.


The Helix Director, which controls master and all other source volumes, subwoofer volume, bass and treble adjustment, preset storing and changing, system monitoring, and much more was installed in the sunglass holder. Yes, the sunglass holder can still fold up and latch without any issues or hints that anything is installed there.

The subwoofer enclosure was built by MTI Acoustics. Frankly, I do not enjoy building truck under-seat enclosures, and theirs are of great quality for a good price.

And the star of the eye candy show, the custom A-Pillars. These pillars house the remaining Audiofrog GB25's and GB10's behind a grill that matches the OEM aesthetic while spicing it up a bit.


And here is Kevin and I wrapping up the 2-seat tune

Thanks for looking! Once I get to the shop I can post all of the frequency response measurements, which should be interesting for some to see.
Last edited:

