Yukon Joe
FRF Addict
I bought a set of used Fox bump stop pads that are purposed for increased towing capacity. The larger pad extends the original Fox bump stop by about 4". It does this by replacing the original pad. And adds adjustability to the RPG bump stop kit.
Original, off-road and daily driver fix bump stop on the RPG kit.
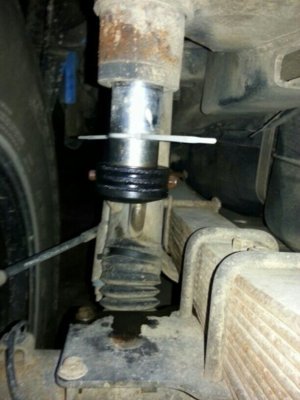
To remove the original pad at the end of the Fox bump is fairly easy. You Need to jack up the body of the truck to give enough room to install the new pad. I put a jack under the tow hitch and raised the truck far enough to where the wheels were still on the ground. I put jack stands under the rear recovery hooks for safety.
The tools required for the change out are minimal.
3/16" allan head socket & ratchet
(Or wrench)
7/16" socket & 1/4" ratchet
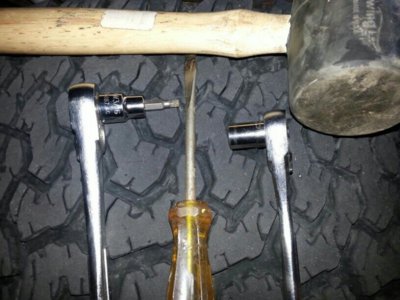
If this is the first time you are changing the bump pad, you may also need the following:
Medium flat head screw driver for prying
Rubber mallet
Anti-seize
1) remove the cap screw and nylon nut with the 3/16" allan socket (or wrench) and the 7/16" socket.
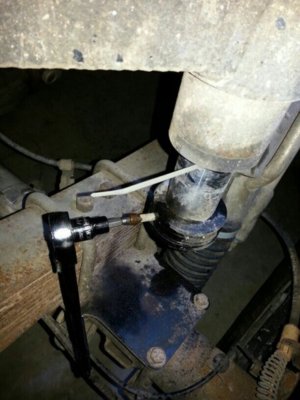
2) remove the bump pad. It is a tight fit. This is where the screw driver and rubber mallet come in handy.
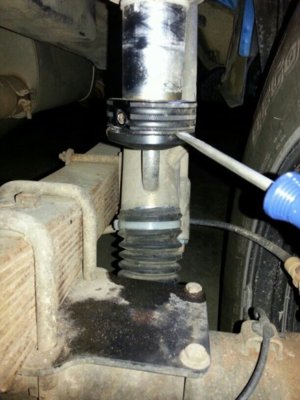
To remove the bolt, I had to use an Allan wrench to help push it through.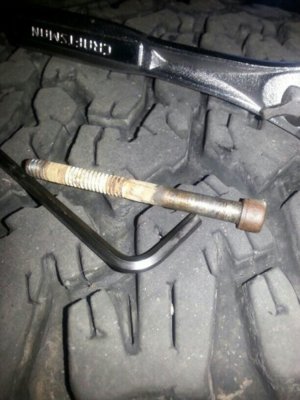
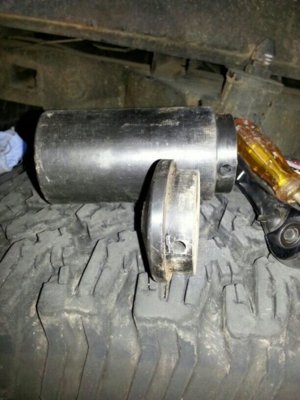
Comparison of the two pads
3) once the original pad was removed, I cleaned the receiving cup on the bump stop with some 3M pads. As you can see, there is dirt and some slight corrosion.
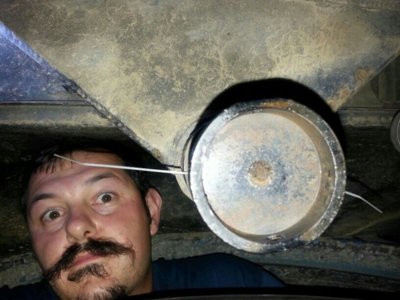
4) I put some anti-sieze in the cup and some on the mounting bolt. Align the mounting holes with the new larger pad.
5) install the bolt and nut. Tighten them down.
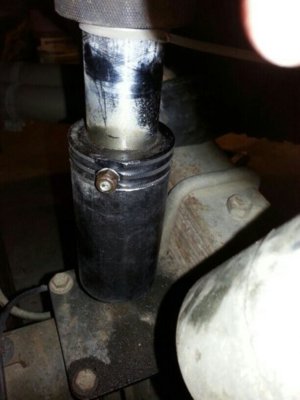
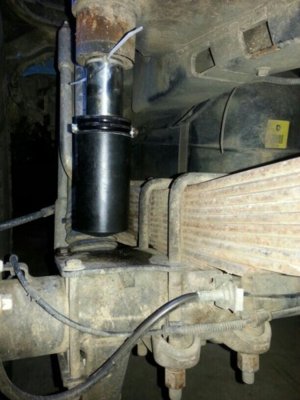
6) Repeat on the other side.
7) Remove the jack stands and lower the truck.
8) you will be able to see that the pad will be in contact with the strike pad on the axle.
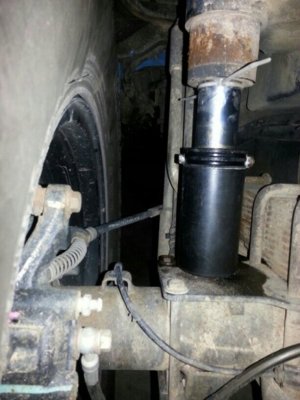
Once the truck was loaded and the popup attached we hit the road. An immediate difference could be felt. With the rear of the truck riding on the bumps stops we could feel every little bump in the road. My truck already towes well with the National HD Springs. So I did not care for the ride at all. It wasn't horrible, but didn't care for it.
If I had a much heavier load to carry, I would use theses. But for long road trips with the popup, I'll probably forgo them.
Once we got to camp for the Havoc in the Hills II run, I changed the bump pad back to the original. It was quite simple and took me about 15 minutes. Including opening a beer and getting the tools out of the off-road tool box.
I'll load more pics once this is approved and I can add another post.
Yukon Joe
Run Raptor Run | Great Lakes Raptor Excursions (GLRE)
Original, off-road and daily driver fix bump stop on the RPG kit.

To remove the original pad at the end of the Fox bump is fairly easy. You Need to jack up the body of the truck to give enough room to install the new pad. I put a jack under the tow hitch and raised the truck far enough to where the wheels were still on the ground. I put jack stands under the rear recovery hooks for safety.
The tools required for the change out are minimal.
3/16" allan head socket & ratchet
(Or wrench)
7/16" socket & 1/4" ratchet

If this is the first time you are changing the bump pad, you may also need the following:
Medium flat head screw driver for prying
Rubber mallet
Anti-seize
1) remove the cap screw and nylon nut with the 3/16" allan socket (or wrench) and the 7/16" socket.

2) remove the bump pad. It is a tight fit. This is where the screw driver and rubber mallet come in handy.

To remove the bolt, I had to use an Allan wrench to help push it through.

Comparison of the two pads

3) once the original pad was removed, I cleaned the receiving cup on the bump stop with some 3M pads. As you can see, there is dirt and some slight corrosion.

4) I put some anti-sieze in the cup and some on the mounting bolt. Align the mounting holes with the new larger pad.
5) install the bolt and nut. Tighten them down.


6) Repeat on the other side.
7) Remove the jack stands and lower the truck.
8) you will be able to see that the pad will be in contact with the strike pad on the axle.

Once the truck was loaded and the popup attached we hit the road. An immediate difference could be felt. With the rear of the truck riding on the bumps stops we could feel every little bump in the road. My truck already towes well with the National HD Springs. So I did not care for the ride at all. It wasn't horrible, but didn't care for it.
If I had a much heavier load to carry, I would use theses. But for long road trips with the popup, I'll probably forgo them.
Once we got to camp for the Havoc in the Hills II run, I changed the bump pad back to the original. It was quite simple and took me about 15 minutes. Including opening a beer and getting the tools out of the off-road tool box.
I'll load more pics once this is approved and I can add another post.
Yukon Joe
Run Raptor Run | Great Lakes Raptor Excursions (GLRE)


