D
Deleted member 12951
Guest
I posted this in the "What did U do to your raptor today" thread but thought it would help to do a double-post in this section incase anyone is looking at installing these and decides to use the Search feature here. I am a novice when it comes to handy work like this but I gave it a shot and here is my quick write up.....
After going to TRR and already seeing how the rear shock guards started to get torn up decided to install these shock guards. Something with just 6 total bolt screws should of taken 15 minutes, so I thought. I fought with the first one for over an hour and threw in the towel and start calling shops. You know after ******** with something so simple for so long, you would rather just pay someone and get it over with? Well called a couple shops and were too busy for Saturday work. So took a long shit and decided to tackle it again. Once I finally got one side done and learned a few things the other side went a lot quicker.
You need an allen wrench to remove the factory bolts holding the plastic shock guard on. Not sure on the exact size, I just brought a set to it and used the one that fit.
The replacement ones from Outlaw are longer to account for the thickness of their guard and is 11mm.
I also used blue locktite as I saw it was on the factory ones. Because it took me too long, I am sure quite a bit didn't stay on for me.
Lessons learned:
1. Start on the outside one since you can't really see the threads due to the tire and leave it real loose. I didn't want to mess with jacking the truck up and removing the tire just to install these.
2. Do the middle one next because you have to slide the thin washer inside between the plastic guard and shock. It's a pain to line up and not really sure why it is needed but it was on factory so decide to keep it on.
3. Do the inside one last and make sure you are lined up straight. The Outlaw holes are somewhat oval to give you some play but the give is on the wrong side. I got crooked and started to mess up the threads.
4. Find the damn torque specs BEFORE you begin a project not AFTER you slightly start to strip one. Damn it!!!
* For the record the specs are NM 4 or 35lb-inch
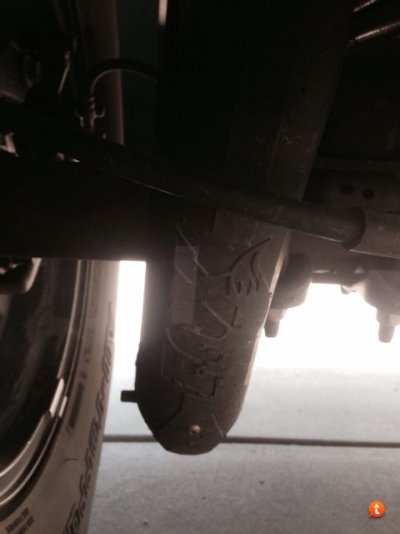
This is how they started to look before I began

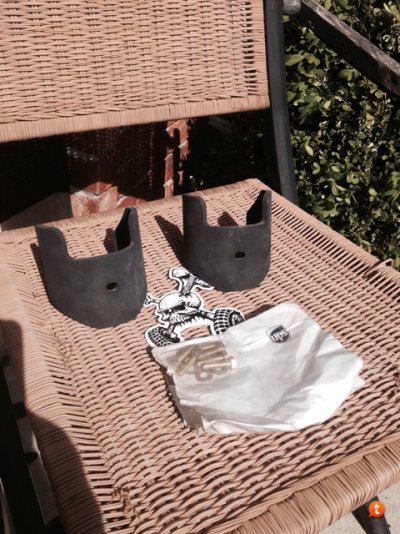
Getting it unpacked and ready to go

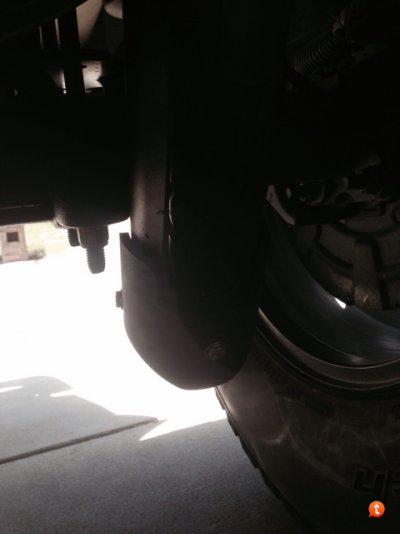
After getting the driver side done (which was my first one)

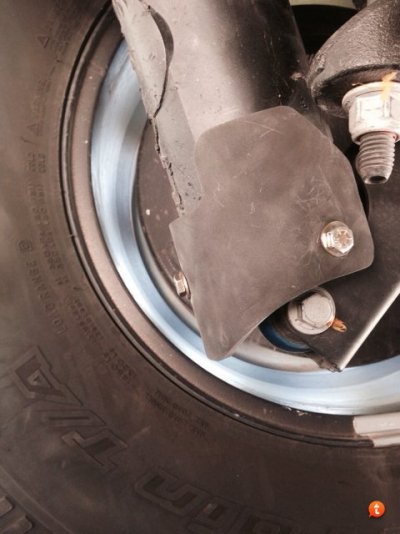
And finally the passenger side

I was also researching and found this too. Anyone ever try these on the rear shock? Not sure if they would help of not, but seems like something easy to take on and off when you go off-roading.
Dirt Bagz:
Race Ready > Dirt Bagz Coil Wraps
After going to TRR and already seeing how the rear shock guards started to get torn up decided to install these shock guards. Something with just 6 total bolt screws should of taken 15 minutes, so I thought. I fought with the first one for over an hour and threw in the towel and start calling shops. You know after ******** with something so simple for so long, you would rather just pay someone and get it over with? Well called a couple shops and were too busy for Saturday work. So took a long shit and decided to tackle it again. Once I finally got one side done and learned a few things the other side went a lot quicker.
You need an allen wrench to remove the factory bolts holding the plastic shock guard on. Not sure on the exact size, I just brought a set to it and used the one that fit.
The replacement ones from Outlaw are longer to account for the thickness of their guard and is 11mm.
I also used blue locktite as I saw it was on the factory ones. Because it took me too long, I am sure quite a bit didn't stay on for me.
Lessons learned:
1. Start on the outside one since you can't really see the threads due to the tire and leave it real loose. I didn't want to mess with jacking the truck up and removing the tire just to install these.
2. Do the middle one next because you have to slide the thin washer inside between the plastic guard and shock. It's a pain to line up and not really sure why it is needed but it was on factory so decide to keep it on.
3. Do the inside one last and make sure you are lined up straight. The Outlaw holes are somewhat oval to give you some play but the give is on the wrong side. I got crooked and started to mess up the threads.
4. Find the damn torque specs BEFORE you begin a project not AFTER you slightly start to strip one. Damn it!!!
* For the record the specs are NM 4 or 35lb-inch
This is how they started to look before I began

Getting it unpacked and ready to go

After getting the driver side done (which was my first one)

And finally the passenger side

I was also researching and found this too. Anyone ever try these on the rear shock? Not sure if they would help of not, but seems like something easy to take on and off when you go off-roading.
Dirt Bagz:
Race Ready > Dirt Bagz Coil Wraps

