KaiserM715
Kaiser Söze
I have really been wanting to add some hood mounted spots, so I installed some Baja Designs SquadronXLs on Alternative Offroad hood mounts. The Squadron XLs are intended to be a long range driving light with the same performance as an 8” HID (as per the BD website). Two cool features about these lights are that they are dimmable (two output settings, one at 45% and the other at 100%) and they have interchangeable lenses.
Here is a link to the lights on the Baja Designs website:
Squadron XL, LED Driving
Here is a link to the hood mounts on the Alternative Offroad website:
Alternative Offroad Ford F-150 & Raptor Hood Mount Light Brackets
Here is a link to some discussion of them here:
http://www.fordraptorforum.com/f81/alternative-offroad-no-cut-hood-mount-light-brackets-26757/
The lights are sold individually with a separate wiring splitter (allowing two lights to be connected together) and vehicle harness is available (it can be integrated into your high beams)
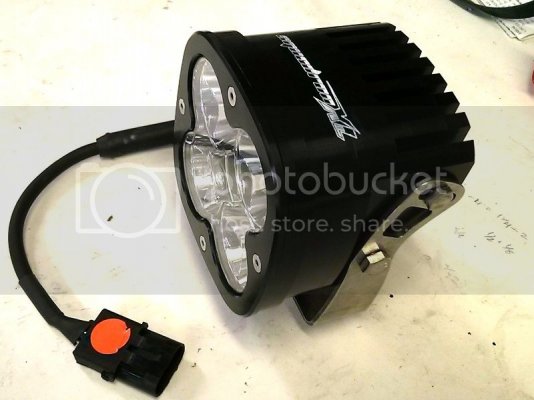
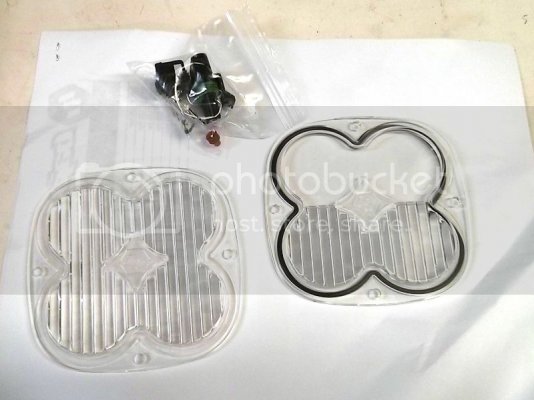
Here is what came in the box with each light:
-One light with the spot lens installed
-One combo lens (spot and wide driving)
-One wide driving lens
-One extra o-ring
-One mating WeatherPack connector
[
Hardware Install
Here are the reference threads I looked at beforehand (note, these two threads cover mounts that require cutting the cowl, nonetheless, they have good info that is applicable):
http://www.fordraptorforum.com/f81/hood-light-mounts-install-walk-thru-lots-o-pics-9705/
http://www.fordraptorforum.com/f81/another-outlaw-hood-mount-thread-easy-one-man-job-edition-17828/
The first order of business is to install the lights on the hood mounts. The lights and mounts are easier to manage as an assembly. In addition, the wiring pig-tail and connector have to go in first, as there is not clearance for it to go in later. I also found it helpful to remove the radio antenna for wrench clearance.
I mounted each side separately, from start to finish. During the mounting portion, it is HIGHLY recommended that you have a buddy to help you out (I got help from my neighbor).
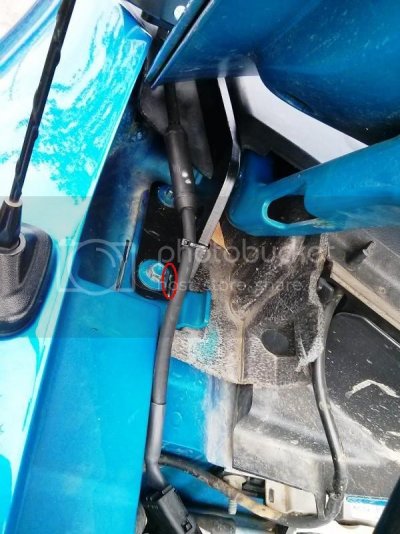
First, open the hood and outline the hood hinge location with a marker (here is pic after the light was installed).
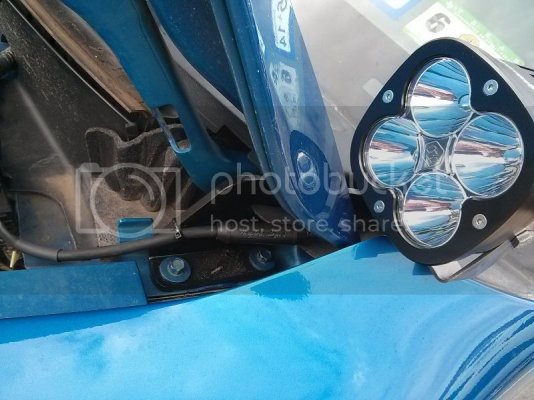
With the hood closed, route the wiring connector in between the cowl and the hood. Then do the same for the light / mount assembly.
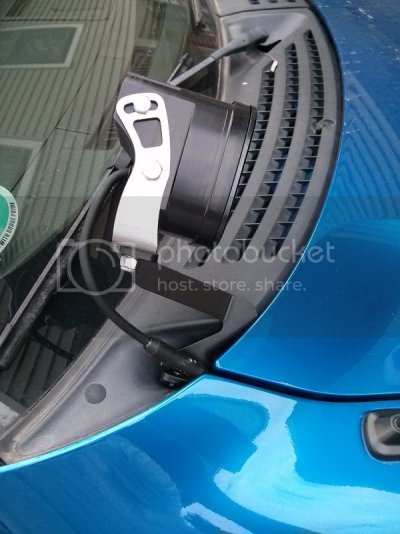
Open the hood and remove the gas strut nearest you at the bottom mount by removing the clip. You can see the clip at the bottom of the strut, it has an outward facing dimple.
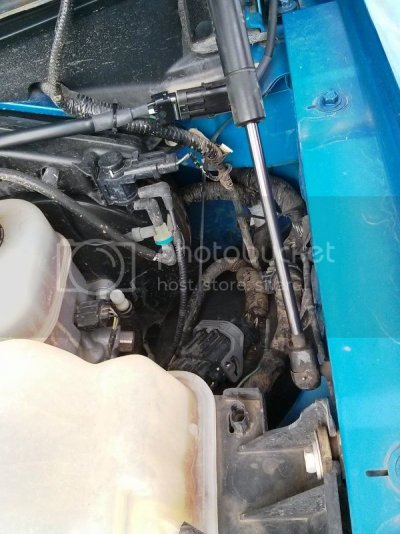
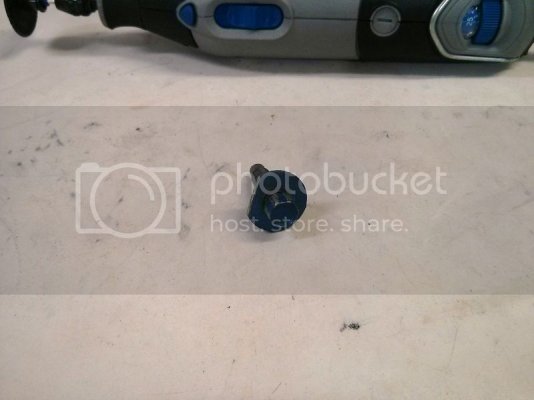
Have your buddy hold the hood up about 75%-80%. Remove the two hood hinge mounting bolts and position the bracket in place. Drop the bolts in and tighten. If you are careful during this step, the hood hinge will not move and you should not have to realign. Reinstall the gas strut and the clip and repeat for the other side. One note: On my truck, I had to cut the washers for the hood bolts on the passenger side in order to get the proper alignment.
Wiring
Here are some reference threads on upfitter wiring:
http://www.fordraptorforum.com/f12/upfitter-aux-switch-wiring-explained-5418/
http://www.fordraptorforum.com/f12/pass-thru-wires-upfitter-switches-explained-video-6501/
http://www.fordraptorforum.com/f170/wire-raptor-aux-upfitter-switches-20335/
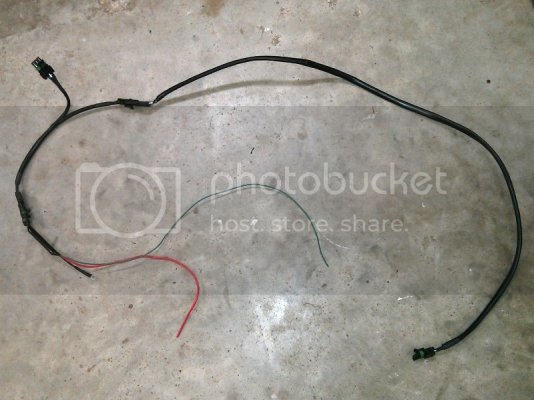
As I have wanted to reconfigure the wiring with my other lights, I bought a WeatherPack kit from Jegs. I used a splitter from Baja Designs and then made two extensions: one from the splitter to the driver’s side light, the other from the battery / ground connections to the splitter, using WeatherPacks at the connections. This harness has three wires: hot, ground and dim. I will hook up the dimming feature at a later date.
Here is the completed harness:
Next , I soldered the pass-through wire to the upfitter wire behind the dash. Under the hood, I made a ground connection using a soldered on ring terminal and connected it to an existing ground (note: I always disconnect the battery before removing existing ground connections). Then I soldered the end of my pigtail to the pass through wire. I covered all of my solder connections with adhesive lined heat shrink.
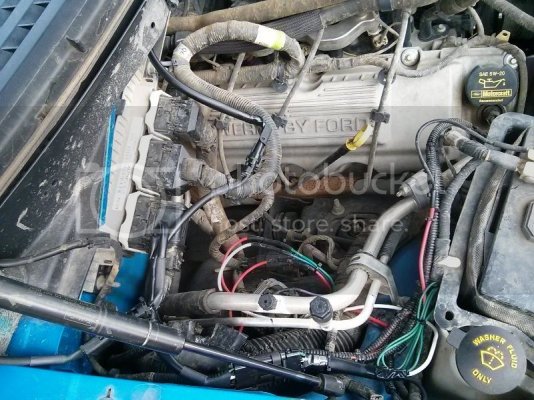
Here you can see some of the connections (the red loose wire, right side of photo, is for future use and the coiled green wire, lower right side, is for the dimming feature):
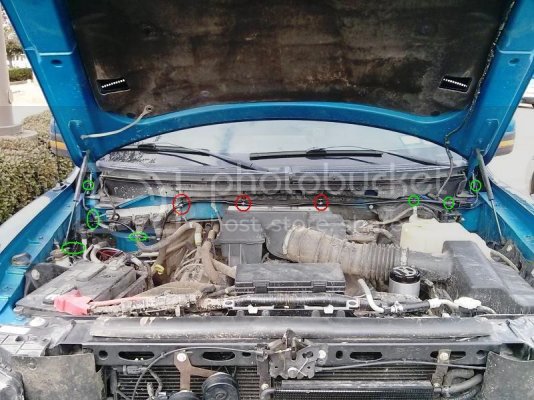
After all of the wiring connections are made, it is time to secure everything. I used a combinations of stainless p-clamps (marked in red) and zip ties (marked in green).
The only thing I have left to do is install a different fuse. These lights are currently installed on Upfitter 2 which has a 30 amp fuse. This is a small maxi cartridge fuse and the lowest amperage they come in is 20 amps.
Impressions
The build quality of these lights is impressive. The fit and finish are top notch. All of the wiring comes with quality loom with the ends heat shrinked. I really like that I can change the beam pattern – but I doubt that I ever will due to their location. The brackets are very sturdy with all of the cuts and bends done by CNC equipment (a big plus in my book). Due to the beef of the mounts, the lights have not wavered at all going down the road. I did notice a slight increase in wind noise, but nothing significant.
Holy cow, these are impressively bright and really send light down range. I will try and get better pics as soon as I can, because these don’t do justice to these lights. Phone pics, street lights and urban light pollution tend to degrade the images.
Here are the Squadrons:
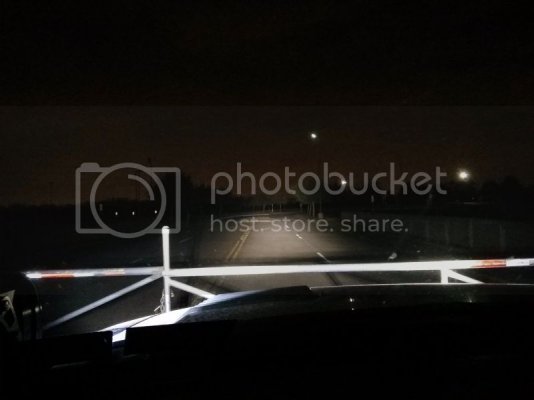
Here is my 20” Rigid E-Series combo:
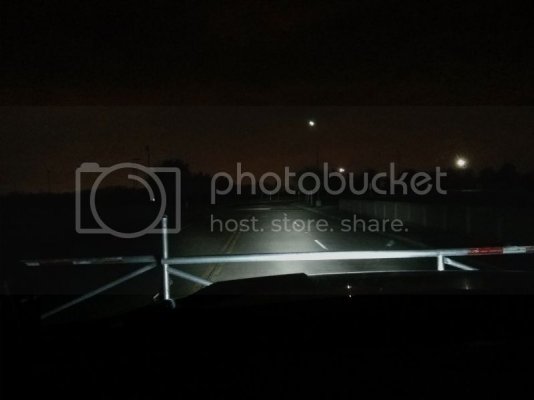
Here are my KC LZR cubes:
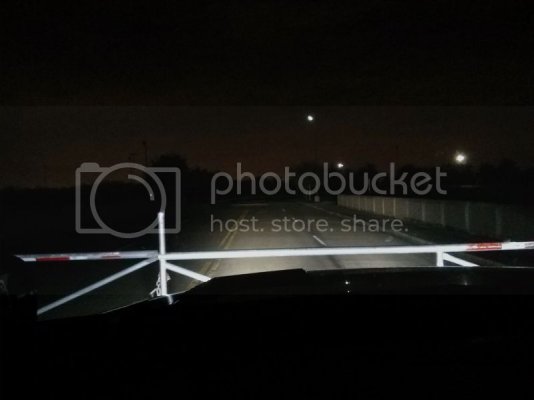
Stock headlights:
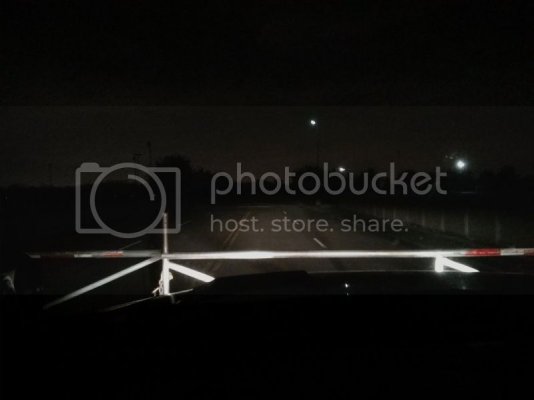
Everything:
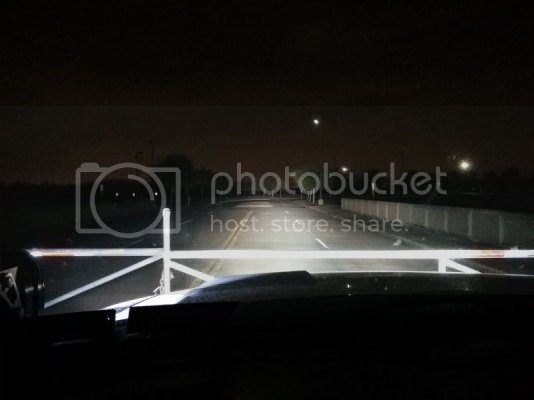
Based on the light patterns I now have, I am planning to re-aim the outboard KCs and for more cornering light.
Overall pic of my setup:
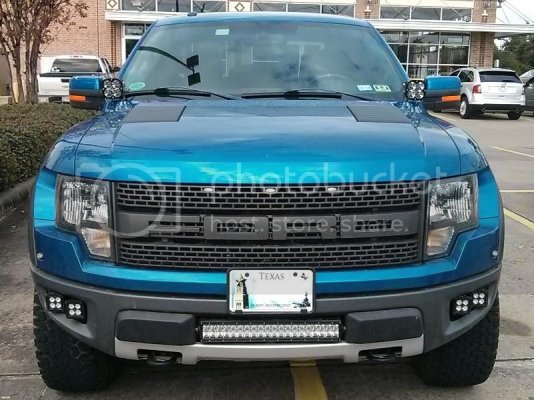
I would love to do a comparison against some hood mount Light Cannons. I will update when I get better pics.
Here is a link to the lights on the Baja Designs website:
Squadron XL, LED Driving
Here is a link to the hood mounts on the Alternative Offroad website:
Alternative Offroad Ford F-150 & Raptor Hood Mount Light Brackets
Here is a link to some discussion of them here:
http://www.fordraptorforum.com/f81/alternative-offroad-no-cut-hood-mount-light-brackets-26757/
The lights are sold individually with a separate wiring splitter (allowing two lights to be connected together) and vehicle harness is available (it can be integrated into your high beams)

Here is what came in the box with each light:
-One light with the spot lens installed
-One combo lens (spot and wide driving)
-One wide driving lens
-One extra o-ring
-One mating WeatherPack connector
[

Hardware Install
Here are the reference threads I looked at beforehand (note, these two threads cover mounts that require cutting the cowl, nonetheless, they have good info that is applicable):
http://www.fordraptorforum.com/f81/hood-light-mounts-install-walk-thru-lots-o-pics-9705/
http://www.fordraptorforum.com/f81/another-outlaw-hood-mount-thread-easy-one-man-job-edition-17828/
The first order of business is to install the lights on the hood mounts. The lights and mounts are easier to manage as an assembly. In addition, the wiring pig-tail and connector have to go in first, as there is not clearance for it to go in later. I also found it helpful to remove the radio antenna for wrench clearance.
I mounted each side separately, from start to finish. During the mounting portion, it is HIGHLY recommended that you have a buddy to help you out (I got help from my neighbor).
First, open the hood and outline the hood hinge location with a marker (here is pic after the light was installed).

With the hood closed, route the wiring connector in between the cowl and the hood. Then do the same for the light / mount assembly.

Open the hood and remove the gas strut nearest you at the bottom mount by removing the clip. You can see the clip at the bottom of the strut, it has an outward facing dimple.

Have your buddy hold the hood up about 75%-80%. Remove the two hood hinge mounting bolts and position the bracket in place. Drop the bolts in and tighten. If you are careful during this step, the hood hinge will not move and you should not have to realign. Reinstall the gas strut and the clip and repeat for the other side. One note: On my truck, I had to cut the washers for the hood bolts on the passenger side in order to get the proper alignment.


Wiring
Here are some reference threads on upfitter wiring:
http://www.fordraptorforum.com/f12/upfitter-aux-switch-wiring-explained-5418/
http://www.fordraptorforum.com/f12/pass-thru-wires-upfitter-switches-explained-video-6501/
http://www.fordraptorforum.com/f170/wire-raptor-aux-upfitter-switches-20335/
As I have wanted to reconfigure the wiring with my other lights, I bought a WeatherPack kit from Jegs. I used a splitter from Baja Designs and then made two extensions: one from the splitter to the driver’s side light, the other from the battery / ground connections to the splitter, using WeatherPacks at the connections. This harness has three wires: hot, ground and dim. I will hook up the dimming feature at a later date.
Here is the completed harness:

Next , I soldered the pass-through wire to the upfitter wire behind the dash. Under the hood, I made a ground connection using a soldered on ring terminal and connected it to an existing ground (note: I always disconnect the battery before removing existing ground connections). Then I soldered the end of my pigtail to the pass through wire. I covered all of my solder connections with adhesive lined heat shrink.
Here you can see some of the connections (the red loose wire, right side of photo, is for future use and the coiled green wire, lower right side, is for the dimming feature):

After all of the wiring connections are made, it is time to secure everything. I used a combinations of stainless p-clamps (marked in red) and zip ties (marked in green).

The only thing I have left to do is install a different fuse. These lights are currently installed on Upfitter 2 which has a 30 amp fuse. This is a small maxi cartridge fuse and the lowest amperage they come in is 20 amps.
Impressions
The build quality of these lights is impressive. The fit and finish are top notch. All of the wiring comes with quality loom with the ends heat shrinked. I really like that I can change the beam pattern – but I doubt that I ever will due to their location. The brackets are very sturdy with all of the cuts and bends done by CNC equipment (a big plus in my book). Due to the beef of the mounts, the lights have not wavered at all going down the road. I did notice a slight increase in wind noise, but nothing significant.
Holy cow, these are impressively bright and really send light down range. I will try and get better pics as soon as I can, because these don’t do justice to these lights. Phone pics, street lights and urban light pollution tend to degrade the images.
Here are the Squadrons:

Here is my 20” Rigid E-Series combo:

Here are my KC LZR cubes:

Stock headlights:

Everything:

Based on the light patterns I now have, I am planning to re-aim the outboard KCs and for more cornering light.
Overall pic of my setup:

I would love to do a comparison against some hood mount Light Cannons. I will update when I get better pics.
Last edited:


