I finally got around to ordering and installing a radio. Hopefully some of the things I did will help someone else, or maybe you will see something I could have done better.
Parts used listed below. Almost everything was ordered from GigaParts.com:
Not part of install but also ordered:
I spent a lot of time reading and studying photos of other builds and credit where credit is due:
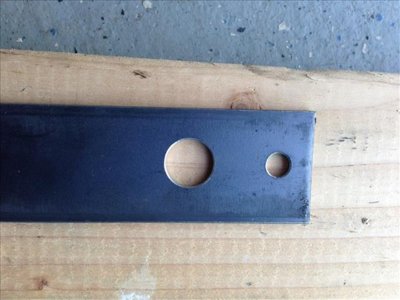
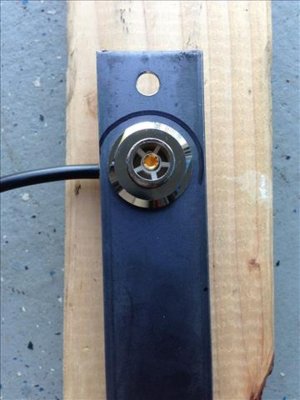
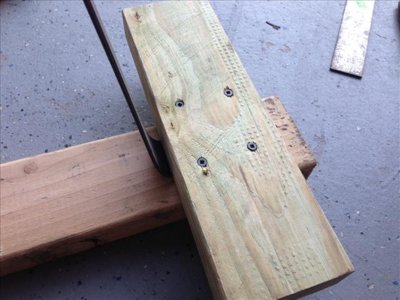
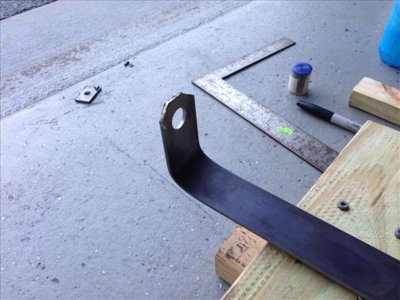
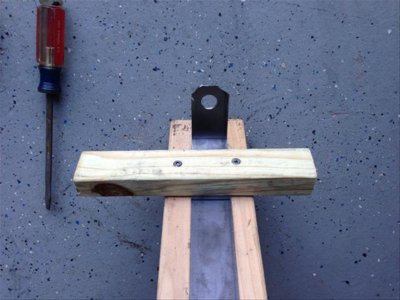
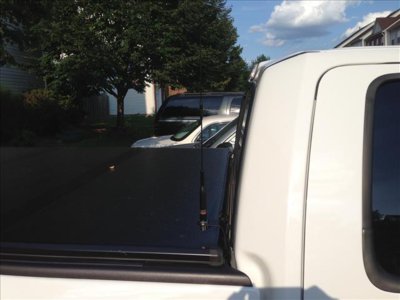
Thanks to Phyguy I already knew exactly what to do for the antenna bracket. My tonneau is an Extang Solid and it stands about an inch above the bedrail so my mount had to be a little taller than his but it’s the same concept. The NMO antenna mount I originally ordered from Giga was not in stock and the replacement gear also had a little more clearance necessary so the bracket had to be even taller. The final bracket stands about 3 inches high. I cut the antenna hole first because it was easier to handle the flat stock. I marked a round line on the end of the bar and did a rough cutaway with a Dremel cutoff wheel. I made a jig to hold the flat bar so I could bend it. I just pressed down on the bar against the stop block with my foot. The bar bent with no problem. I then used a grinder to round out the end of the mount and hit it with 4 coats of 2 in 1 Rustoleum flat black.
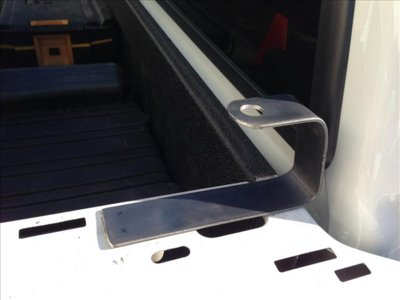
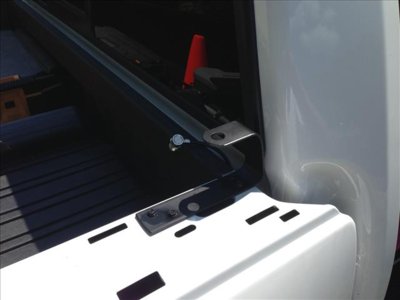
I used a Dremel tool to cut the notch in the plastic bedrail cover to let the mount stick out. The bracket is screwed down with self-taping screws into the rail with star washers to bite through the paint for grounding, then I spot painted over them.
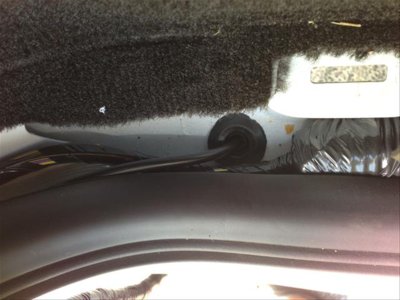
Antenna cable is routed through the rubber grommet in the wiring tray on the passenger side. I didn't want to use the vent in the back of the cab as others have done for fear of water and other things getting into the cab through the gap.
All of the cable is inside split loom tubing and runs down the cable tray under the door sills on the passenger side. Once at the front of the truck the power leads go out through a large rubber grommet in the firewall to the battery and the other cables (mic, control panel and speaker connections) go up on the passenger kick panel, across the bar behind the glove box and either up over the radio for the control cable or down into the console for the mic and speaker cables.
<-- Continued in next post -->
Parts used listed below. Almost everything was ordered from GigaParts.com:
- Kenwood TM-V71A with MARS/CAP Mod
- Kenwood PG-5F Extension Cable Kit
- Kenwood DFK-3D Remote Mount Kit
- Kenwood SP-50B External Speaker
- Comet 3D5M Antenna Cable Assembly
- Comet SBB-2 Antenna
- CAT5E Female-Female Feed-Thru Panel Mount
- - which I am going to replace with this jack
- Proclip Center Mount
- Steel Flat Bar (Antenna mount)
- Flat black paint
- 3M VHB Tape
- Tetrax Fixway dashboard mount
Not part of install but also ordered:
I spent a lot of time reading and studying photos of other builds and credit where credit is due:
- Phyguy for antenna mount
- KaiserM715 for faceplate mount and radio location
- Desaraptor for the jack mount
- All The Way mic mount
Thanks to Phyguy I already knew exactly what to do for the antenna bracket. My tonneau is an Extang Solid and it stands about an inch above the bedrail so my mount had to be a little taller than his but it’s the same concept. The NMO antenna mount I originally ordered from Giga was not in stock and the replacement gear also had a little more clearance necessary so the bracket had to be even taller. The final bracket stands about 3 inches high. I cut the antenna hole first because it was easier to handle the flat stock. I marked a round line on the end of the bar and did a rough cutaway with a Dremel cutoff wheel. I made a jig to hold the flat bar so I could bend it. I just pressed down on the bar against the stop block with my foot. The bar bent with no problem. I then used a grinder to round out the end of the mount and hit it with 4 coats of 2 in 1 Rustoleum flat black.


I used a Dremel tool to cut the notch in the plastic bedrail cover to let the mount stick out. The bracket is screwed down with self-taping screws into the rail with star washers to bite through the paint for grounding, then I spot painted over them.


Antenna cable is routed through the rubber grommet in the wiring tray on the passenger side. I didn't want to use the vent in the back of the cab as others have done for fear of water and other things getting into the cab through the gap.


All of the cable is inside split loom tubing and runs down the cable tray under the door sills on the passenger side. Once at the front of the truck the power leads go out through a large rubber grommet in the firewall to the battery and the other cables (mic, control panel and speaker connections) go up on the passenger kick panel, across the bar behind the glove box and either up over the radio for the control cable or down into the console for the mic and speaker cables.
<-- Continued in next post -->
Last edited:


