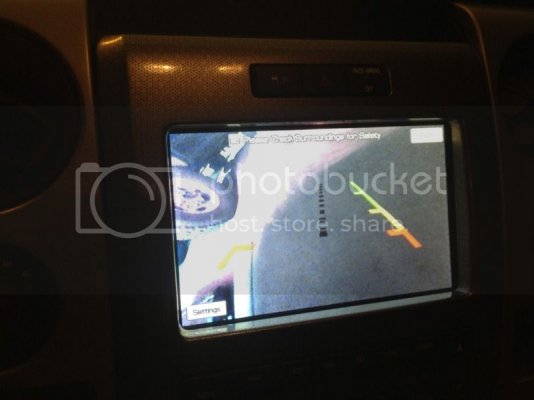
So my 2011 has the Nav system yet is missing the rear camera. I have been on the fence to do the install as its one of those luxury items that you ask yourself do I "really" need that? I do find myself hating backing up with the huge blind spot the F150 has. I did remove my rear headrests to aid in seeing behind me but having a back up cam will be even better. Having the ability to do the programming myself and getting a good price on the parts helped sway me in the direction of doing the retrofit.
I will get a part number list up for you guys looking to do the same. It is pretty straight forward with the camera itself being the expensive part. Also keep in mind you will probably need to pay for programming at the dealer unless you happen to have access to IDS. I will also explain in a little detail on the programming when I get to that point. It might help those of you with dealer that says its not possible.
Part #s required
BL3Z-19G490-B Camera Assembly
N895949 Screw (2x needed)
W714711 Insert (2x needed)
AL3Z-19H511-A Camera housing
BL3Z-14A411-A Wiring Assembly
CL3Z-9942528-AA Name Plate Ford Emblem
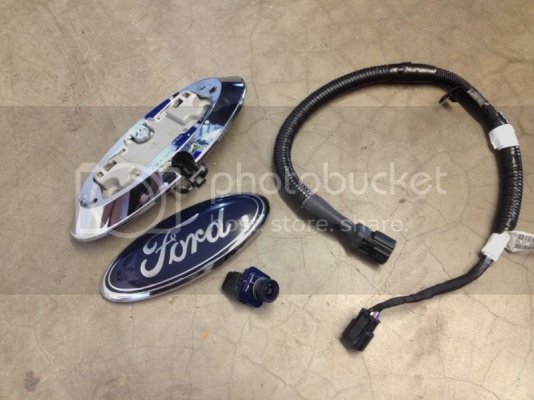
Mount the camera assembly in the new emblem housing, it only fits one way so no worries on having a misadjusted camera alignment
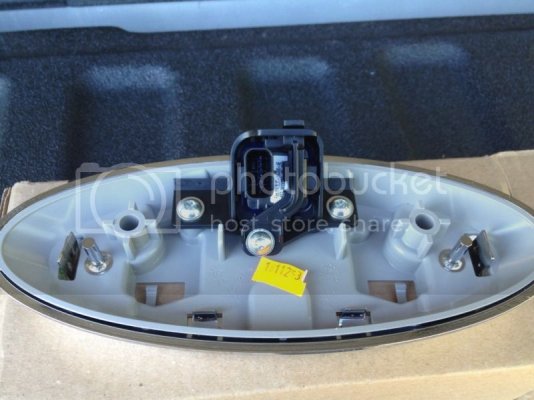
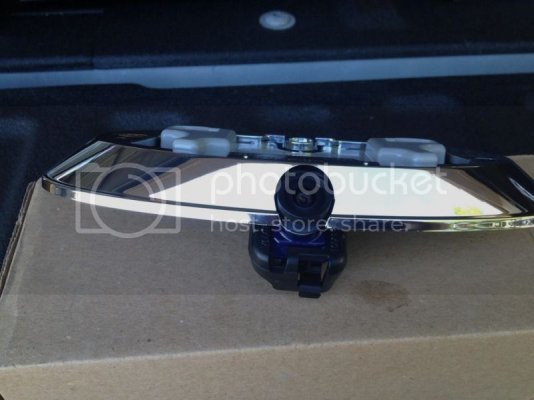
Use a heat gun to heat up the original ford emblem to remove the gate and clean up all the left over 3m tape. Feed the wire harness down the tailgate through the center opening in the bottom of the gate
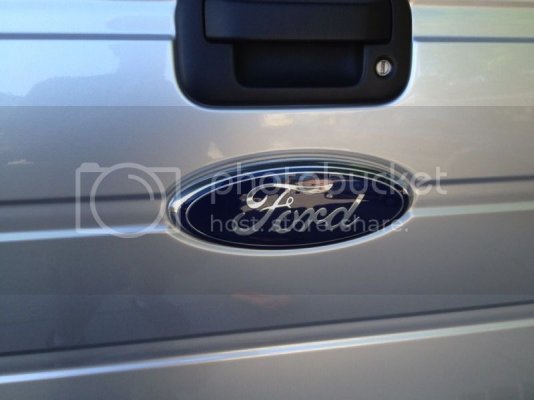
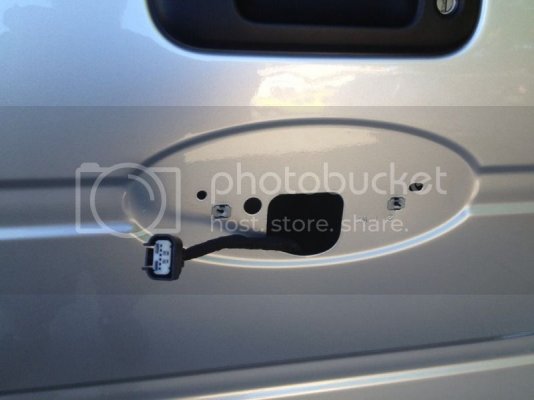
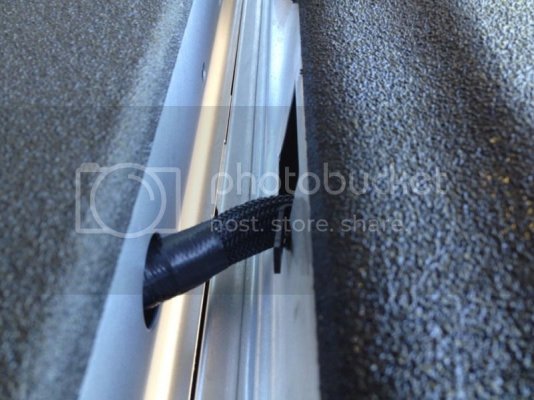
Here is the factory location of the camera plug. There will be a blank installed you will need to remove
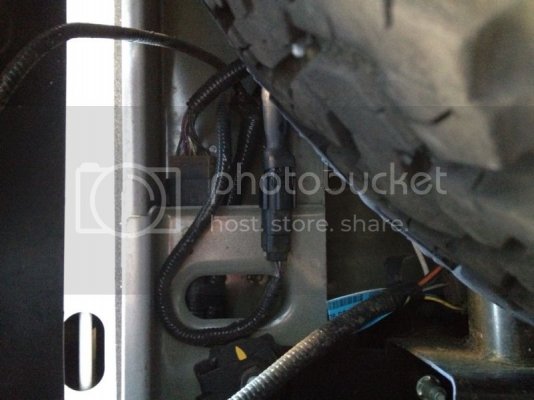
Thats it for the parts install, it was very easy and maybe took me about a hour only because removing the old emblem was a bit time consuming.
The next step in the install is programming of the Audio Control Module or ACM for short. The rear camera information is passed through a couple modules including the FDIM and BCM. The ACM however is going to be what you want to change to get the camera to display on your Nav screen. Your going to need the As-Built Data from a vehicle that was built from the factory with the options your trying to install. In this case I needed a VIN from a Raptor that was built with a Backup Camera. Its always best to find a truck as close to yours as possible for example mine is a 2011 so I wanted to find another 2011. I just so happened to find a VIN for truck on ebay with a build date 1 month newer then mine but getting within the same model year is enough. From there is was a matter of running the VIN for the AS-Built Data for that vehicle. (If anyone needs help with getting as-built data let me know). The ACM data is 18 lines of code which basically tells the ACM what to look for on the vehicle for installed equipment such as the back up camera. After entering all the data into the programming section of the IDS you can upload it to the module and enjoy the features of the backup camera.
A interesting feature I missed with the excitement of being able to see behind me is your able to zoom the camera to aid in hooking up a trailer. I have the button on the screen to select however it does not zoom when pressed. I believe this feature to be controlled through a different module either the BCM or FDIM and I will need to change the AS-built for that module as well. Im not to concerned with it at this point in time as everything else functions as it should and when I get some free time I will investigate further.
I will get a part number list up for you guys looking to do the same. It is pretty straight forward with the camera itself being the expensive part. Also keep in mind you will probably need to pay for programming at the dealer unless you happen to have access to IDS. I will also explain in a little detail on the programming when I get to that point. It might help those of you with dealer that says its not possible.
Part #s required
BL3Z-19G490-B Camera Assembly
N895949 Screw (2x needed)
W714711 Insert (2x needed)
AL3Z-19H511-A Camera housing
BL3Z-14A411-A Wiring Assembly
CL3Z-9942528-AA Name Plate Ford Emblem

Mount the camera assembly in the new emblem housing, it only fits one way so no worries on having a misadjusted camera alignment


Use a heat gun to heat up the original ford emblem to remove the gate and clean up all the left over 3m tape. Feed the wire harness down the tailgate through the center opening in the bottom of the gate


Here is the factory location of the camera plug. There will be a blank installed you will need to remove

Thats it for the parts install, it was very easy and maybe took me about a hour only because removing the old emblem was a bit time consuming.
The next step in the install is programming of the Audio Control Module or ACM for short. The rear camera information is passed through a couple modules including the FDIM and BCM. The ACM however is going to be what you want to change to get the camera to display on your Nav screen. Your going to need the As-Built Data from a vehicle that was built from the factory with the options your trying to install. In this case I needed a VIN from a Raptor that was built with a Backup Camera. Its always best to find a truck as close to yours as possible for example mine is a 2011 so I wanted to find another 2011. I just so happened to find a VIN for truck on ebay with a build date 1 month newer then mine but getting within the same model year is enough. From there is was a matter of running the VIN for the AS-Built Data for that vehicle. (If anyone needs help with getting as-built data let me know). The ACM data is 18 lines of code which basically tells the ACM what to look for on the vehicle for installed equipment such as the back up camera. After entering all the data into the programming section of the IDS you can upload it to the module and enjoy the features of the backup camera.
A interesting feature I missed with the excitement of being able to see behind me is your able to zoom the camera to aid in hooking up a trailer. I have the button on the screen to select however it does not zoom when pressed. I believe this feature to be controlled through a different module either the BCM or FDIM and I will need to change the AS-built for that module as well. Im not to concerned with it at this point in time as everything else functions as it should and when I get some free time I will investigate further.
Last edited:


