DezRaceSVT
Full Access Member
So I recently bought a Icom 880h after doing alot of research on what radio would be the best for me. I also wanted to have a clean install so when im not using the radio you wouldn't know that I had one. So after searching FRF I found PhyGuys install http://www.fordraptorforum.com/f12/icom-id-880h-install-lots-pics-16688/and this was exactly what I was looking for but I had a few changes in mind. All the wires are ran the same way he did hidden and out of the way. I dont have any pics of the wire routing throughout the cab and the engine compartment so if you want to see how that is done just refer to the link above because he has it covered.
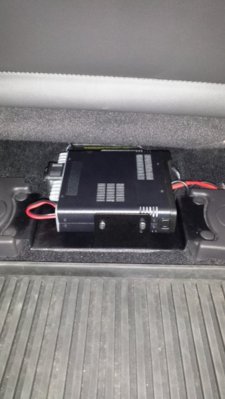
To start off I mounted the radio under the passenger seat so it was out of the way. I didnt want to put any holes in the bottom of the cab with the provided self tapping screws. What I came up with was that I would use a mount that would secure to the metal seat frame rails. As you can see I attached the radio mount to the seat frame rails using the factory plastic push pins. There are no worries that the radio will come loose; the push pins secure it really well.
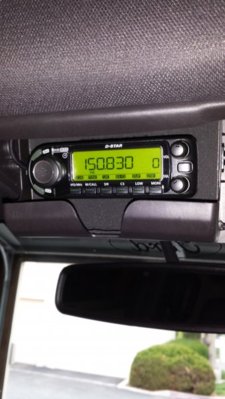
Now it was on to the detachable face. I installed the face in the sunglasses holder using heavy duty velcro and the supplied metal mounting plate. The back of the detachable face has heavy duty magnets built in, and really have a good hold, so the face wont pop off.
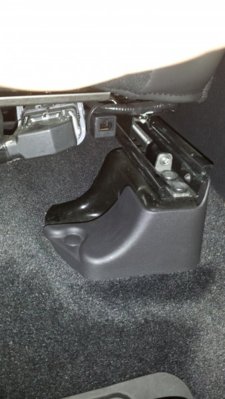
Next was the Mic. cable I didnt want to drill any holes into the center console, or anywhere on the dash. So an easy solution to this was to buy a 3ft. long cat 5 cable and a double female cat 5 connector. I ran the 3ft. cat cable under the passenger seat to the double female cat connector and secured it to one of the existing wire bundles under the pass. front seat. The double female cat connector wont fall into the seat tracks because the cable has a groove in the center so it cant slide forward or back. Also all the existing wire bundles under the pass seat will need to be zip tied up so they can clear the radio and as for the 3ft. cat cable it was zip tied into place with the extra slack at the back of the pass. seat so the seat can move all the way forward and back with no snags and it has plenty of slack. Here you can see the double female cat connector. It's out of the way but easy access for the mic to be pluged in.
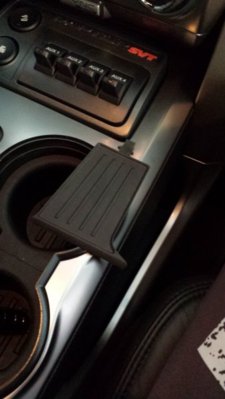
I wanted to have the mic on the passenger side just for safety reasons like the mic getting stuck under the brake pedal. So for the mic attachment I figured I would put the random hole in the dash to use. If you lift and pull the rubber mat in that hole it will come out. As you can see the rubber mat has some prongs on each side and that is all that keeps it in.
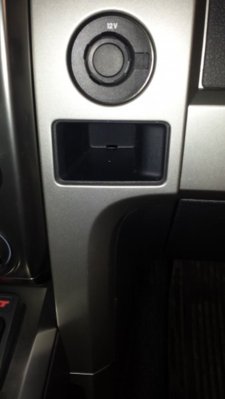
So I wanted to make a mount that I could install in a few minutes. I made the mount to fit in the same groove that the rubber mat fit in. I also needed a way to secure the mount to the panel so a simple nut and bolt would work for that. Here you can see the slot in the back of the panel that im talking about and the white dot is where the hole was drilled.
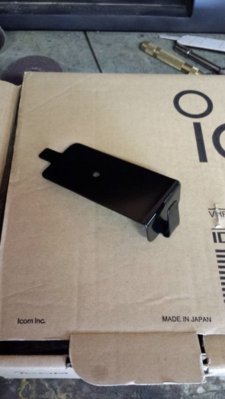
This is the bracket that I made for the mic. Simple and easy.
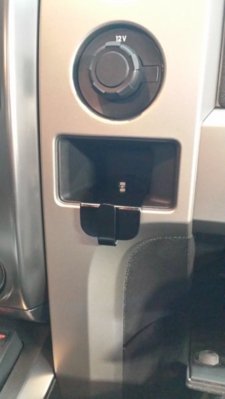
Bracket installed. It is really easy to install the nut and bolt all you have to do is drop the glove box down and you can access the back side of the pannel where the hold was drilled.
Mic. installed.
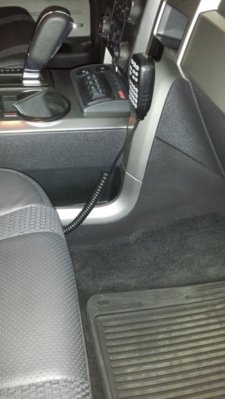
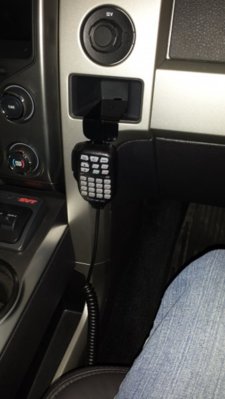
Job done. What do you guys think?
To start off I mounted the radio under the passenger seat so it was out of the way. I didnt want to put any holes in the bottom of the cab with the provided self tapping screws. What I came up with was that I would use a mount that would secure to the metal seat frame rails. As you can see I attached the radio mount to the seat frame rails using the factory plastic push pins. There are no worries that the radio will come loose; the push pins secure it really well.

Now it was on to the detachable face. I installed the face in the sunglasses holder using heavy duty velcro and the supplied metal mounting plate. The back of the detachable face has heavy duty magnets built in, and really have a good hold, so the face wont pop off.

Next was the Mic. cable I didnt want to drill any holes into the center console, or anywhere on the dash. So an easy solution to this was to buy a 3ft. long cat 5 cable and a double female cat 5 connector. I ran the 3ft. cat cable under the passenger seat to the double female cat connector and secured it to one of the existing wire bundles under the pass. front seat. The double female cat connector wont fall into the seat tracks because the cable has a groove in the center so it cant slide forward or back. Also all the existing wire bundles under the pass seat will need to be zip tied up so they can clear the radio and as for the 3ft. cat cable it was zip tied into place with the extra slack at the back of the pass. seat so the seat can move all the way forward and back with no snags and it has plenty of slack. Here you can see the double female cat connector. It's out of the way but easy access for the mic to be pluged in.

I wanted to have the mic on the passenger side just for safety reasons like the mic getting stuck under the brake pedal. So for the mic attachment I figured I would put the random hole in the dash to use. If you lift and pull the rubber mat in that hole it will come out. As you can see the rubber mat has some prongs on each side and that is all that keeps it in.

So I wanted to make a mount that I could install in a few minutes. I made the mount to fit in the same groove that the rubber mat fit in. I also needed a way to secure the mount to the panel so a simple nut and bolt would work for that. Here you can see the slot in the back of the panel that im talking about and the white dot is where the hole was drilled.

This is the bracket that I made for the mic. Simple and easy.

Bracket installed. It is really easy to install the nut and bolt all you have to do is drop the glove box down and you can access the back side of the pannel where the hold was drilled.

Mic. installed.


Job done. What do you guys think?
Last edited:

