pat'sRAPTOR
FRF Addict
I got my RPG raceline bumpers yesterday and installed them this morning. very easy and straight forward install. the cutting of the frame for the front and rear are also really straight forward. i had a few guys ask me to do a write up on the frame mods and the dove tailing cause like a lot of you guys they were extremely iffy on taking an angle grinder or saws all to their truck. my baby is over 3 years old and well im very comfortable with doing these sort of mods plus I've put mmy truck through worse i promise you that.
on to the front frame mod. its simple to do just remember triple check all your measurements cause you wanna measure twice cut once not the other way around haha.
the video RPG has for the frame mod will pretty much explain everything you need to do to cut the frame off.
here is the link to the video:Race Line Front Bumper Frame Mod | Raptor Performance Group
I followed the video exactly! measured it checked it about 7 times. i taped of the whole frame horn to be able to see the lines i measured.
http://i1167.photobucket.com/albums/q640/patsraptor/163_zps228d6bdf.jpg
once i was sure i had all the measurements i took my angle grinder with a 5" metal cut of disc and got to cutting!


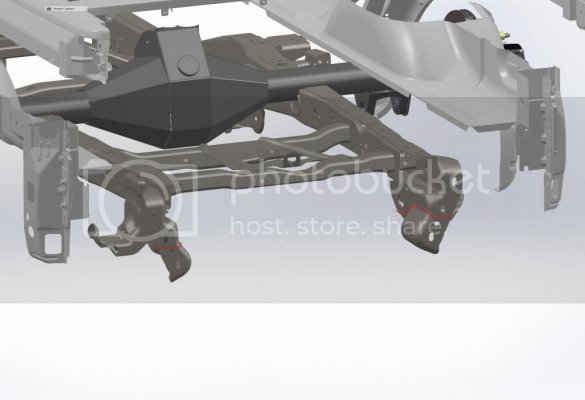
once i was done with the front i moved to the back. corey sent me a file that showed where to cut the rear frame for the rear raceline once again super straight forward and easy! and for some reason i can't find the pictures i took of the rear frame cutting but the picture of the file Corey sent me is really all you need. just follow the red line and the curves of the frame and you're good to go!!
once all the frame mods were done its time to dove tail the rear bedsides!!!!!!!!
you want to remove that plastic guard that's behind the rear wheel, clean the are where you are gonna be cutting and then tape it... I used masking tape to tape off the area this helps keep the paint from chipping while cutting the bed and i used yellow masking take so you can see the black sharpie line a lot easier. i layed down electrical tape to get the angle just right. ok now once you've removed the plastic guard you will see an area that was under that guard that is indented. the part thats closest to the wheel where it comes back up from that dent is your reference point for starting the cut from under the bed cause you wanna leave enough room on the edge for the weather striping.
in this picture you can the tap curve around the corner of the indented area and runs down the bottom leaving that little bit so the weather stripping has something to be applied to.. now thank god core mentioned this little piece of info because i was going to cut it right along the fender flare and leave no room at all for the weather stripping and would have been screwed so please make sure you do this step!!!
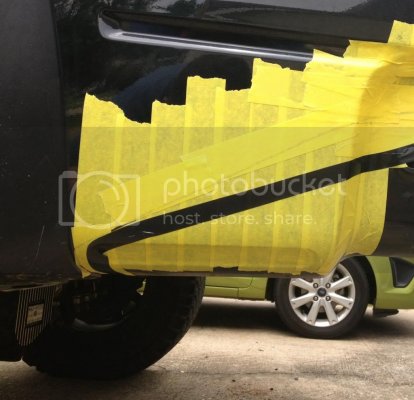
now take that curved part of the indentation and you're going to use that curve to help with the angle of the cut. from that curve run the tap up to the hole in the side you want to make the line run right to the top of that hole. on the inside of the bed side there is a bracket that hangs down you can kind of see in this picture its hard to see but looking at the truck you'll see the line I'm talking about.

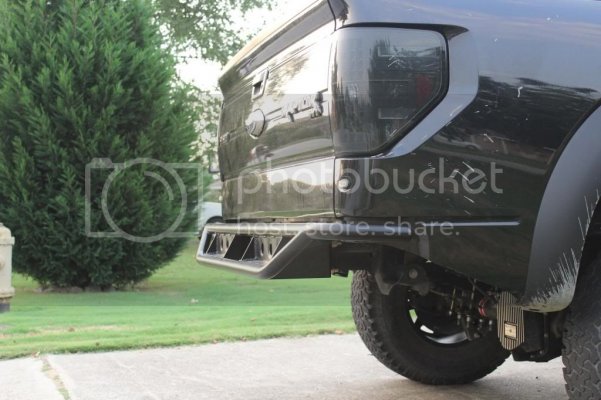
ok so here are the pictures of the cutting process. i used a saws all but you can use a body saw which is just a smaller version of a saws all. now make sure you have a metal cutting blade with AT LEAST 18TPI (teeth per inch) i used a blade with 24TPI for a cleaner cut. now while cutting its hard to make the blade curve so what i did was start at the bottom and bring the cut up to the part that starts to curve up and back and once the blade wouldn't turn with the line anymore i stopped. the i started from the back below the tailgate started my cut from there remembering to go slow bring the cut around to the side of the bed and follow the line as it curves down and meet the line that you cut from the bottom previously. it wont be a curved cut but that's an easy fix just take you're angle grinder and curve it back with the line you drew and just like that you're done!!! Corey also told me that you need to paint the edge before putting the weather stripping on so the edge wont rust. you can use touch up paint or nail polish for whatever color your truck is. it doesn't have to be perfect because the weather stripping will cover it.


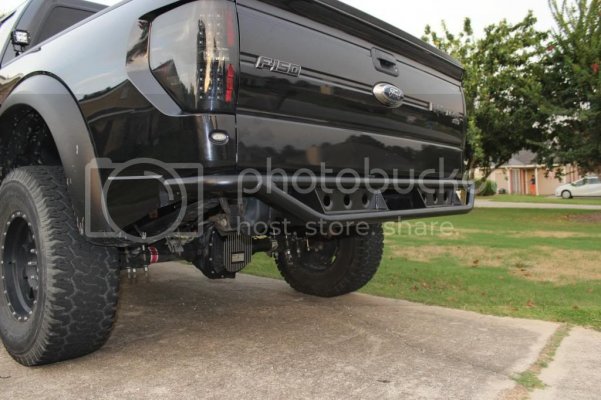
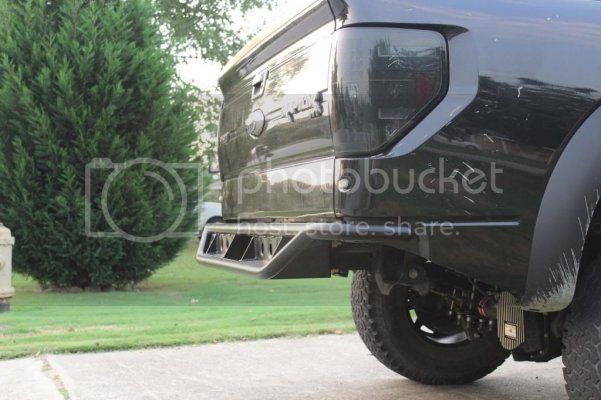
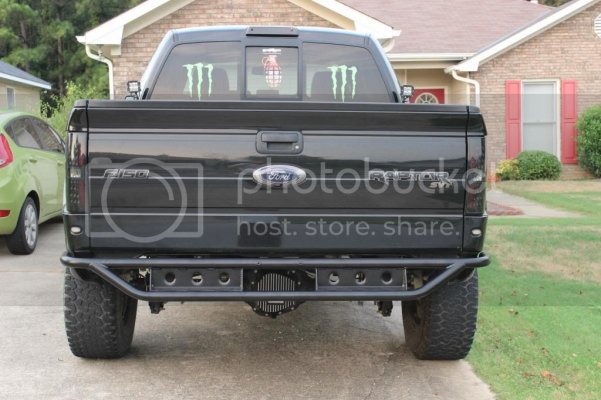
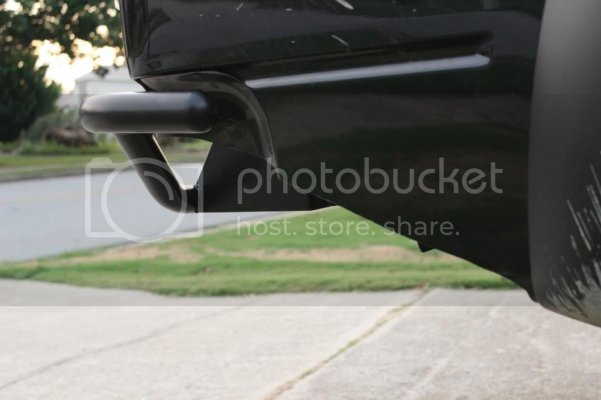
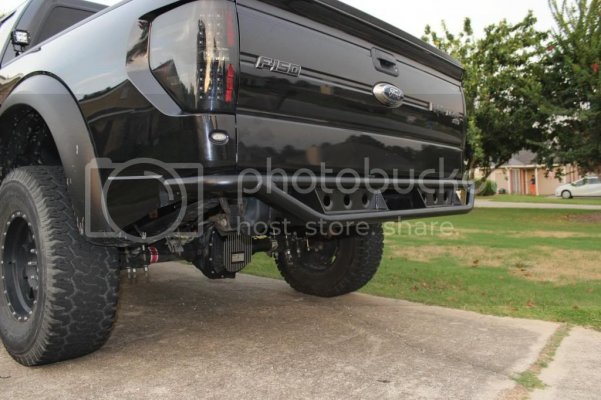
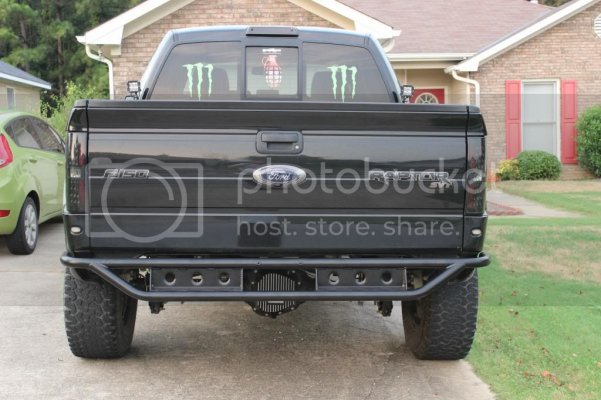
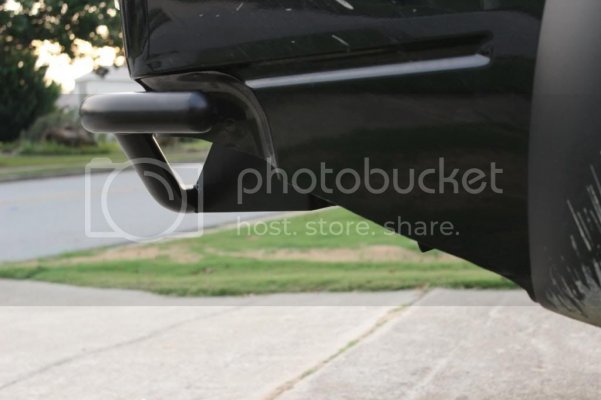
ok so now on to the installation of the bumpers. i started with the easy one first the rear bumper. all you have to so now is throw it on and bolt it down. i tightened that bolts down as tight as i could get them. and DONE!!
finished product!
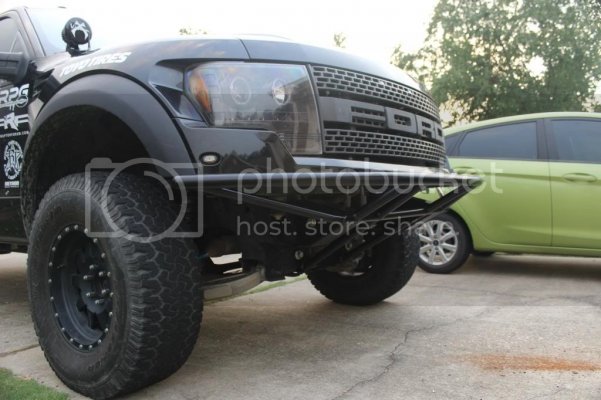
ok now to the front. what you want to do first is drop the skid plat either all the way down or do what i did and took 3 of the 4 bolts out and loosened the 4th one and swung it out of the way. the reason you do this is because the lower attachment part of the bumper has been cut so that once the bumper is on that lower skid plat will sit up flush with the bumper and it looks streamline. once that is dropped now you want to take out the two bold on the front cross member that hold the steering rack in place. now don't start freaking out haha taking these bolts out won't screw up anything in the steering its not gonna fall out or fall apart.
with all that out of the way you're ready to start with the the holes that are in the frame where the bolts will go through the frame and hold the bumper on. RPG supplies you with two tubes that will slide into those holes in the frame.

Corey designed it with these tubes there so that when you tighten the 3/4 bolt you wont crush the frame.now the opening for these tubes are a little small so what i did was get my dremal out with a grinding wheel and made the opening on the wholes large enough for the tubes to fit in. if you don't have a dremal you could use a file.it looks like this.

once the holes are large enough slide the tube into the frame. now depending on what length they cut the tubes at you will have to either cut some off or maybe just file or grind some down because you want the ends of the tube to sit flush with the outer edge of the frame while they're in the holes on the frame. like this.


this is how much i had to cut off each one.

after that you're ready to throw the front bumper on.

now make sure you slide the two steering rack bolts in the lower part of the bumper mounts BEFORE you put it on the truck haha they're large long bolts so once those two steering rack bolts are in you can slide the bumper onto the frame horns. this is easier with two people but i did it by myself cause I'm a MAN! haha get it on there slide the bolts through the frame and put the nut on. the washer goes against the bolt head no washer against the nut. don't tighten anything down just yet. next you get the steering rack bolts all the way in you might have to move the rack around to get the bolts in. once they're in tighten them down as tight as you're little girly arms can get them haha they should be extremely tight is what Corey told me.

tighten down the two bolts on the frame and make sure those too are extremely tight like super duper tight haha the nuts are self locking nuts so no need for thread locker but if you would feel better with some on then go ahead and throw some on there. once the bolts on the bumper are all super tight you can now put the lower skid plate back up and you're all done.
i know this is a very long write up but it really doesn't take very long to install the bumpers and do the mods it can easily be done by one or two people and maybe a 6 pack. i don't have my skid plate yet or my 20" light bar that goes in the bumper. the light bar and weather stripping will be here Monday and my skid plate right now is sitting at kirks (raptor addict) for a custom paint job. he's doing a lime green on the skid plate and also a coat of the 3M clear bra spray protection so the awesome paint job wont get nicks and scratches!
now for some ****!


on to the front frame mod. its simple to do just remember triple check all your measurements cause you wanna measure twice cut once not the other way around haha.
the video RPG has for the frame mod will pretty much explain everything you need to do to cut the frame off.
here is the link to the video:Race Line Front Bumper Frame Mod | Raptor Performance Group
I followed the video exactly! measured it checked it about 7 times. i taped of the whole frame horn to be able to see the lines i measured.
http://i1167.photobucket.com/albums/q640/patsraptor/163_zps228d6bdf.jpg
once i was sure i had all the measurements i took my angle grinder with a 5" metal cut of disc and got to cutting!


once i was done with the front i moved to the back. corey sent me a file that showed where to cut the rear frame for the rear raceline once again super straight forward and easy! and for some reason i can't find the pictures i took of the rear frame cutting but the picture of the file Corey sent me is really all you need. just follow the red line and the curves of the frame and you're good to go!!

once all the frame mods were done its time to dove tail the rear bedsides!!!!!!!!
you want to remove that plastic guard that's behind the rear wheel, clean the are where you are gonna be cutting and then tape it... I used masking tape to tape off the area this helps keep the paint from chipping while cutting the bed and i used yellow masking take so you can see the black sharpie line a lot easier. i layed down electrical tape to get the angle just right. ok now once you've removed the plastic guard you will see an area that was under that guard that is indented. the part thats closest to the wheel where it comes back up from that dent is your reference point for starting the cut from under the bed cause you wanna leave enough room on the edge for the weather striping.
in this picture you can the tap curve around the corner of the indented area and runs down the bottom leaving that little bit so the weather stripping has something to be applied to.. now thank god core mentioned this little piece of info because i was going to cut it right along the fender flare and leave no room at all for the weather stripping and would have been screwed so please make sure you do this step!!!

now take that curved part of the indentation and you're going to use that curve to help with the angle of the cut. from that curve run the tap up to the hole in the side you want to make the line run right to the top of that hole. on the inside of the bed side there is a bracket that hangs down you can kind of see in this picture its hard to see but looking at the truck you'll see the line I'm talking about.

ok so here are the pictures of the cutting process. i used a saws all but you can use a body saw which is just a smaller version of a saws all. now make sure you have a metal cutting blade with AT LEAST 18TPI (teeth per inch) i used a blade with 24TPI for a cleaner cut. now while cutting its hard to make the blade curve so what i did was start at the bottom and bring the cut up to the part that starts to curve up and back and once the blade wouldn't turn with the line anymore i stopped. the i started from the back below the tailgate started my cut from there remembering to go slow bring the cut around to the side of the bed and follow the line as it curves down and meet the line that you cut from the bottom previously. it wont be a curved cut but that's an easy fix just take you're angle grinder and curve it back with the line you drew and just like that you're done!!! Corey also told me that you need to paint the edge before putting the weather stripping on so the edge wont rust. you can use touch up paint or nail polish for whatever color your truck is. it doesn't have to be perfect because the weather stripping will cover it.


ok so now on to the installation of the bumpers. i started with the easy one first the rear bumper. all you have to so now is throw it on and bolt it down. i tightened that bolts down as tight as i could get them. and DONE!!
finished product!


ok now to the front. what you want to do first is drop the skid plat either all the way down or do what i did and took 3 of the 4 bolts out and loosened the 4th one and swung it out of the way. the reason you do this is because the lower attachment part of the bumper has been cut so that once the bumper is on that lower skid plat will sit up flush with the bumper and it looks streamline. once that is dropped now you want to take out the two bold on the front cross member that hold the steering rack in place. now don't start freaking out haha taking these bolts out won't screw up anything in the steering its not gonna fall out or fall apart.
with all that out of the way you're ready to start with the the holes that are in the frame where the bolts will go through the frame and hold the bumper on. RPG supplies you with two tubes that will slide into those holes in the frame.

Corey designed it with these tubes there so that when you tighten the 3/4 bolt you wont crush the frame.now the opening for these tubes are a little small so what i did was get my dremal out with a grinding wheel and made the opening on the wholes large enough for the tubes to fit in. if you don't have a dremal you could use a file.it looks like this.

once the holes are large enough slide the tube into the frame. now depending on what length they cut the tubes at you will have to either cut some off or maybe just file or grind some down because you want the ends of the tube to sit flush with the outer edge of the frame while they're in the holes on the frame. like this.


this is how much i had to cut off each one.

after that you're ready to throw the front bumper on.

now make sure you slide the two steering rack bolts in the lower part of the bumper mounts BEFORE you put it on the truck haha they're large long bolts so once those two steering rack bolts are in you can slide the bumper onto the frame horns. this is easier with two people but i did it by myself cause I'm a MAN! haha get it on there slide the bolts through the frame and put the nut on. the washer goes against the bolt head no washer against the nut. don't tighten anything down just yet. next you get the steering rack bolts all the way in you might have to move the rack around to get the bolts in. once they're in tighten them down as tight as you're little girly arms can get them haha they should be extremely tight is what Corey told me.

tighten down the two bolts on the frame and make sure those too are extremely tight like super duper tight haha the nuts are self locking nuts so no need for thread locker but if you would feel better with some on then go ahead and throw some on there. once the bolts on the bumper are all super tight you can now put the lower skid plate back up and you're all done.
i know this is a very long write up but it really doesn't take very long to install the bumpers and do the mods it can easily be done by one or two people and maybe a 6 pack. i don't have my skid plate yet or my 20" light bar that goes in the bumper. the light bar and weather stripping will be here Monday and my skid plate right now is sitting at kirks (raptor addict) for a custom paint job. he's doing a lime green on the skid plate and also a coat of the 3M clear bra spray protection so the awesome paint job wont get nicks and scratches!
now for some ****!


