Here is a complete write up and instruction on how to install an amp and sub in your Raptor without drilling a single hole or removing any door/dash panels. This is very integrated in to stock without any major modifications.
You CAN do this! Unless you have an abundance of money, do not pay an audio shop to do this for you and for the love of God do not let Best Buy touch your truck.
I'm by no means an expert or a professional, but this isn't my first rodeo and I feel I have compiled a very safe and reliable installation method here. Thanks for reading.
Time: 5hrs - +/- 2 hours for advanced or novice installers.
Cost: $550.00(approx)
Difficulty:
Beginner
Easy
-> Medium
Hard
Expert
Materials Used:
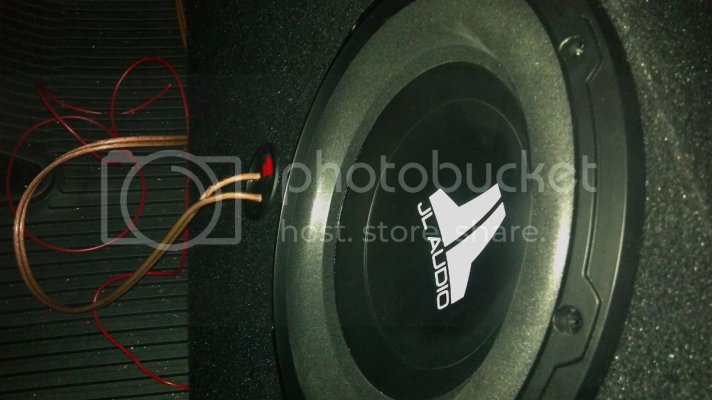
JL Audio 10W0v3 10" Component Subwoofer - 300W RMS Power Handling
10WØv3-4 - Car Audio - Subwoofer Drivers - WØv3 - JL Audio
*Tip: 10" or 12" would be most appropriate for SuperCab application due to constraints of under the seat installation.
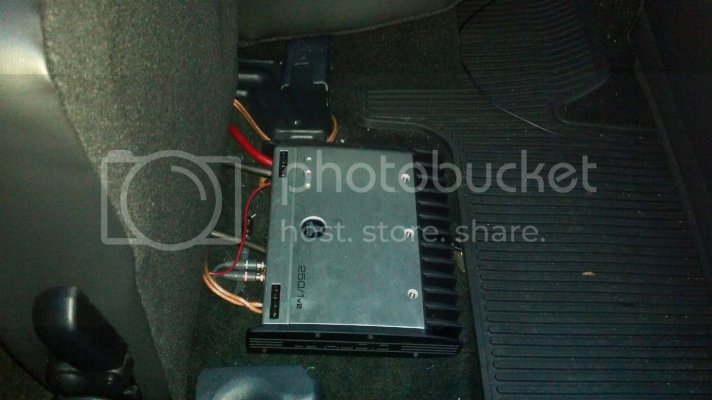
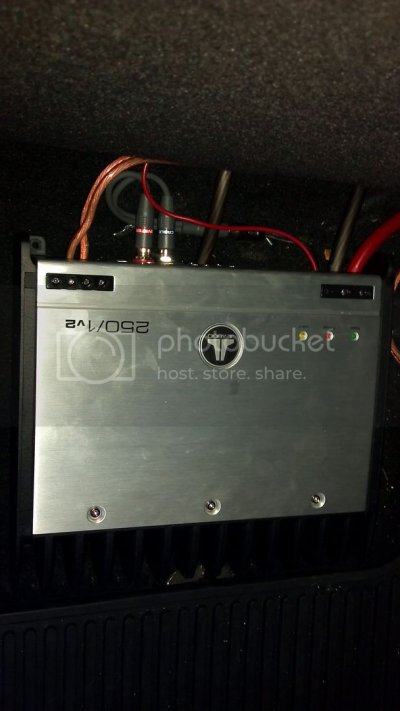
Amplifier: JL Audio Slash 250/1v2 Mono Block Class D amplifier
250/1v2 - Car Audio - Amplifiers - Slash v2 - JL Audio
*Tip: Due to the constraints of the subwoofer "mounting depth" of approximately 5 1/8" using an under the rear seat box, an amp in the 200w-400w RMS range will be most appropriate based on the selection of a subwoofer in this size class. I recommend the JL Audio W0 as I used, or the Alpine Type-S would also perform admirably in this application.
Single 10" Super Cab Subwoofer Box for 09-12 F-150 Supercab - SuperCrewSound.com
Ford F-150 Extended Cab / Super Cab 09-11 Single Subwoofer Box
Tip: Available in with black upholstery carpeting to match factory upholstery.
15' 4ga Amplifier power wire
*Tip: 8ga wire is sufficient up to 300W RMS, however using 4ga will allow for future system upgrades and will guarantee full power from your system.
*Tip: Do not purchase wiring kits, they are overpriced and usually do not contain enough cable. Go to your local car audio shop and purchase your power +, ground -, and speaker wire by the foot. Be sure to look for a quality wire such as Rockford Fosgate, Monster or JL Audio as some cheaper wiring is not true to gauge and you may end up with a 4ga cable that is more like 6ga.
2' 4ga Amplifier ground wire
*Tip: ALWAYS use the same gauge ground wire as used for your power wire.
30A in-line fuse
*Tip: Choose the size your in-line fuse based on the fuse amp rating of your amplifier. If your amplifier has a 30A fuse installed on it, use a 30A in-line fuse. Proper practice in any accessory installation is to install the in-line fuse within 18" of the battery connection.
6' 12ga high quality speaker wire
(2) 4ga ring terminals- power and ground connections
*Tip, go to NAPA and get quality copper, automotive grade terminals. The ones you get at Lowe's will rot in 6 months.
(2) 12ga insulated (automotive grade) female slot adapters - speaker wire to subwoofer box
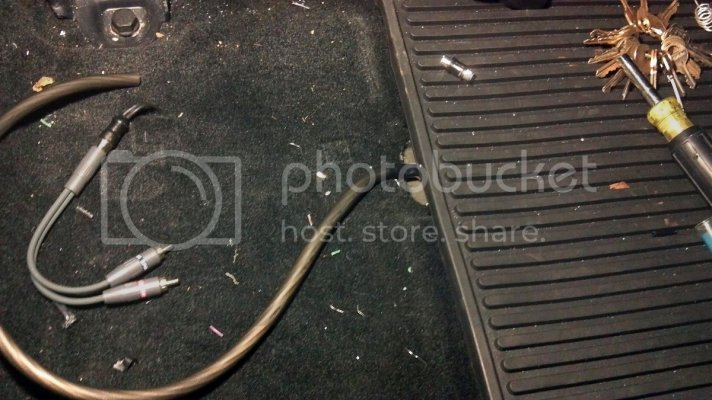
JL Audio Speaker wire to RCA adapter - XD-CLRAIC2-SW
Car Audio - Connection Systems - Audio Connections - RCA to Speaker Wire
*Choose a quality adapter such as JL Audio or Monster Cable - for as cheap as this part is, it's important not to skimp!
Monster Cable Single Female - Dual Male RCA Y-Adapter
http://www.crutchfield.com/p_119ILJRY1F/Monster-Cable-1-Female-2-Male-RCA-Y-Adapter.html?tp=1934
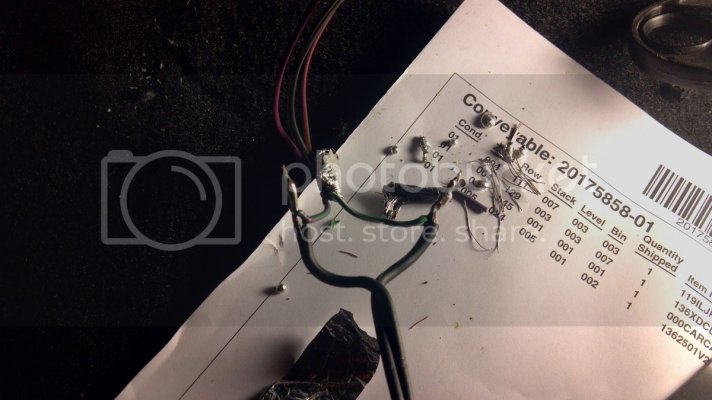
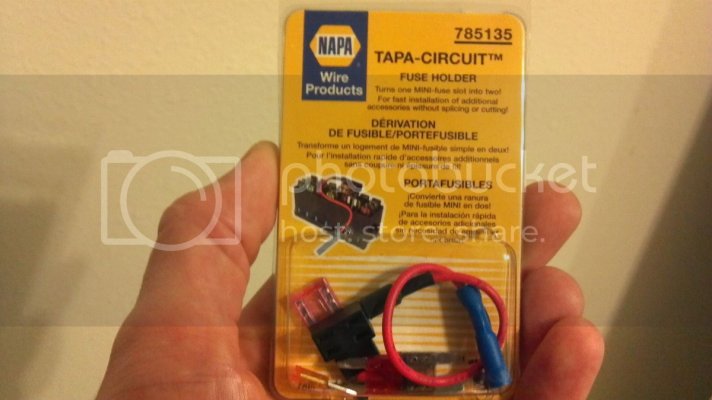
TAPA-CIRCUIT Accessory fuse block power adapter
10' 14-16ga primary wire - remote turn on wire
Tools needed:
Socket Set
Wire Strippers/Crimpers
Soldering iron
Razor Blade/Utility Knife
A/C - D/C Voltage Tester
Large Flat Heat Screwdriver
Here We GO!
Step 1: Install Subwoofer in to Subwoofer box/enclosure
- (8) 1" - 1 1/4" Drywall screws are perfect for securing the sub to the box
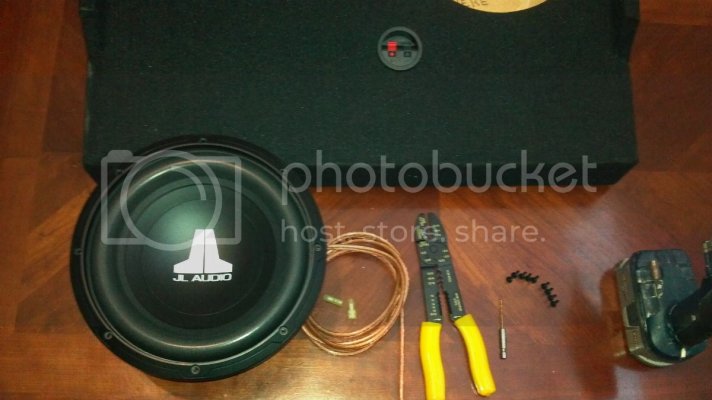
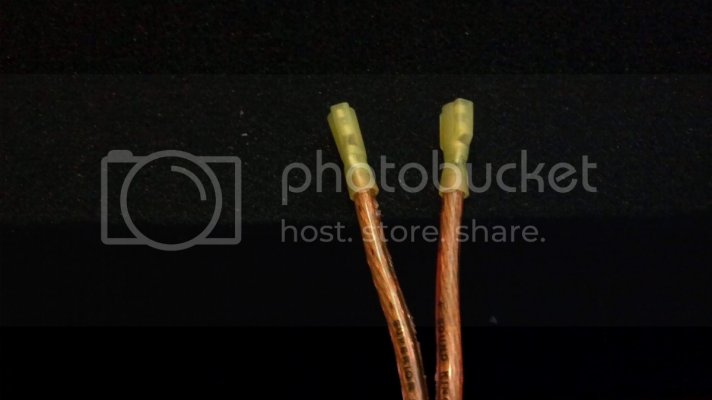
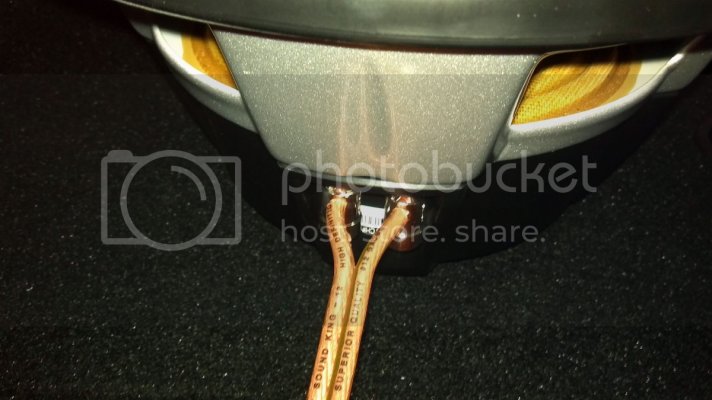
- Crimp the Female Terminals on to one end of the 12ga speaker wire - Cut the wire 18" and strip the other ends. Connect to Subwoofer. OBSERVE +/- POLARITY DURING THIS STEP
- Once everything is connected, place the sub in the box - make sure it's straight , pre-drill small pilot holes where the screws are due to be installed, and screw the sub in to the box. Pretty easy, right? Just be careful not to send the drill bit or screw driver through the sub and you're good!
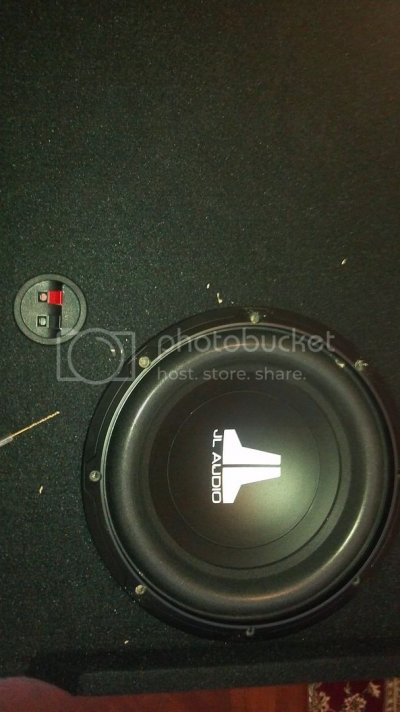

- On to the installation...
- REMOVE BATTERY NEGATIVE TERMINAL BEFORE PERFORMING ANY WIRING IN YOUR TRUCK!
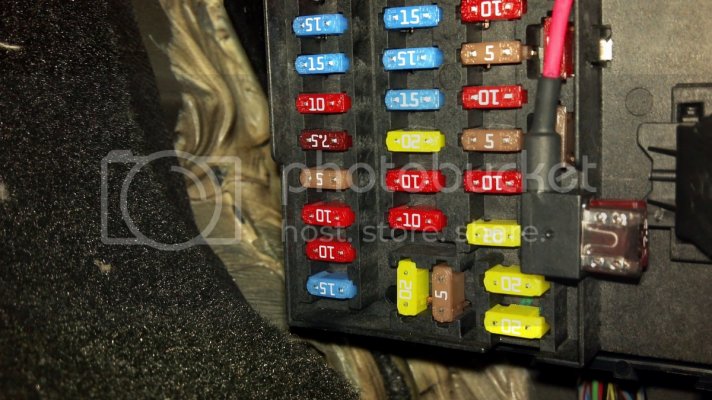
Step 2: Run the 4ga Power Wire from your Positive battery terminal and the 12v Remote Turn on wire(from factory fuse block location) to where your amp will be installed
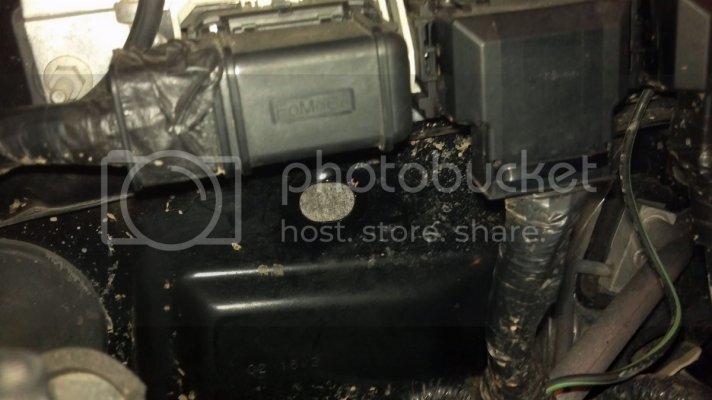
- There is a hole in the firewall just under the PCM with a rubber plug in it. I used this hole to conveniently run the power wire through the firewall without drilling a single hole. The pass-through leads just under the glove box near the fuse block.
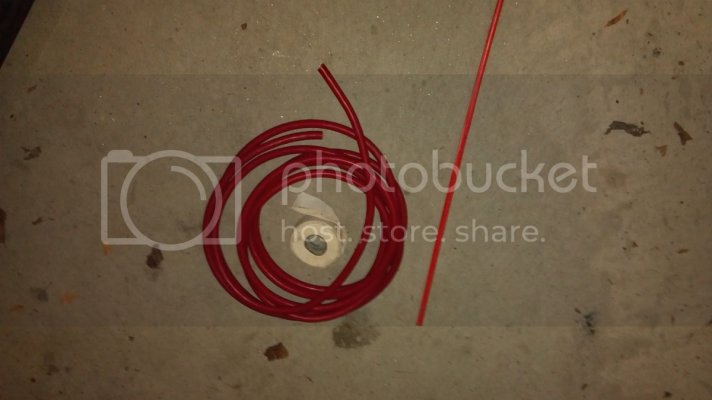
- I used a flexible "driveway snow stake" I had laying around to guide my wire through the firewall by taping the wire to the stake and shoving it through:
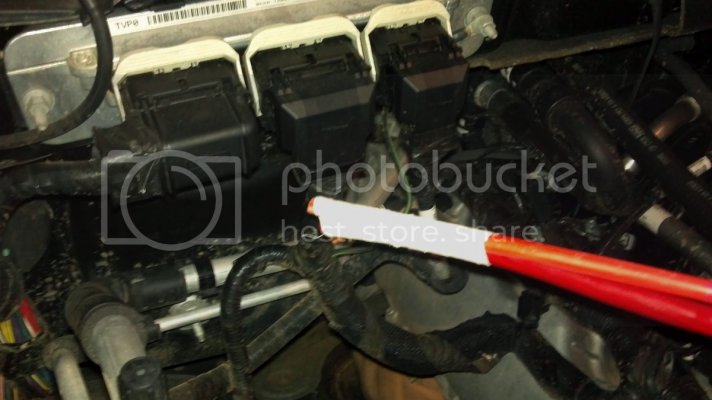
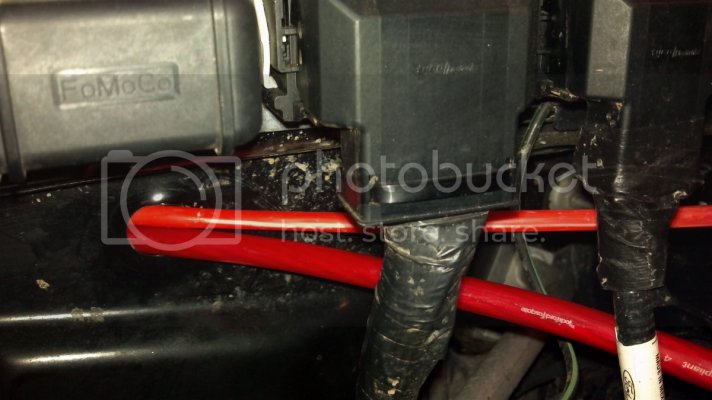
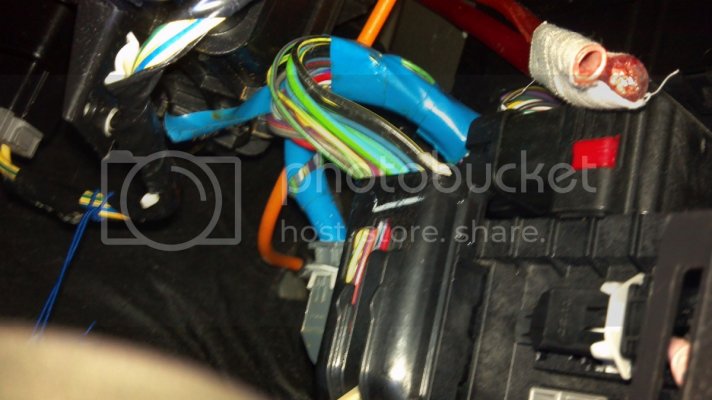
- I then used a utility knife to carve a hole in the factory plug to use as a grommet for the wire, slid it down and reinstalled securely in to the fire wall.
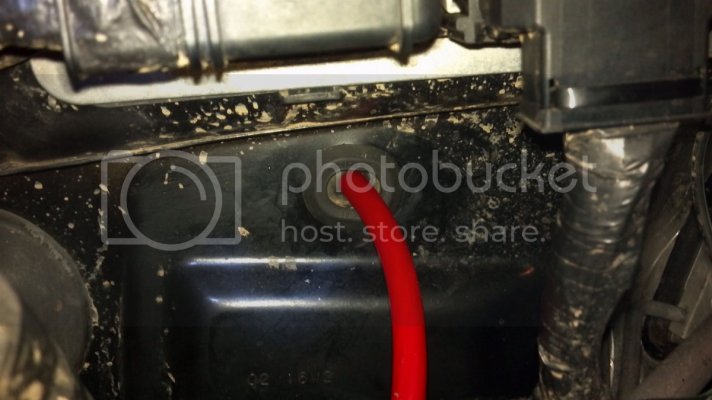
- Crimp on your power wire ring terminal and connect to the battery - install your in-line fuse holder(do not install the actual fuse until you hook up the power/ground to the amp)during this step and zip tie the wires securely on the wire's route to the firewall pass through. I also replaced my battery with an Interstate MTP-65 during this step cause my stock battery sucked - upgraded to 850CCA vs stock 650CCA.
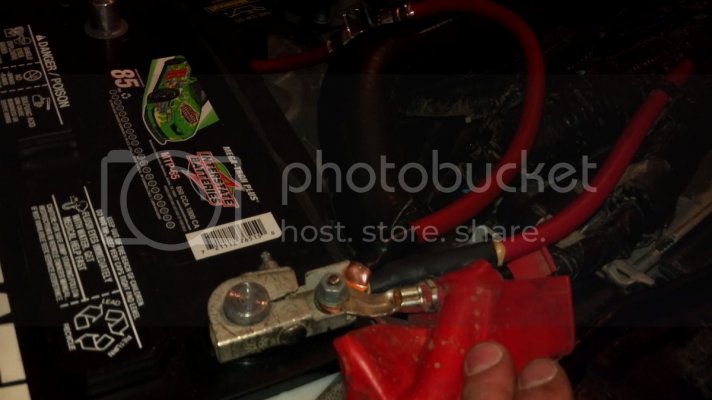
- Next, remove the passenger side door sill panel using a large flat head screwdriver to gently pop the clips out, exposing the factory wiring channel.
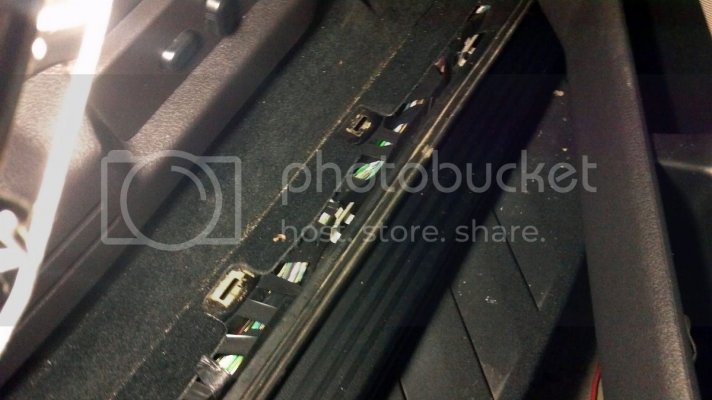
- Now, just run the 4ga power wire under the kick panel near the fuse block and through the factory wiring channel. Make sure to route the wiring underneath the electrical tape used from the factory to hold the wires in or else your door sill panel will not snap back in!
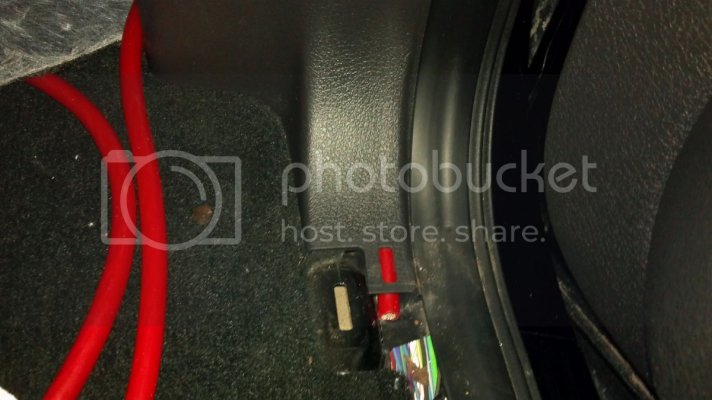
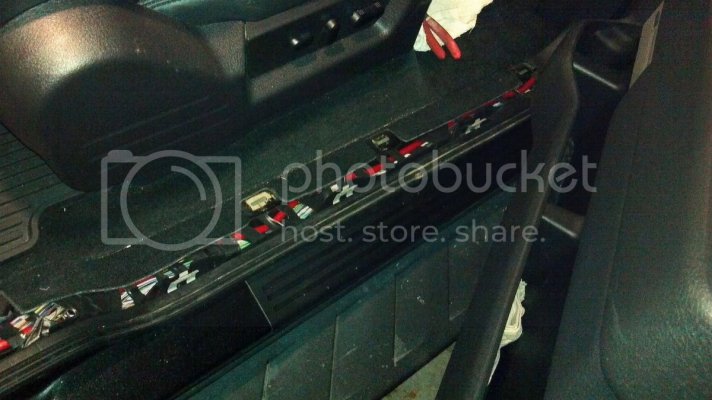
- Next, on under the C-pillar panel and behind the seat - route the wire out of sight and leave yourself a couple feet where you plan on installing your amp.
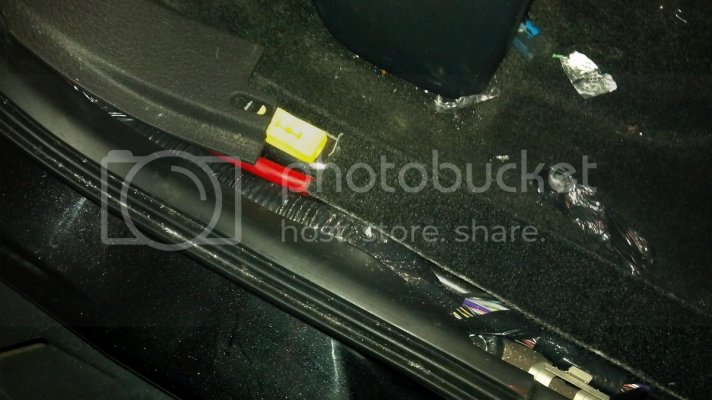
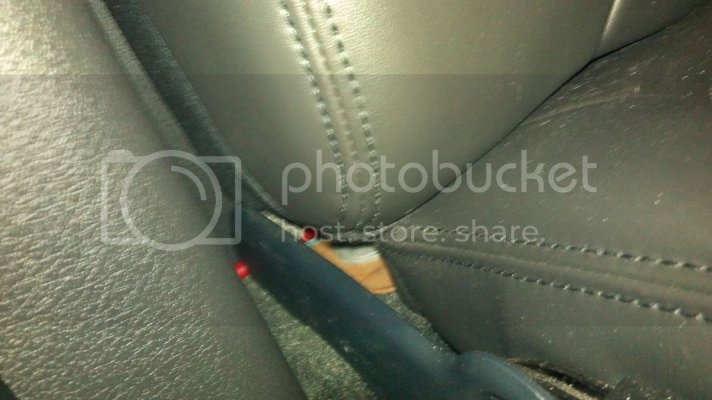
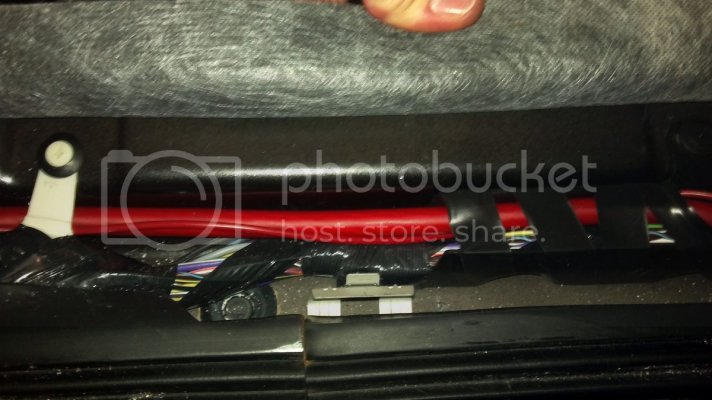
- Repeat the same process for your remote turn on wire(the smaller red wire in this picture), starting the wire routing near the fuse block behind the passenger side kick panel.
Step 3: Install 4ga Ground Wire:
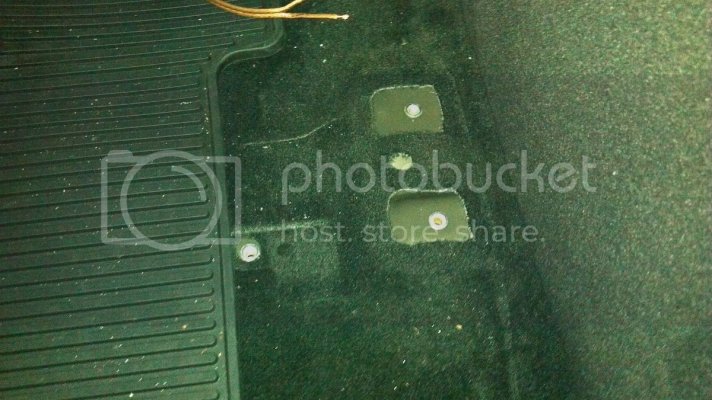
- Well, I should have mentioned you need to first remove your factory Sony Subwoofer (if applicable) by removing the 3 bolts that hold the brackets in....and looky here - the bolt hole used to secure the factory sub will make a GREAT location for your ground wire - without drilling any holes or sanding any paint/clear coat off!
- Strip, and crimp one of your 4ga ring terminals to one end of the ground wire, and secure it to the factory bolt location using an additional washer and a lock washer to make sure it doesn't rattle loose.
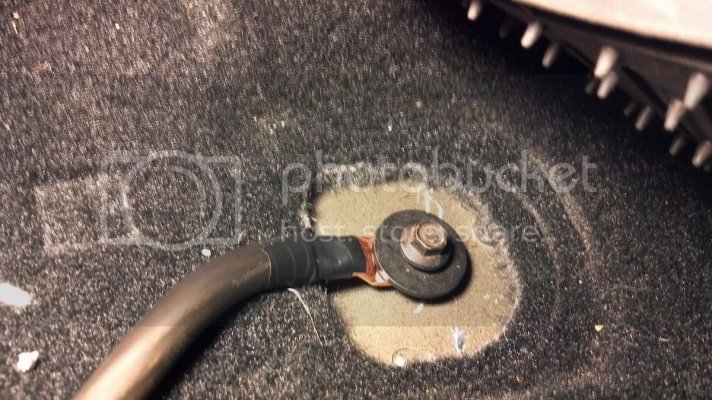
- Oh, and isn't that nice, you can snap the factory trim piece back over the bolt to hide your ring terminal connection - thanks Ford!
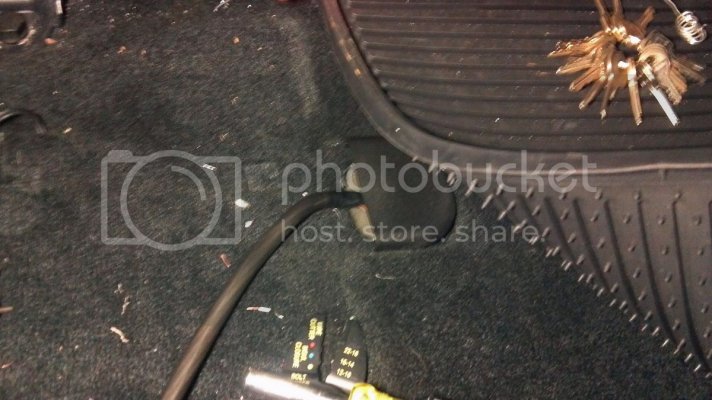
You CAN do this! Unless you have an abundance of money, do not pay an audio shop to do this for you and for the love of God do not let Best Buy touch your truck.
I'm by no means an expert or a professional, but this isn't my first rodeo and I feel I have compiled a very safe and reliable installation method here. Thanks for reading.
Time: 5hrs - +/- 2 hours for advanced or novice installers.
Cost: $550.00(approx)
Difficulty:
Beginner
Easy
-> Medium
Hard
Expert
Materials Used:
JL Audio 10W0v3 10" Component Subwoofer - 300W RMS Power Handling
10WØv3-4 - Car Audio - Subwoofer Drivers - WØv3 - JL Audio
*Tip: 10" or 12" would be most appropriate for SuperCab application due to constraints of under the seat installation.
Amplifier: JL Audio Slash 250/1v2 Mono Block Class D amplifier
250/1v2 - Car Audio - Amplifiers - Slash v2 - JL Audio
*Tip: Due to the constraints of the subwoofer "mounting depth" of approximately 5 1/8" using an under the rear seat box, an amp in the 200w-400w RMS range will be most appropriate based on the selection of a subwoofer in this size class. I recommend the JL Audio W0 as I used, or the Alpine Type-S would also perform admirably in this application.
Single 10" Super Cab Subwoofer Box for 09-12 F-150 Supercab - SuperCrewSound.com
Ford F-150 Extended Cab / Super Cab 09-11 Single Subwoofer Box
Tip: Available in with black upholstery carpeting to match factory upholstery.
15' 4ga Amplifier power wire
*Tip: 8ga wire is sufficient up to 300W RMS, however using 4ga will allow for future system upgrades and will guarantee full power from your system.
*Tip: Do not purchase wiring kits, they are overpriced and usually do not contain enough cable. Go to your local car audio shop and purchase your power +, ground -, and speaker wire by the foot. Be sure to look for a quality wire such as Rockford Fosgate, Monster or JL Audio as some cheaper wiring is not true to gauge and you may end up with a 4ga cable that is more like 6ga.
2' 4ga Amplifier ground wire
*Tip: ALWAYS use the same gauge ground wire as used for your power wire.
30A in-line fuse
*Tip: Choose the size your in-line fuse based on the fuse amp rating of your amplifier. If your amplifier has a 30A fuse installed on it, use a 30A in-line fuse. Proper practice in any accessory installation is to install the in-line fuse within 18" of the battery connection.
6' 12ga high quality speaker wire
(2) 4ga ring terminals- power and ground connections
*Tip, go to NAPA and get quality copper, automotive grade terminals. The ones you get at Lowe's will rot in 6 months.
(2) 12ga insulated (automotive grade) female slot adapters - speaker wire to subwoofer box
JL Audio Speaker wire to RCA adapter - XD-CLRAIC2-SW
Car Audio - Connection Systems - Audio Connections - RCA to Speaker Wire
*Choose a quality adapter such as JL Audio or Monster Cable - for as cheap as this part is, it's important not to skimp!
Monster Cable Single Female - Dual Male RCA Y-Adapter
http://www.crutchfield.com/p_119ILJRY1F/Monster-Cable-1-Female-2-Male-RCA-Y-Adapter.html?tp=1934
TAPA-CIRCUIT Accessory fuse block power adapter
10' 14-16ga primary wire - remote turn on wire
Tools needed:
Socket Set
Wire Strippers/Crimpers
Soldering iron
Razor Blade/Utility Knife
A/C - D/C Voltage Tester
Large Flat Heat Screwdriver
Here We GO!
Step 1: Install Subwoofer in to Subwoofer box/enclosure
- (8) 1" - 1 1/4" Drywall screws are perfect for securing the sub to the box

- Crimp the Female Terminals on to one end of the 12ga speaker wire - Cut the wire 18" and strip the other ends. Connect to Subwoofer. OBSERVE +/- POLARITY DURING THIS STEP

- Once everything is connected, place the sub in the box - make sure it's straight


- On to the installation...
- REMOVE BATTERY NEGATIVE TERMINAL BEFORE PERFORMING ANY WIRING IN YOUR TRUCK!
Step 2: Run the 4ga Power Wire from your Positive battery terminal and the 12v Remote Turn on wire(from factory fuse block location) to where your amp will be installed
- There is a hole in the firewall just under the PCM with a rubber plug in it. I used this hole to conveniently run the power wire through the firewall without drilling a single hole. The pass-through leads just under the glove box near the fuse block.
- I used a flexible "driveway snow stake" I had laying around to guide my wire through the firewall by taping the wire to the stake and shoving it through:


- I then used a utility knife to carve a hole in the factory plug to use as a grommet for the wire, slid it down and reinstalled securely in to the fire wall.

- Crimp on your power wire ring terminal and connect to the battery - install your in-line fuse holder(do not install the actual fuse until you hook up the power/ground to the amp)during this step and zip tie the wires securely on the wire's route to the firewall pass through. I also replaced my battery with an Interstate MTP-65 during this step cause my stock battery sucked - upgraded to 850CCA vs stock 650CCA.

- Next, remove the passenger side door sill panel using a large flat head screwdriver to gently pop the clips out, exposing the factory wiring channel.

- Now, just run the 4ga power wire under the kick panel near the fuse block and through the factory wiring channel. Make sure to route the wiring underneath the electrical tape used from the factory to hold the wires in or else your door sill panel will not snap back in!


- Next, on under the C-pillar panel and behind the seat - route the wire out of sight and leave yourself a couple feet where you plan on installing your amp.


- Repeat the same process for your remote turn on wire(the smaller red wire in this picture), starting the wire routing near the fuse block behind the passenger side kick panel.
Step 3: Install 4ga Ground Wire:
- Well, I should have mentioned you need to first remove your factory Sony Subwoofer (if applicable) by removing the 3 bolts that hold the brackets in....and looky here - the bolt hole used to secure the factory sub will make a GREAT location for your ground wire - without drilling any holes or sanding any paint/clear coat off!
- Strip, and crimp one of your 4ga ring terminals to one end of the ground wire, and secure it to the factory bolt location using an additional washer and a lock washer to make sure it doesn't rattle loose.

- Oh, and isn't that nice, you can snap the factory trim piece back over the bolt to hide your ring terminal connection - thanks Ford!


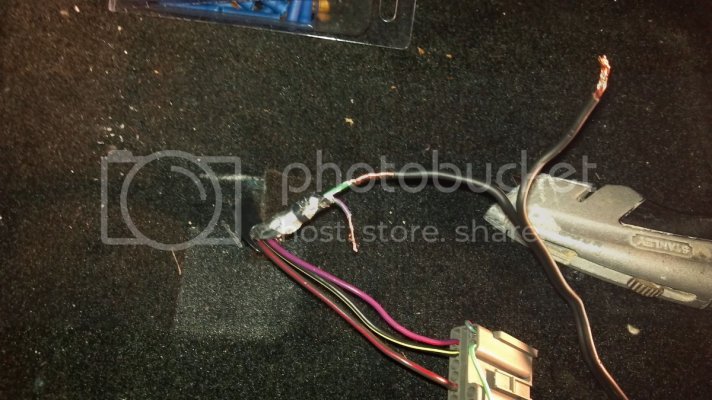
 hack category.
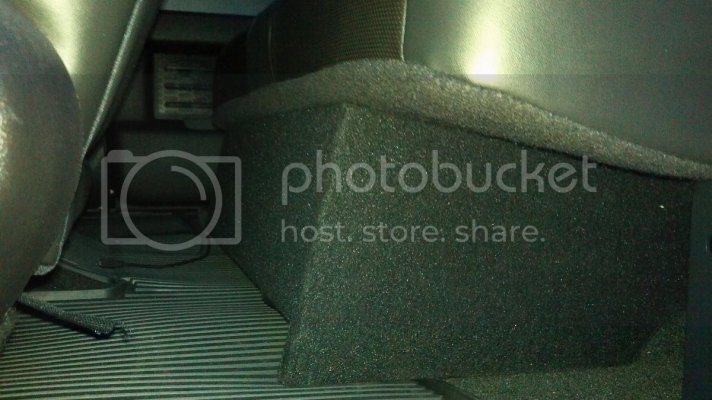
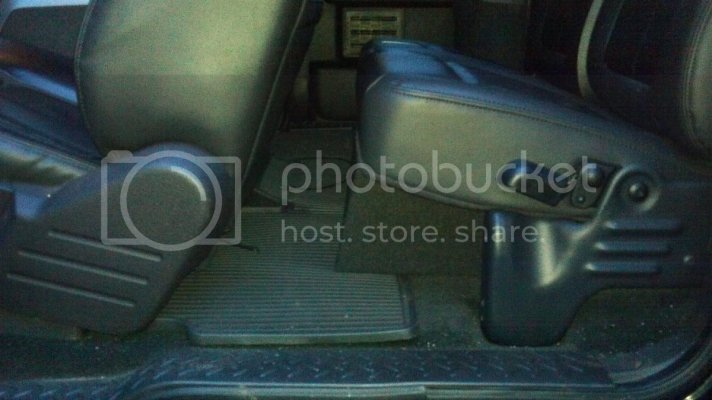
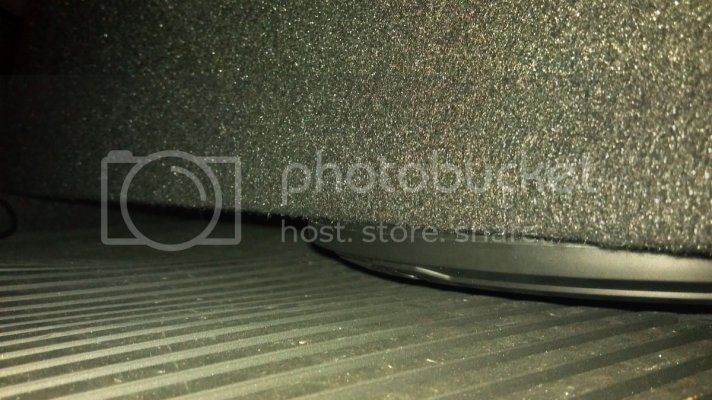
 . The double bass sections are reproduced accurately and without any slop. It should also be noted that a sealed enclosure is ideal for rock/metal music because it will produce a tighter sound. The sub's response to the double bass drum section @ :36 is very impressive IMO.